Last updated on 1 April 2024
Important or Recent Updates
| Historic Updates | Date |
|---|---|
| Guide rewritten for Container Manager and simplified due to alternative base image from erikdevries making setup easier. | 11/06/2023 |
| You can now amend the cron schedule to pull on your own schedule rather than the 5-minute default | 17/09/2023 |
| Fixed the incorrect Cron Job formatting (my fault!) Changed from the official MariaDB to LinuxServer so we can control IDs Implemented a Healthcheck to remove the need to wait and restart the Spotweb container | 13/10/2023 |
| Added additional security option to the compose to restrict the containers from gaining new privileges and amended restart policy, so container will start on boot. | 28/10/2023 |
| Changed the MariaDB container Name and Service name to spotweb_db – this is purely to differentiate it for anyone with multiple Maria Database containers. | 14/02/2024 |
What is Spotweb?
To quote the GitHub page.
“Spotweb is a decentralized Usenet community based on the Spotnet protocol.”
It is essentially a self-hosted Usenet indexer that integrates with your favourite media managers such as Radarr, and I am going to walk you through setting this up in Docker on your Synology NAS
Let’s Begin
The guide has 2 parts:
- Part 1 – Folder setup and Container Manager
- Part 2 – Spotweb Changes and FAQ
Before we start with the main guide head over and follow these two guides to get a docker user and dedicated bridge network set up.
Part 1 – Folder Setup
Let’s start by getting some folders set up for the containers to use. Open up File Station create the following.
/docker/projects/spotweb-compose
/docker/spotweb-mariadb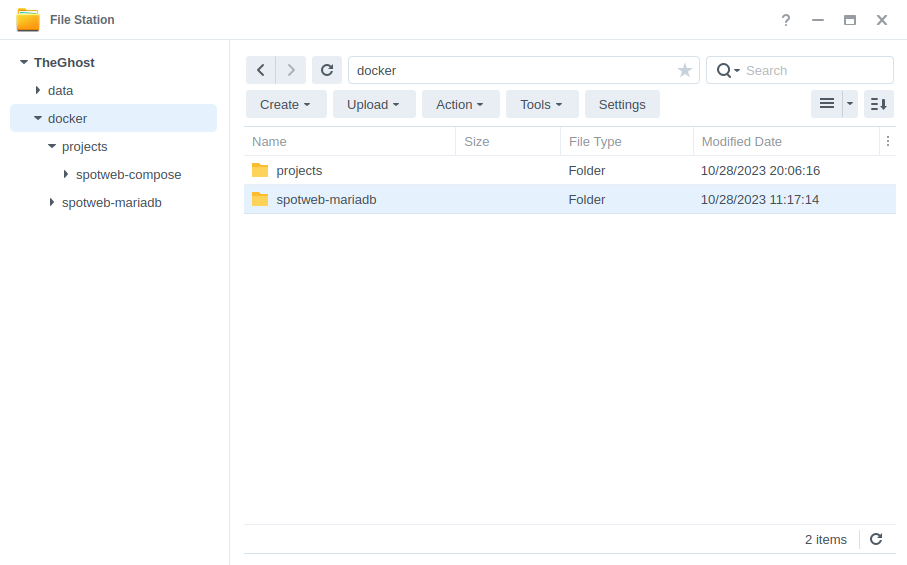
The Container Manager Project
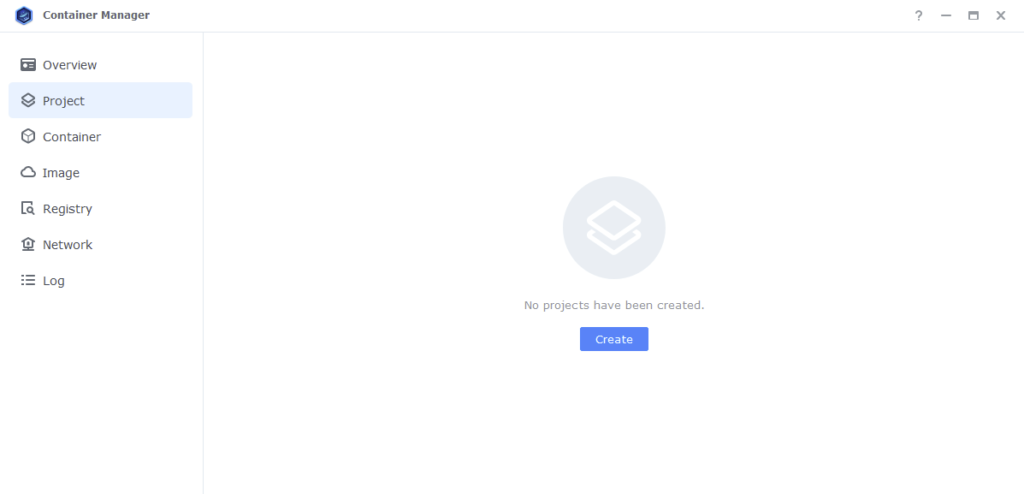
We are going to be using the Project feature of Container Manager (Docker Compose). Open up Container Manager and click on Project then on the right-hand side click ‘Create’.
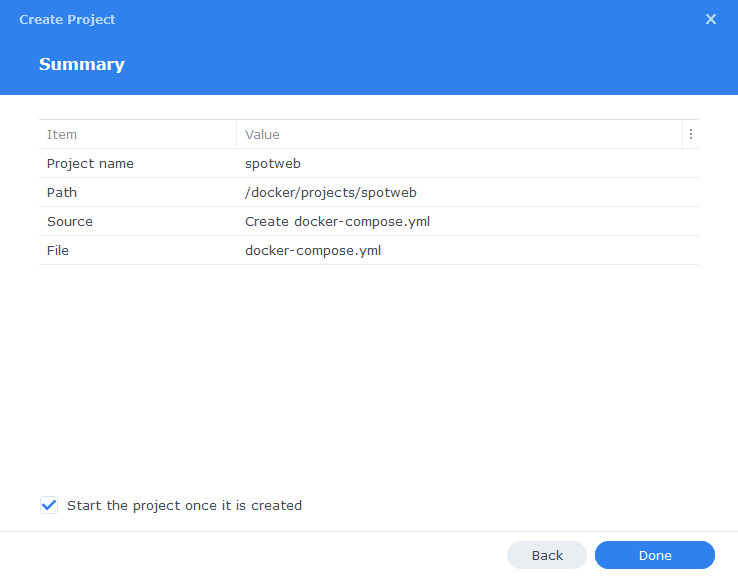
In the next screen we will set up our General Settings, enter the following:
| Section | Setting |
|---|---|
| Project Name: | spotweb |
| Path: | /docker/projects/spotweb-compose |
| Source: | Create docker-compose.yml |
Next we are going to drop in our docker compose configuration copy all the code in the box below and paste it into line ‘1’ just like the screenshot.
What on earth is a Docker Compose?
Docker Compose allows us to define how Docker should set up one or more containers within a single configuration file. This file is yaml formatted and Container Manager uses the Projects feature to manage them.
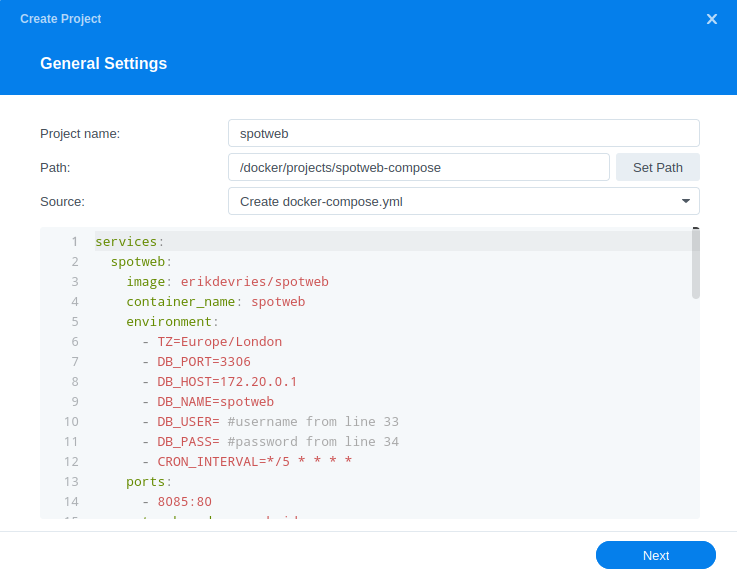
services:
  spotweb:
    image: erikdevries/spotweb
    container_name: spotweb
    environment:
      - TZ=Europe/London #CHANGE_TO_YOUR_TZ
      - DB_PORT=3306
      - DB_HOST=172.20.0.1
      - DB_NAME=spotweb
      - DB_USER= #username from line 32
      - DB_PASS= #password from line 33
      - CRON_INTERVAL=*/5 * * * *
    ports:
      - 8085:80/tcp
    network_mode: synobridge
    depends_on:
      spotweb_db:
        condition: service_healthy
    security_opt:
      - no-new-privileges:true
    restart: always

  spotweb_db:
    image: linuxserver/mariadb:latest
    container_name: spotweb_db
    environment:
      - MYSQL_ROOT_PASSWORD=StRoNgPa55WoRd
      - PUID=1234 #CHANGE_TO_YOUR_UID
      - PGID=65432 #CHANGE_TO_YOUR_GID
      - TZ=Europe/London #CHANGE_TO_YOUR_TZ
      - MYSQL_DATABASE=spotweb
      - MYSQL_USER= #A username
      - MYSQL_PASSWORD= # Another database password
    volumes:
      - /volume1/docker/spotweb-mariadb:/config
    ports:
      - 3306:3306/tcp
    network_mode: synobridge
    healthcheck:
      test: ["CMD", "mysqladmin" ,"ping", "-h", "172.20.0.1"]
      timeout: 20s
      retries: 10
    security_opt:
      - no-new-privileges:true
    restart: always
Environment Variables
We need to make some changes in order for the containers to have the correct permissions to save configuration files and set up an appropriate database.
First lets cover off the amendments for the MariaDB container, you will adjust these after the = for each variable
| Variable | Value |
|---|---|
| MYSQL_ROOT_PASSWORD | enter a unique password do not use special characters and keep below 20 alphanumeric e.g. A-Z – 0-9 This is the master password for MariaDB in case you ever need it. |
| PUID | (required) The UID you obtained in the user setup guide |
| PGID | (required) The GID you obtained in the user setup guide |
| TZ | Your timezone wikipedia.org/wiki/List_of_tz_database_time_zones |
| MYSQL_DATABASE | spotweb |
| MYSQL_USER | enter a unique username for the spotweb database |
| MYSQL_PASSWORD | enter a unique password do not use special characters and keep below 20 alphanumeric e.g. A-Z – 0-9 as this is known to cause issues if overly complex |
Next we are going to amend the Spotweb container section.
| Variable | Value |
|---|---|
| TZ | Your timezone wikipedia.org/wiki/List_of_tz_database_time_zones |
| DB_NAME | spotweb |
| DB_USER | Enter the same username from the MYSQL_USER above |
| DB_PASS | Enter the same password from the MYSQL_PASSWORD above |
| CRON_INTERVAL | */5 * * * *#by default this is 5 minutes you can work out a different interval by using https://cron.help to adjust the timing e.g. */60 * * * * is every hour on the hour. |
Once done click ‘Next’
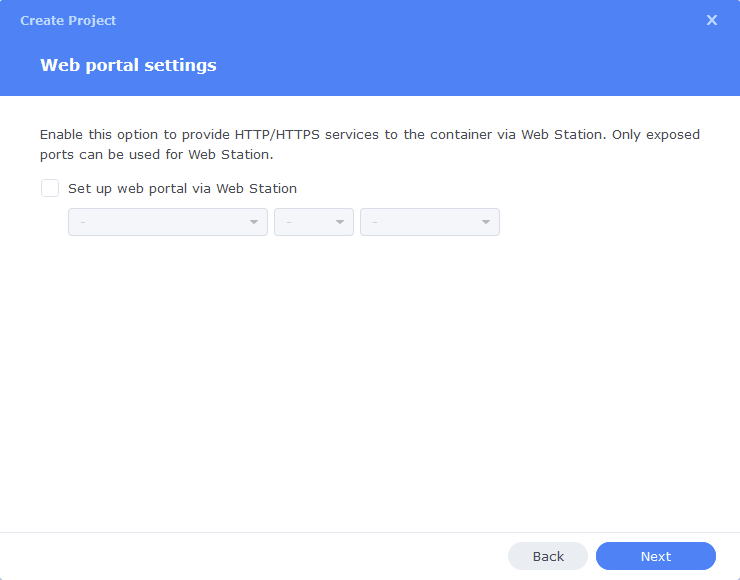
You do not need to enable anything on the ‘Web portal settings’ screen click ‘Next’ again.
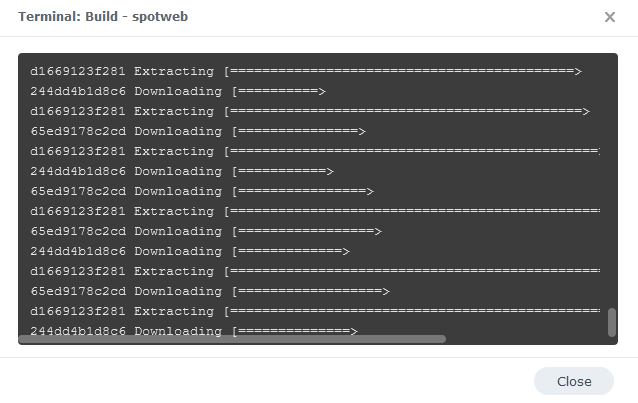
On the final screen click ‘Done’ which will begin the download of the container images and once downloaded they will be launched!
The images will now be downloaded and extracted. You should see ‘Code 0’ when it has finished.
OK you should now see our project running with a Green status however we are not quite done yet.
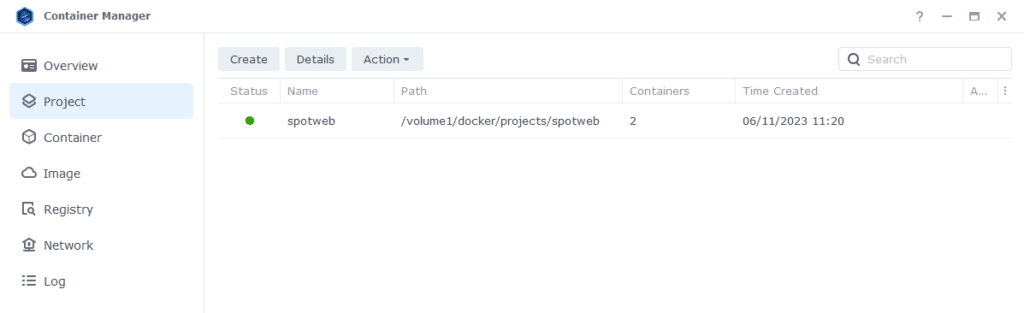
Depending on your NAS and drive speed just hold fire for 5 mins while the initial database is configured. You will see this in the Spotweb Log Files.
Firewall Exceptions
(Skip if you don’t have the Firewall configured)
If you have enabled and configured the Synology Firewall you will need to create exceptions for any containers that have a Web UI or have any incoming or outgoing connections. This section covers the basics of how to add these. (Please note this is a generic section and will not show the specific ports used in this guide however it applies in the same way)
Also, I would like to refer people to the great guide on getting the Firewall correctly configured over on WunderTechs site.
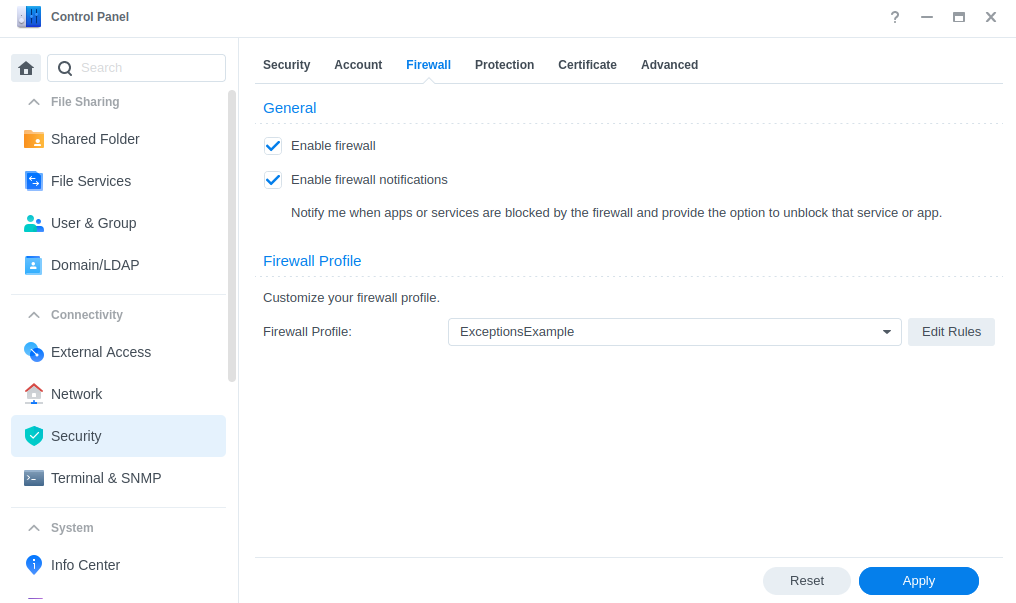
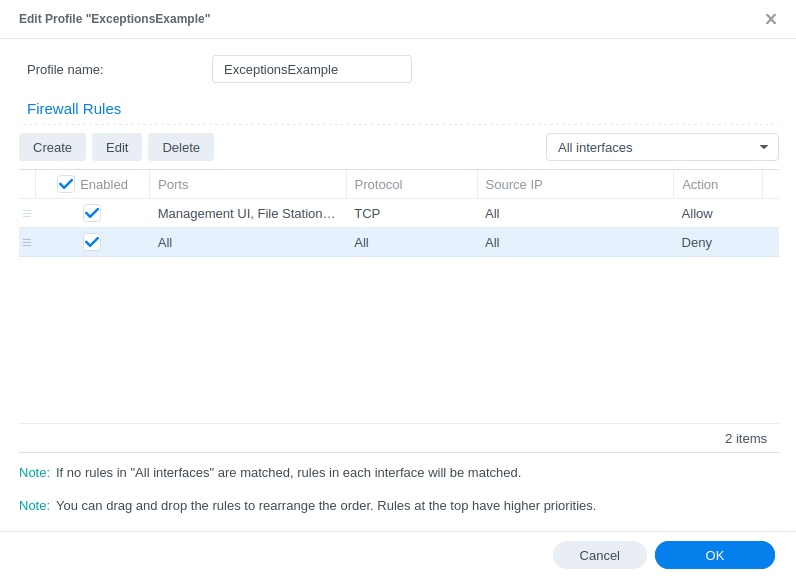
Head into the Control Panel> Security > Firewall, from here click Edit Rules for the profile you set up when you enabled the Firewall.
Next click on Create and you will see the screen below. Source IP and Action will be automatically selected to All and Allow, I will leave it up to you as to your own preference on whether you want to lock down specific Source IPs from having access. In this example we will leave as All.
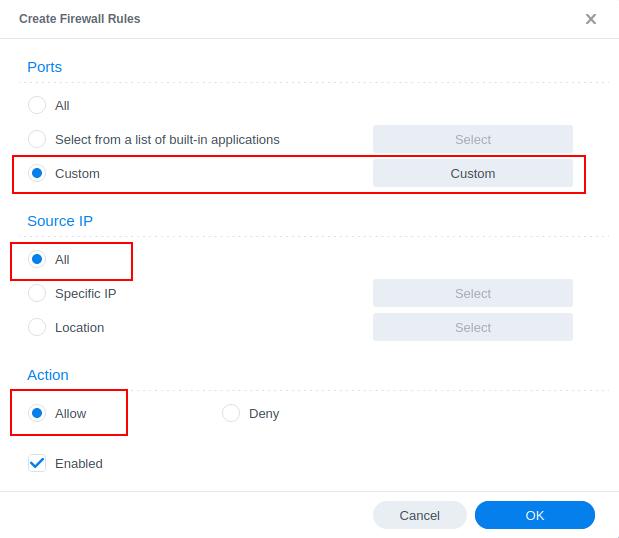
You will now choose ‘Custom‘ and then the Custom button
Now select Destination from the drop-down menu, most web based containers require TCP access but check the guide as it will show the port and protocol. Then add comma separated ports. Then press OK.

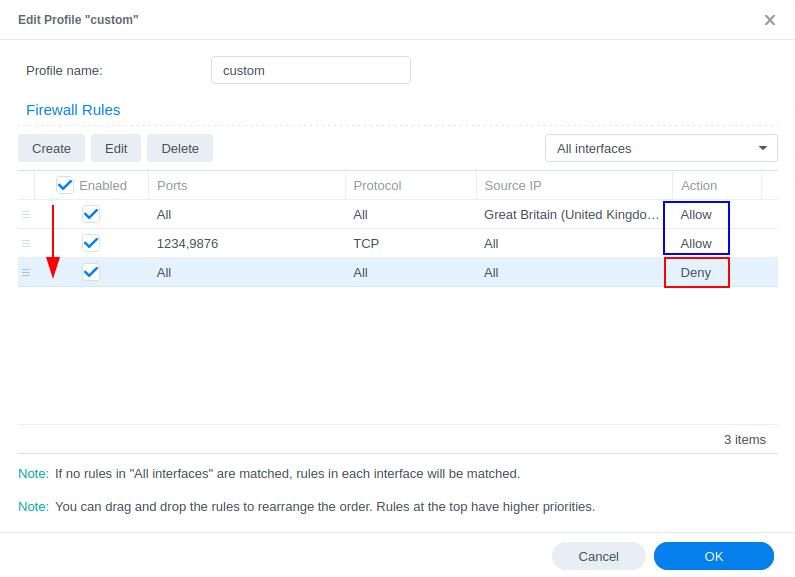
Click OK a couple of times to get back to the main screen. You will see by default the new rule is added to the bottom of the list. You must always have your Block All rule last in the list as the rules are applied top down so move your container up.
You have now completed the Firewall changes and can continue with the guide.
Container set up completed
You can navigate to your NASIP:8085 after a few minutes and should be greeted by an empty Spotweb UI (if you get a load of text at the top of a white screen wait a little longer as the database is still being configured)
We will come back to add some additional settings a little later in the guide.
Part 2 – Spotweb Settings
We can now log in as the admin user and get some settings in place to grab all the Spots.
Login to the UI on the top right of the screen using the default credentials
| Credentials | Value |
|---|---|
| user | admin |
| password | spotweb |
Once logged we need to change the Admin password as this will be separate from the user we will use for all the other normal functions
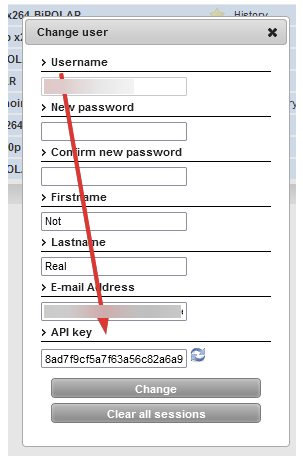
Click on the Admin username > Change User and in the screen that appears change the password. Don’t amend the permissions at the bottom of the screen.
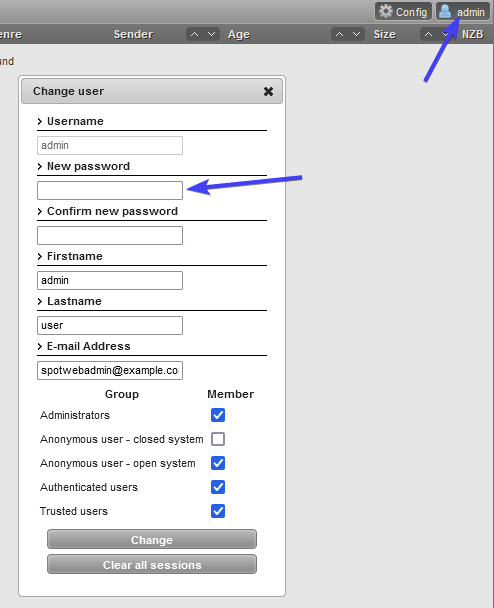
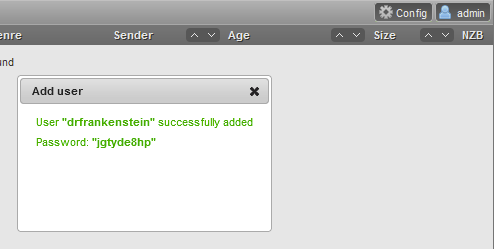
Once done click Change. Then Click the Admin user again, but this time select ‘Add User’ from the drop-down.
You can now create a new user for the main account you will use with Radarr etc. Fill in the required details then click Add. You will be given a password for the user you can change this later on if you wish.
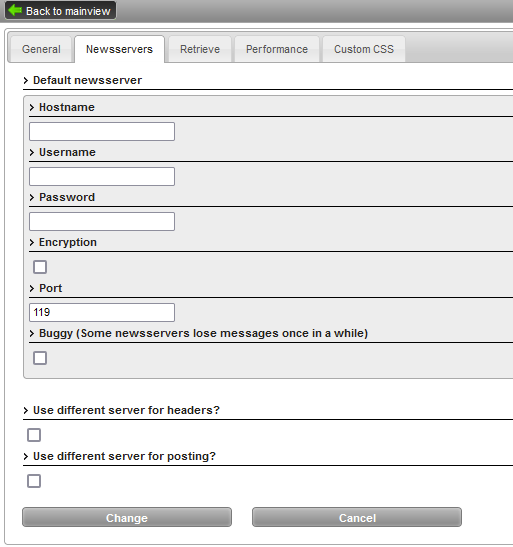
Now let’s get our News Server details added, so the Spots can be retrieved.
Click on Config > Settings > Newsservers
Enter the details for your Usenet provider, this will be exactly the same as the ones used for SABnzbd or NZBGet.
Next we will change the Retrieve Settings on the next tab, by default Spotweb will download all the spots back to 2009 so ideally just leave that date as is.
| Option | What it does |
|---|---|
| Retrieve Full Spots | Turn Off This will pull the full information about each spot this includes any images and text included with them. Only turn this on if you want to hoard gigabytes of information for the last 14+ years. By default, only headers are pulled and when you click on a Spot the other information is dynamically pulled. |
| Retrieve Comments | Turn Off This turns comments on or off |
| Retrieve Full Comments | Turn Off This will pull all comments on every spot again this will take a very long time and are generally not useful only works if the above setting is also turned on. |
| Retrieve Reports | Turn On This pulls any reports (e.g. spam reports) that users have made, so you can avoid those spots. |
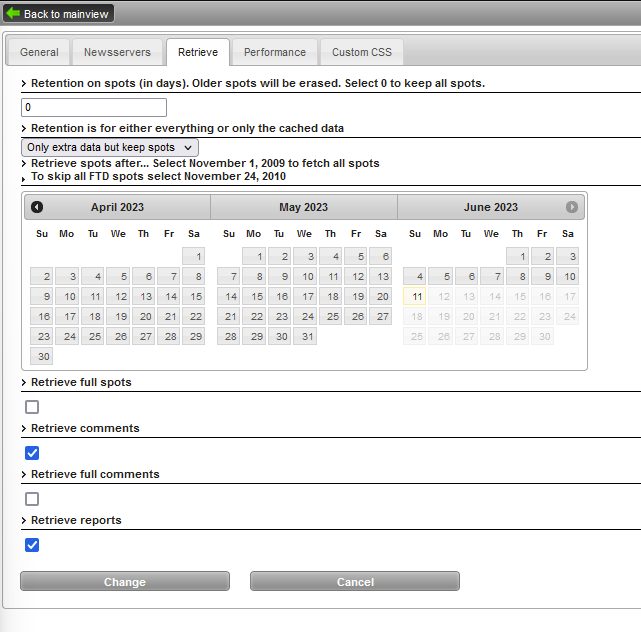
After you press ‘Change’ Spotweb will begin the automated cron job based on the setting you used in the compose, the initial pull will take a while so be patient and don’t stop the container.
These settings are only available to the Admin user so if you ever want to change them or the various other preferences login with Admin.
Finally log out of the Admin user account and log in with your main user you created.
You can find your API key for Sonarr/Radarr/Prowlarr in the Change User screen
You are now complete see the FAQ for some common questions
Frequently Asked Questions
My Spots only seem to be populating from the day I set up Spotweb!
This seems to happen fairly often, I have created a separate page to solve the issue.
Where are all the releases?
Spotweb has over 14 years of releases, it is going to take some time to completely backfill your local copy, the cron job we set up earlier will begin this process for you automatically and works oldest to newest.
Also note this will only backfill as far as your provider has days of retention.
How do I add Spotweb to Radarr, Sonarr, Prowlarr etc?
Click on your username in the top right and then ‘Change User’
In the screen that pops up, you will find the API key for your user, you can use this along with the IP address and port of your installation as a Newznab Indexer.
How can I send releases to NZBGet or SabNZBd while browsing the UI?
Click on Config > Change Preferences > NZB Handling. You can then fill in your details, using the ‘Call’ option. You will then find a download arrow appears in the WebUI next to each release.
I am having an issue that is not listed!
The best way to contact me is via Discord or the help page.
Buy Me a Coffee or a Beer
If you have found my site useful please consider pinging me a tip as it helps cover the cost of running things or just lets me get the odd beverage. Plus 10% goes to the devs of the apps I do guides for every year.


Hi All,
Maybe someone can help me. I tried to install spotweb via the yaml several times but keep running into the same issue again and again. Everything works except the login for spotweb. The last time I tried I filled in admin as user and admin01 as pw but could still not log into spotweb. I’m 100% sure I put it right into the .yaml. Any ideas?
Hey, check page 2 for the correct login details
admin
spotweb
Hahaha, nice. I missed the huge text at the bottom of page one telling me to take a look at page two 😛
Ha no worries, I am just adding a command towards the end if backfilling doesn’t work.