
Important or Recent Updates
| Historic Updates | Date |
|---|---|
| Guide refreshed and updated for Container Manager | 22/07/2023 |
| Fixed the folder name in the compose | 09/08/2023 |
| Due to an upstream issue/change the method to add people to the allow list has changed – guide updated to reflect this (See the compose and notes below) Also added a new section on how to open up Remote Play using your own address. | 12/08/2023 |
| Added additional security option to the compose to restrict the container from gaining new privileges | 25/10/2023 |
| Fixed a typo of GAMDEMODE which should be GAMEMODE in the compose. Thanks Nikos | 14/01/2024 |
| Removed the user defined bridge ‘synobridge’ as it is not really required for this setup as the container will create its own isolated bridge | 13/07/2024 |
In this guide I am going to take you through the steps to get a Minecraft Bedrock server up and running in Container Manager on a Synology NAS.
As Container Manager now supports using Docker Compose in the UI we will be using it as it will save you lots of time and steps!
What on earth is a Docker Compose?
Docker Compose allows us to define how Docker should set up one or more containers within a single configuration file. This file is yaml formatted and Container Manager uses the Projects feature to manage them.
What is the Bedrock Edition?
The Bedrock edition is the version used by all consoles such as the Nintendo Switch, Android, iPhone, and the Windows store edition. If you are looking for a JAVA edition see my other guide.
The documentation on how to use the server once it is running can be found here
https://github.com/itzg/docker-minecraft-bedrock-server
Let’s Begin
In order for you to successfully use this guide please complete the two additional steps below
Folder Setup
First we need to set up a couple of folders to store our World and config files.
Using File Station create the following folders.
/docker/minecraftbedrock
/docker/projects/minecraftbedrock-compose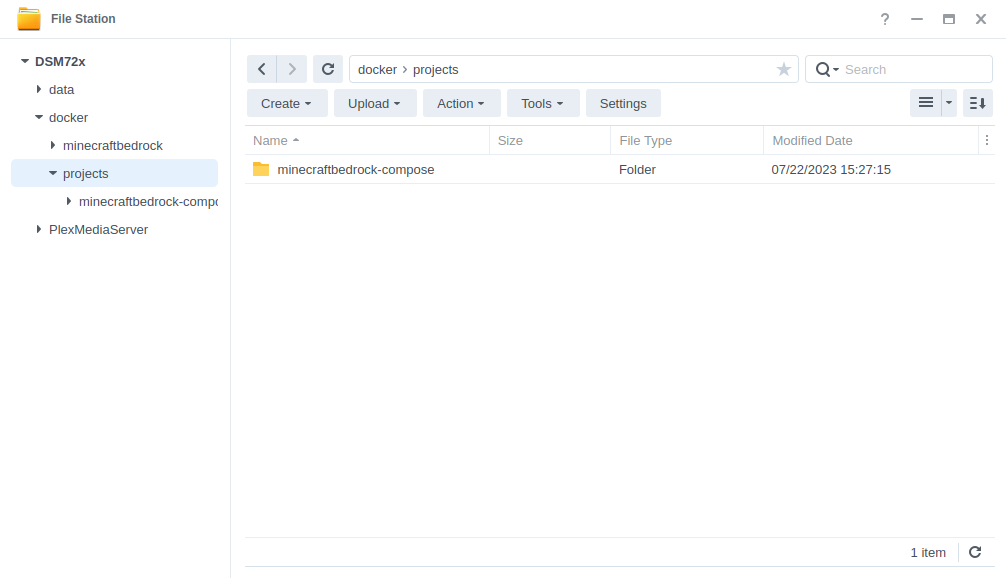
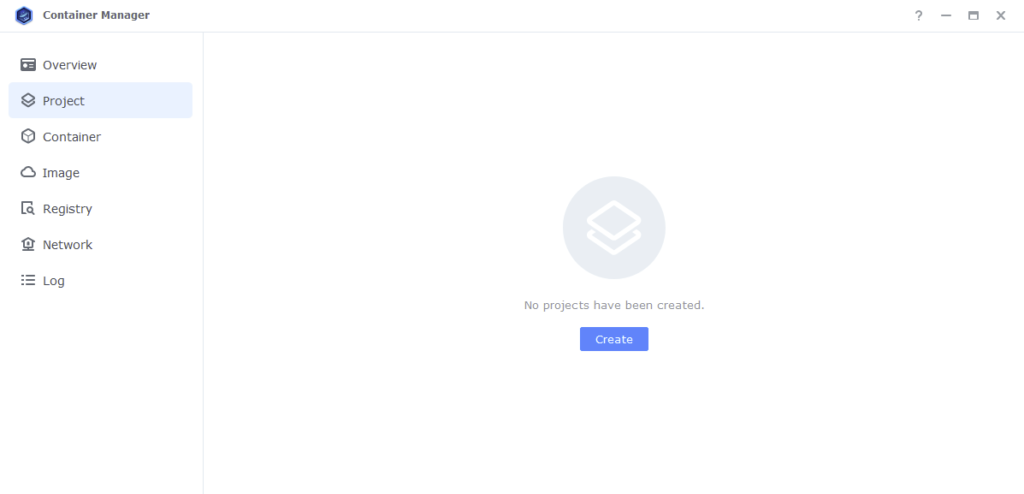
Container Set Up
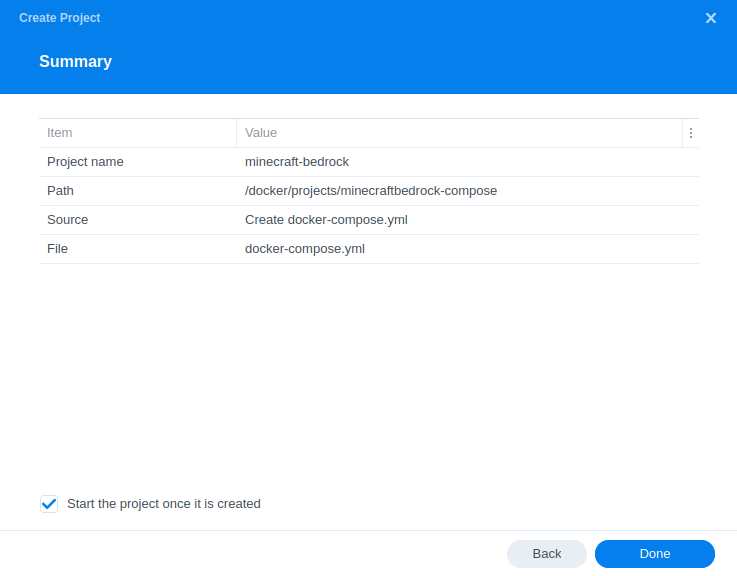
Next we are going to set up a ‘Project’ in Container Manager. Open up Container Manager and click on Project, then on the right-hand side click ‘Create’.
In the next screen we will set up our General Settings.
| Section | Setting |
|---|---|
| Project Name: | minecraft-bedrock |
| Path: | /docker/projects/minecraftbedrock-compose |
| Source: | Create docker-compose.yml |
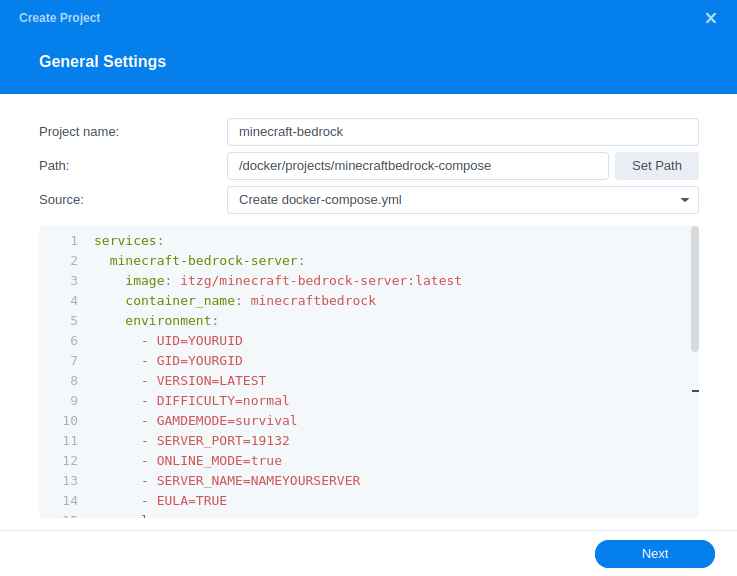
Next we are going to drop in our docker compose configuration, copy all the code in the box below and paste it into line ‘1’ just like the screenshot.
services:
  minecraft-bedrock-server:
    image: itzg/minecraft-bedrock-server:latest
    container_name: minecraftbedrock
    tty: true
    stdin_open: true
    environment:
      - UID=1234 #CHANGE_TO_YOUR_UID
      - GID=65432 #CHANGE_TO_YOUR_GID
      - EULA=TRUE
      - VERSION=latest
      - SERVER_NAME=NAMEYOURSERVER
      - SERVER_PORT=19132
      - GAMEMODE=survival
      - DIFFICULTY=normal
      - ONLINE_MODE=true
      - OPS=SEE BELOW
      - ALLOW_LIST=true
    volumes:
      - /volume1/docker/minecraftbedrock:/data
    ports:
      - 19132:19132/udp
    security_opt:
      - no-new-privileges:true
    restart: unless-stopped
Editing the Config and Environment Variables
Let’s make some edits to the compose in order to customise the server. I am covering the basics here, ITZG has great information over on the documentation which covers the additional variables you can change including how to give permissions to your users.
Take note that some items are UPPERCASE and some are lowercase. This is how they should be set.
| Variable | Value | Comment/options |
|---|---|---|
| UID | YOURUID | UID you obtained earlier |
| GID | YOURGID | GID you obtained earlier |
| EULA | true | This accepts the Minecraft EULA, without this the server will not run |
| VERSION | latest | This keeps the server updated to the latest release. You can also change this to a specific version such as 1.18.10 which is useful if Microsoft updates the server version before releasing new clients! |
| SERVER_NAME | Give your server a name | |
| SERVER_PORT | 19132 | don’t change this |
| GAMEMODE | creative, survival, adventure | |
| DIFFICULTY | peaceful, easy, normal, hard | |
| ONLINE_MODE | true or false (true will require you to be signed in to Xbox Live when playing) | |
| OPS | yourxuid | In order to get your xuid you will need to visit this site enter your xbox/microsoft gamertag and select decimal (DEC) in the options |
| WHITE_LIST | true / false | see the section further on in the guide for the steps to add people to the White List |
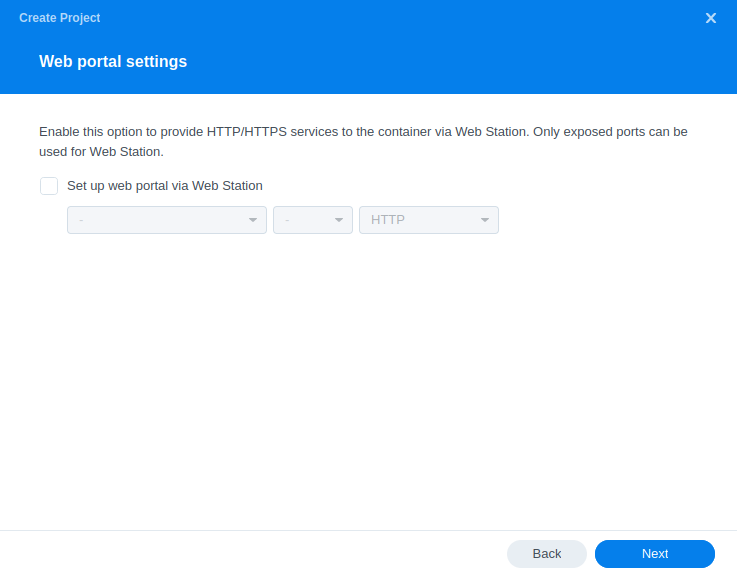
Once you have made all your required edits click ‘Next’
Nothing to change on the next screen click ‘Next’ again..
On the final screen just click ‘Done’ and you will see a new window appear which will kick of downloading of the required container image and configure your server.

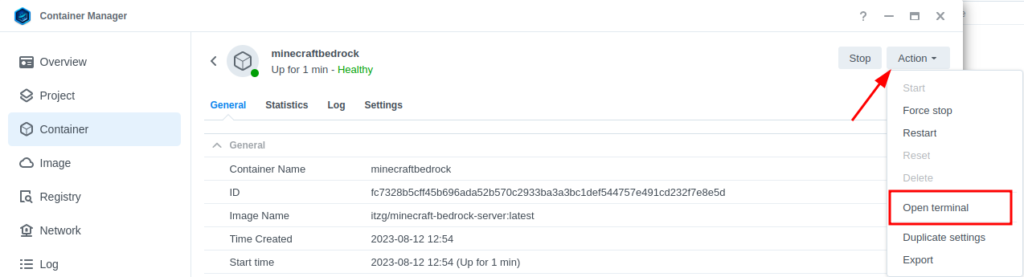
Adding People to the White List
We can now add additional people to the White List otherwise you will get errors when they attempt to connect
Open up container manager and within the Container list select the Bedrock Server and click Details.

On the next screen click ‘Action’ then ‘Open terminal’
On the Terminal that appears type allowlist add then the exact name of the Friend you want to add including any Capital letters and press Enter.
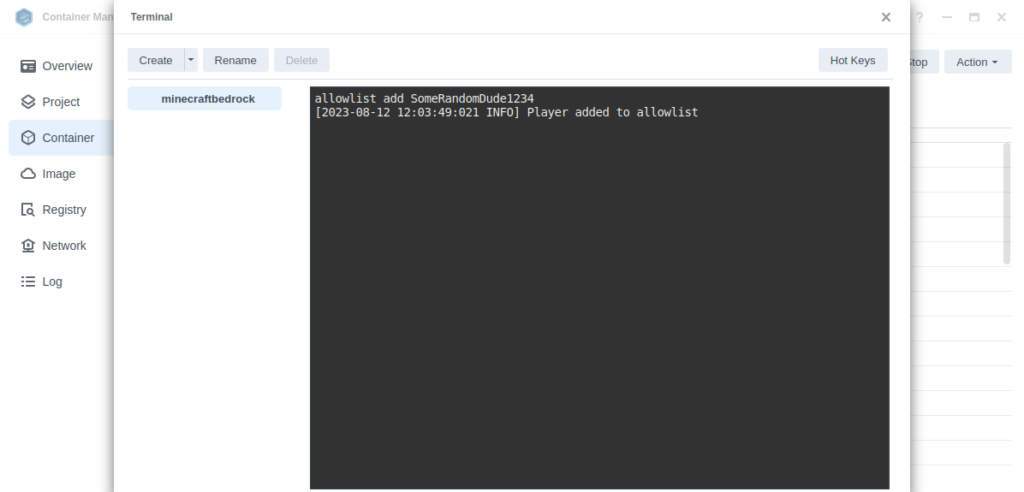
You can repeat this step for each player you want to add including you.
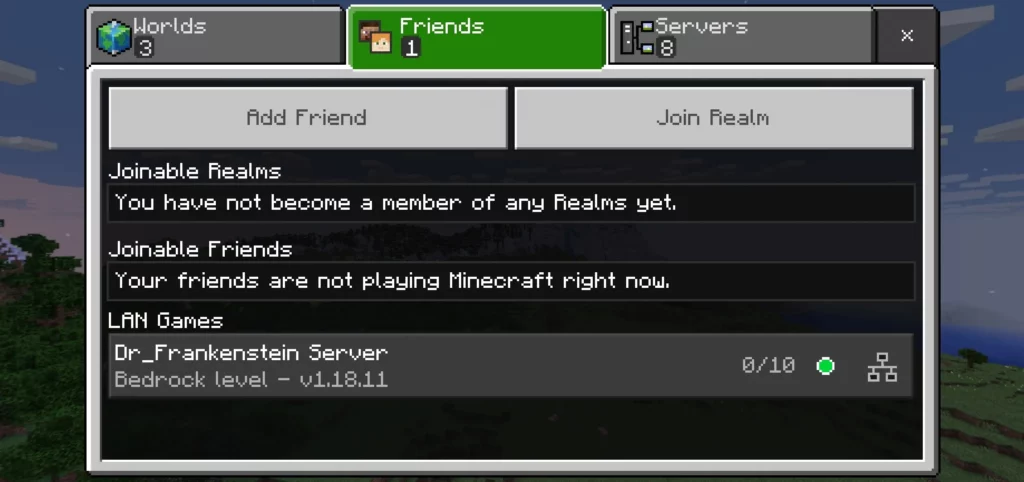
Connecting to the Server
There are two ways to connect to the server, either via the Friends tab or by adding it manually to the Servers tab in Minecraft. Using your NAS IP:19132
(Optional Extra for Remote Play)
So your friends have an easy way to play remotely lets set up an address for them to connect to, please note that the section below opens port 443 however you will also need to forward port 19132.
External Access
You have some choices when it comes to making your new container accessible from outside your home network, these come with different levels of security and convenience. This mini section is generic but covers the basics of getting this guide up and running and is entirely optional.
- Synology’s DDNS (Dynamic Domain Name System) with a TLS Certificate and Reverse Proxy
This is useful if you have some family members or friends that need access to something like Overseerr or Jellyseer and is covered below. - Tailscale or Wireguard VPN
If just you are accessing these services, and you don’t want to expose them to the internet this would be the more secure choice. See my other separate guides. - Cloudflare Tunnels
I don’t currently use these, so I would recommend watching the Wundertech guide on how they work.
A note on Double NAT or CGNAT
Unfortunately more ISPs are moving to these methods of address allocation as the IPv4 address space is getting low on available addresses. If your ISP is doing this your choices are more limited.
You can test if this is the case by checking the WAN IP on your Router/Modem settings and then comparing it to the one shown on portchecker.co. If they are different you are likely Double NAT and will either need to see if you can pay your ISP for a standard IPv4 address or use Tailscale or Cloudflare Tunnels for access.
Using the built-in tools on DSM
The first step of this process is to forward port 443 on your Router to your NAS IP Address, how you do this will depend on your router model, so please refer to its manual.
Router (External):443 > NASIP (Internal):443
Next make sure you have registered for a Synology Account as we are going to be using their DDNS service. https://account.synology.com/en-uk/register/ If you already have this set up move to the next step.
DDNS (Dynamic Domain Name System)
A DDNS address allows you to get external access to your container via an address provided by Synology, this is useful on home internet connections where your ISP will change your IP address on a semi-regular basis.
In the DSM Control panel go to ‘External Access’ and then to the ‘DDNS’ tab
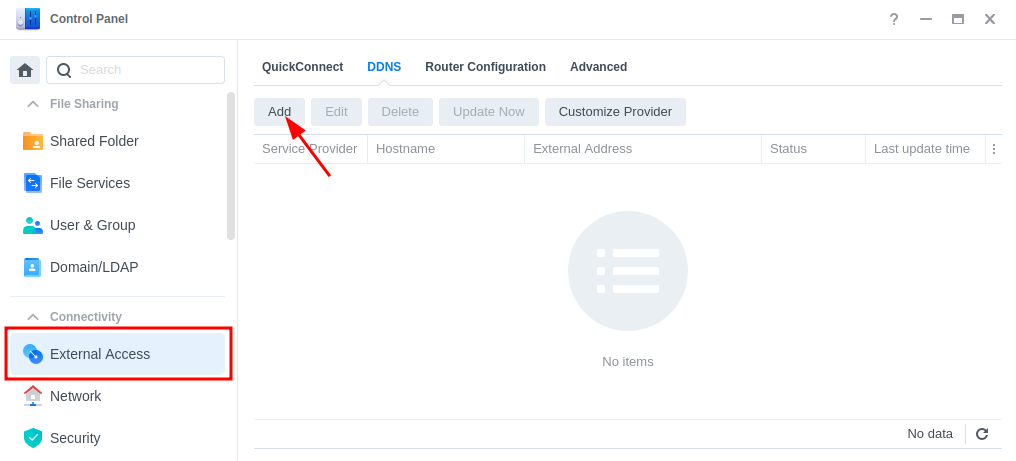
Click on ‘Add’, then fill out the following sections.
| Section | Value |
|---|---|
| Service Provider | Synology |
| Hostname | This will be the unique address just for you so keep the name generic. minecraft.synology.me = BAD myawesomenas.synology,me =GOOD |
| Email: | Log into your Synology account |
| External Address (IPv4) | This should be filled in automatically |
| External Address (IPv6) | This should be filled in automatically if your ISP is using IPv6 |
| Get a Cert from Let’s Encrypt | Tick this box |
| Enable Heartbeat | Tick this box |
Now press OK, DSM will apply your settings. It can take a few moments to set up and the DSM interface will refresh. You will likely receive a certificate error which you will need to accept to get back into DSM.
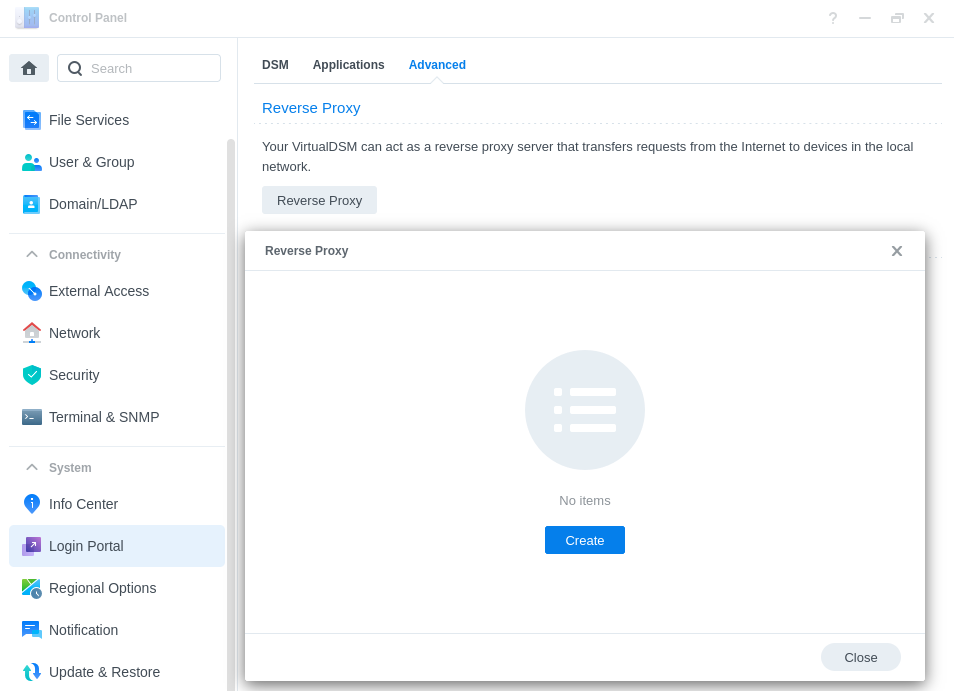
Reverse Proxy
We are going to set up a reverse proxy subdomain for the address you just register. This means you and your users can access the container without using a port number as it will route all traffic through the secure 443 port.
Go back into the Control Panel and access the ‘Login Portal’ then in the ‘Advanced’ tab click ‘Reverse Proxy’ and then click on ‘Create’.
We are now going to enter some rules, so when you or your users access the URL specified the request will automatically be sent to the containers web UI.
Use the settings below, you will need to amend the Hostname sections in line with the hostname you registered earlier, and the IP of your NAS.
| Setting | Value |
|---|---|
| Reverse Proxy Name: | Give it a meaningful name in line with the container you are setting up. |
| Protocol: | HTTPS |
| Hostname: | containername.xxx.synology.me ‘containername‘ will be the name you want to use to access this container ‘.xxx.synology.me‘ will be the exact name you registered earlier |
| Port: | 443 |
| Protocol: | HTTP |
| Hostname: | ‘localhost’ or your NAS IP address |
| Port: | The UI Port Number from the yaml in the guide you are following |
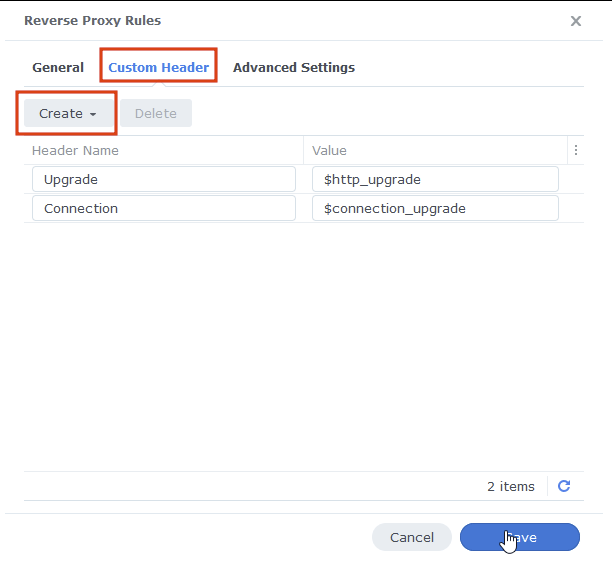
On the second tab ‘Custom Header’ click on Create then WebSocket, this will add two entries for WebSockets to function correctly, you can now press save.
You should now be able to access the web UI of the container by going to the address you just set up in the reverse proxy, it will be a secure connection, and you should have no certificate errors.
Looking for some help, join our Discord community
If you are struggling with any steps in the guides or looking to branch out into other containers join our Discord community!

Buy me a beverage!
If you have found my site useful please consider pinging me a tip as it helps cover the cost of running things or just lets me stay hydrated. Plus 10% goes to the devs of the apps I do guides for every year.


Hey there, I’ve followed this full guide and got it up and running on my home network. Now I’m trying to get the server accessible for my kids cousins from outside the network.
I followed the DDNS section of the guide, but now when I try to launch the terminal on the container, I get an error that says “failed to attach no teletype terminal found” and I’m not sure what to do.
Hey – It may be your browser try doing it in a private browser window with no plugins running as it should let you connect – failing that more than happy to have a look at your compose as you should be able to connect to the terminal.
I am having difficulty with setting up a local server for my children to run locally without the XUID, as generic characters on our iPads.
I ran through the steps for a docker limited user and bridge connection on my 1520+ on DSM 7.2.2
I am unsure if my project settings are off:
services:
minecraft-bedrock-server:
image: itzg/minecraft-bedrock-server:latest
container_name: minecraftbedrock
tty: true
stdin_open: true
environment:
– UID=#User ID
– GID=#Group ID
– EULA=TRUE
– VERSION=latest
– SERVER_NAME=NASminecraft
– SERVER_PORT=19132
– GAMEMODE=creative
– DIFFICULTY=easy
– ONLINE_MODE=false
– PVP=false
– ALLOW_LIST=false
– MAX_PLAYERS=10
– ENABLE_LAN_VISIBILITY=true
volumes:
– /volume1/docker/mc-data:/data
ports:
– 19132:19132/udp
security_opt:
– no-new-privileges:true
restart: unless-stopped
Keep in mind my minecraft data is on mc-data under the docker folder, and the user and group run were captured on my NAS, but they removed for privates.
Hey sorry for the delay in replying it has been busy IRL and got quite behind!
This all look good – appreciate it has been a minute. Did you figure it out before I go further searching for the issue..
Great write up, much appreciated!!
The only hang up I have is getting the terminal to open up within the Container Manager GUI like you did above in order to add to the allowlist. I get this error “Failed to attach. No teletype terminal found”. The only way I can get to the server terminal is first ssh’ing into the synology box and then issuing the command: sudo docker attach minecraftbedrock. No amount of googling online seemed to show others with this same teletype error in Container Manager with either Minecraft or any other type of containerized app.
Granted this isn’t a huge deal as I can use the workaround method, but it surely would be more convenient to just use Container Manager’s GUI of the terminal like you can, as shown in your article. I suspect something may have changed with Container Manager to not support teletype anymore? Maybe it’s a permissions thing somehow? I’m leveraging the UID/GID config like you are, but can’t immediately see where that could be impacting it.
DS220+
DSM 7.2.2-72806 Update 3
Container Manager 20.10.23-1437
Hey excuse my brief response as I am not currently home. I have seen others have this issue. Check you don’t have an adblocker enabled on the DSM page or other addon that could block something.. You are doing the right work around though
Thanks a lot for this great tutorial. What would be awesome is if you could show how to configure the backup solution as well from the community: https://github.com/Kaiede/Bedrockifier/blob/main/Examples/bedrock-itzg-ssh-multiple/config.yml
I will have a read, in the interim you could enable snapshots on the docker share meaning you can go back in time like the container does you can set the frequency and retention time etc. I do that plus a minimum of a nightly hyperbackup.
Used your guide up and server is running great! Is there any viability in changing the guide to use this docker compose instead?
https://github.com/Kaiede/Bedrockifier/wiki
I think the backup is quite useful and seems like you wouldn’t need to change much of the guide!
I made what I think would work for the compose file but haven’t tested and I don’t have much experience with the way Synology likes to format them. Let me know if you want it.
Hey looks fairly straight forward, this should work based on my guide, it will put the backups in the separate folder.
https://paste.drfrankenstein.co.uk/?c2c077e2e1d6e97e#HXBZFhR5yiJgMBjQYc3bmnYyAoFJPW6St4majdukCFKM
Thanks for the write up! With your help I got it all tested and working.
There were 3 extra lines needed in the .yaml compose to have the backup communicate with the server container which I have commented on your pastebin link. It consists of the entire .yaml compose along with an additional config.yml that is necessary to config the backup.
Feel free to add to guide if you’d like!
Thanks – and I think I spotted some coffee so again thanks for that too!
I will see if I can get it either in the FAQ or as an optional extra during 🙂