Last updated on 1 January 2025
Important or Recent Updates
| Historic Updates | Date |
|---|---|
| New guide Published | 02/11/2022 |
| Updated new screen layouts and changed in line with the new Storj free data allowance. | 09/04/2023 |
| Amended the Encryption Option section to reflect that it is for the user to decide on this setting | 26/11/2023 |
| Amended some wording in line with the updated pricing model from 1st April 2024 | 04/03/2024 |
What is Storj.io
Storj (pronounced Storage) is a decentralised cloud storage provider, it has over 13k nodes spread across the world supplied by people renting out free storage space on their servers. All data is end-to-end encrypted, and all files are diced up and distributed across nodes.
Storj are offering the first 25 GB of storage/bandwidth free for 30 days after which point you need to upgrade to a Pro account you only pay for the bandwidth and space used which is very competitive with other providers.
Let’s Begin
There are quite a few steps in this guide, but I am taking you through click by click so actual time to complete is probably around 10 mins once you are used to the process.
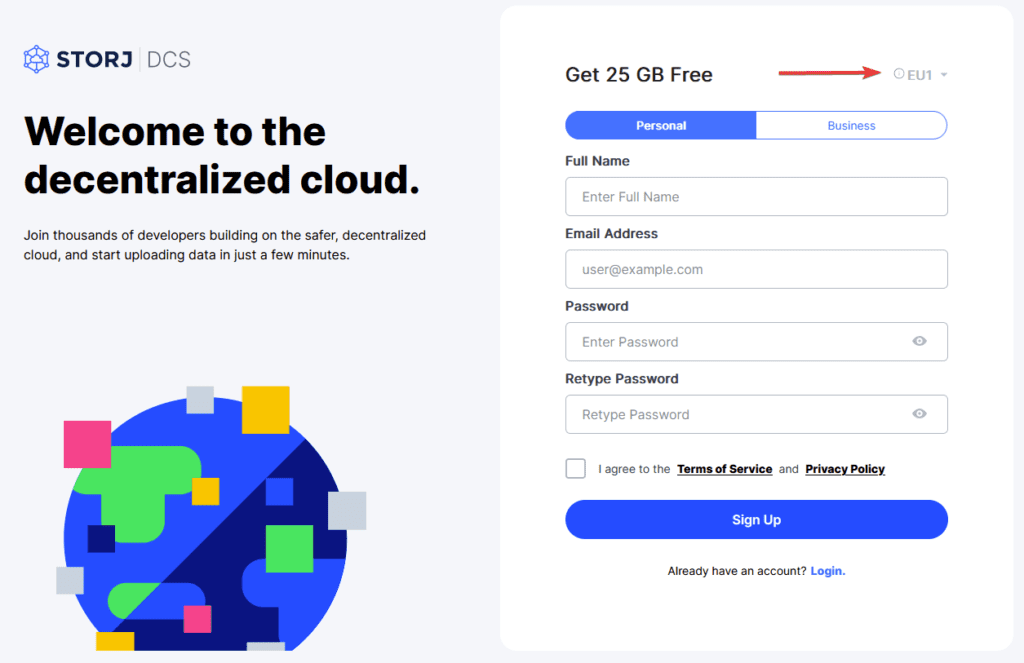
Head over to https://www.storj.io/ and sign up for an account, make sure you choose your region from the top right drop down (this will usually auto-detect) once signed up verify your email address before moving on.
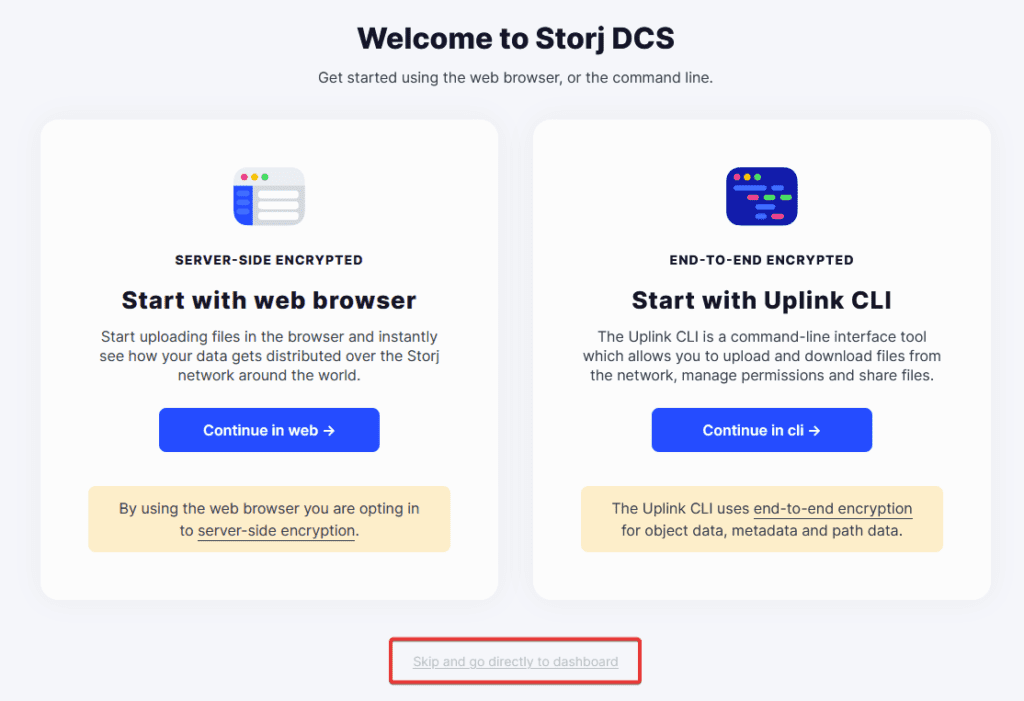
When you click your email verification link you will see this page, click the ‘Skip and go directly to dashboard’ option
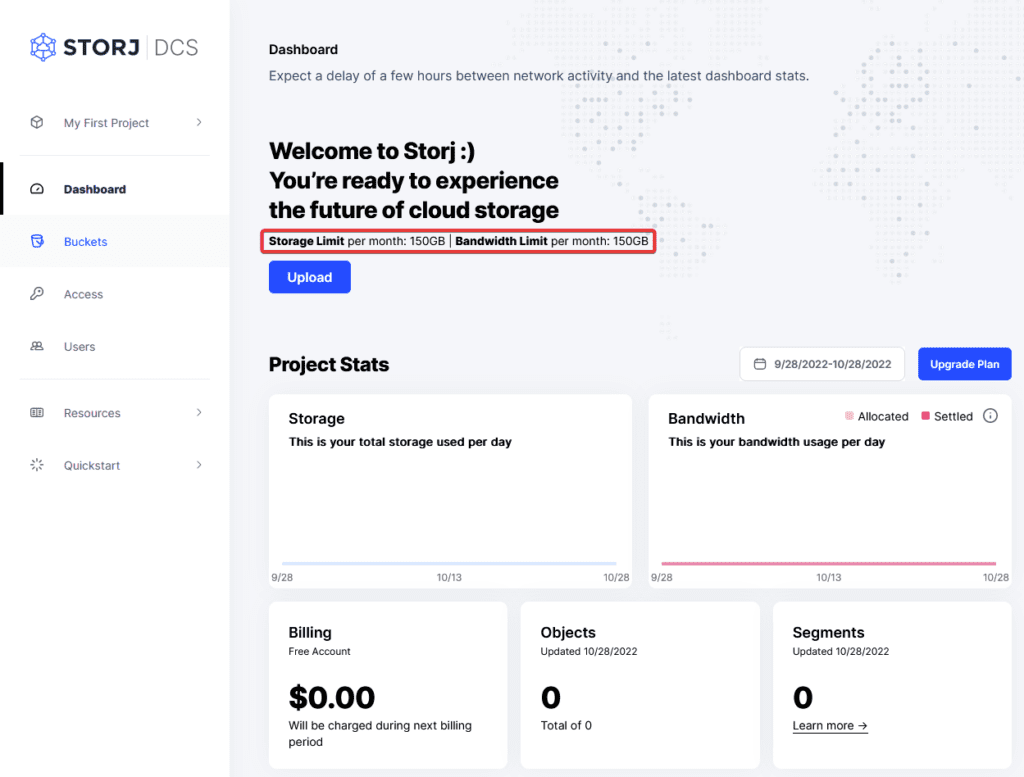
You will now see your Dashboard, this will give an overview of your overall account usage month to date. You will notice you have a Storage limit and Bandwidth limit of 150GB per month, to go above this you will either need to add your credit card details or top up your account with Storj coin. We will be continuing with the free account for now.
My First Project
Storj allows you to just create a single ‘Project’ on the free account, if you add your payment information you can create different projects for different use cases. To keep things simple we are just going to rename the default project to ‘My NAS Backup’.
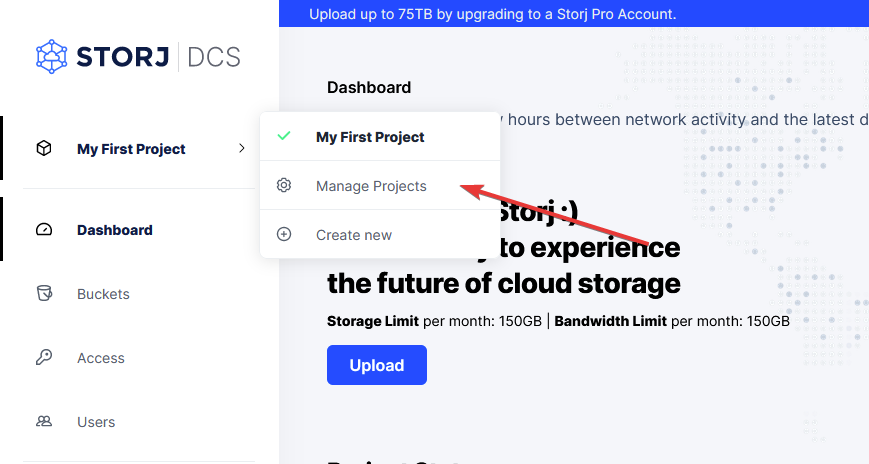
Click on My First Project on the top left of the menu then ‘Manage Projects’
Then click on the bold ‘My First Project’ this allows you to edit the name and also the description.
Once done click on the Dashboard button to go back to the main screen.
Creating a Bucket
Storj uses the term Buckets for the place where your data is stored, this is due to them using the Amazon S3 protocol.
Our first task is to create a Bucket so click on Buckets on the left-hand menu, then click ‘New Bucket’

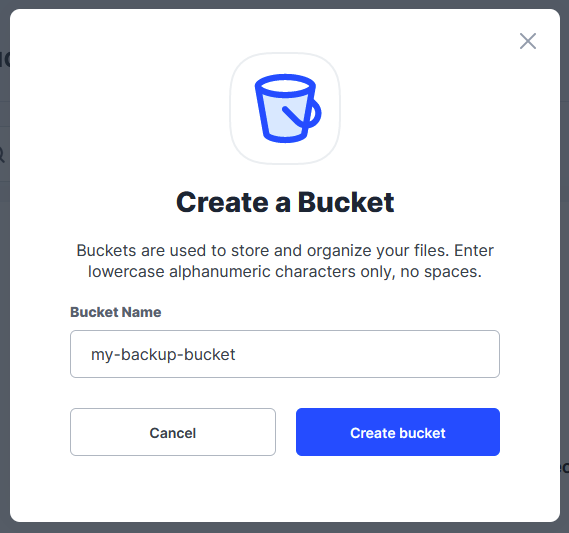
Give you bucket a name, it has to be all lower case and no spaces, then click ‘Continue’
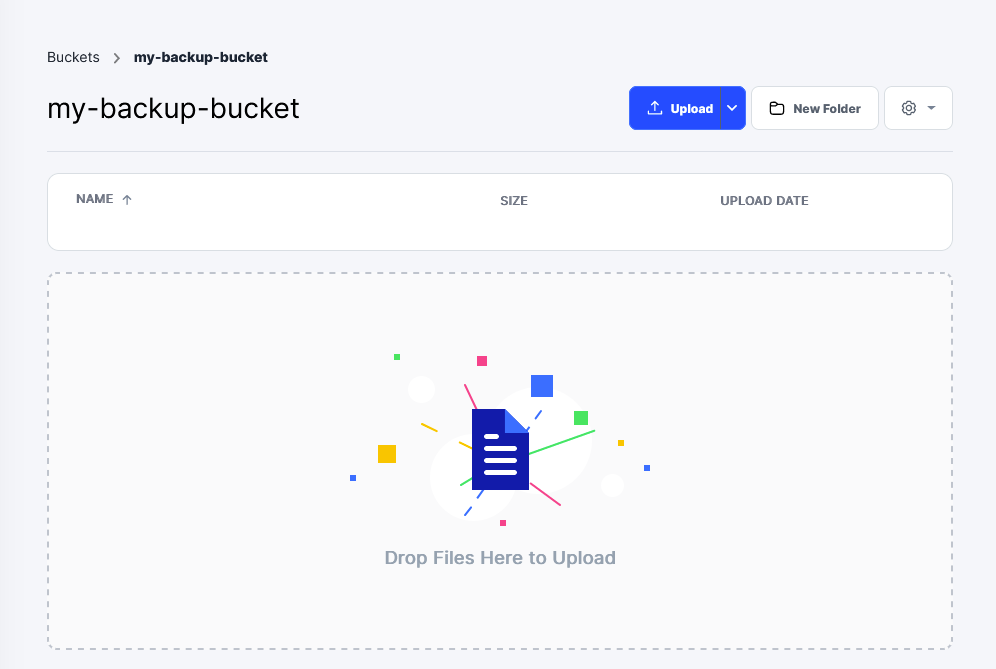
After a couple of seconds you will be inside the empty bucket. We won’t be doing anything on this screen but if you ever wanted to upload files to a different bucket via a browser you could do it here.
Granting Access
Next up we are going to create some S3 credentials that will allow Hyper Backup to put, retrieve or delete files in the bucket.
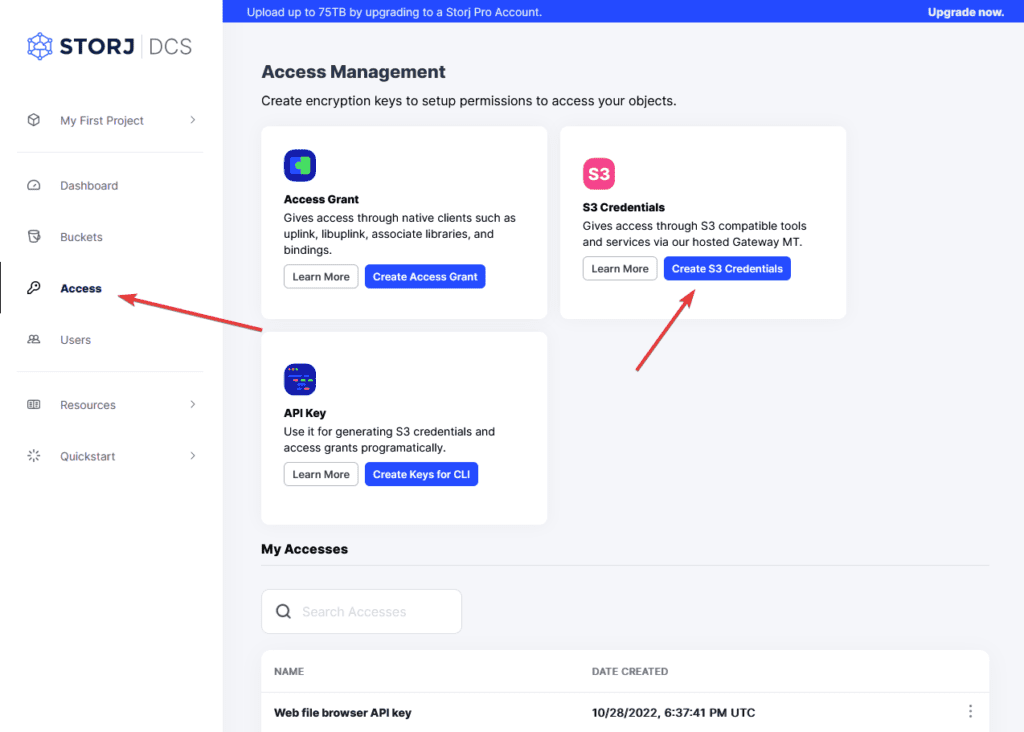
Click on ‘Access’ from the left-hand menu and then ‘Create S3 Credentials’ from the main screen.
In the screen that appears you will need to have the following options set, we will be setting up access purely for this one bucket. We now will set a number of options to enable access to the bucket and set an encryption key.
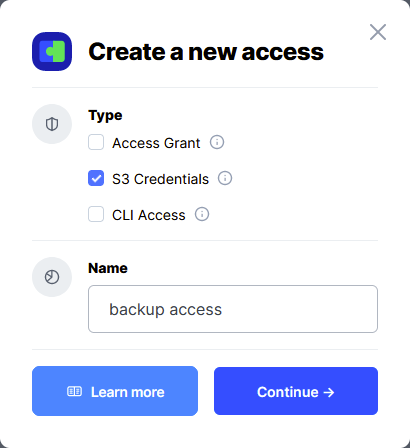
On the first screen, enter a name for your access credentials, I am using ‘backup access’ and leave ‘S3 Credentials’ ticked and click Continue
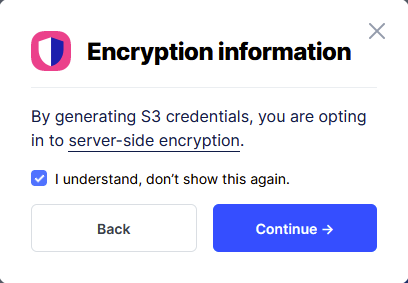
Next you need to confirm that you understand that due to using the WebUI, for this setup you are enabling server-side encryption. This means a copy of the keys are stored on Storj in order for you to access the data via the WebUI. Click Continue.
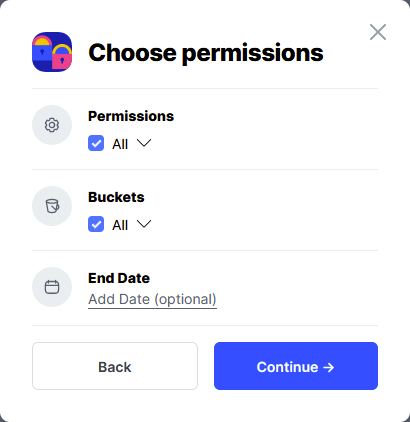
Next select All for Permissions and then select All Buckets (You can just select the bucket we created earlier if you want different keys for each bucket) Leave End Date to its default and click Continue.
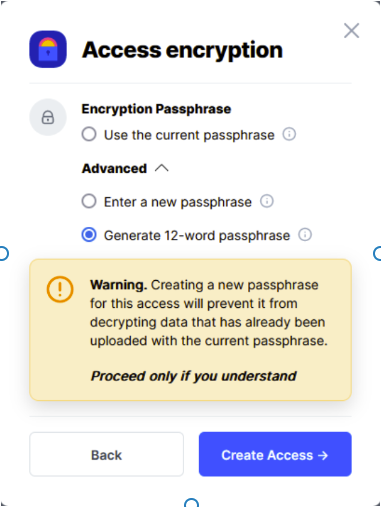
Now we are going to generate a fresh encryption key, Select ‘Generate 12-word passphrase’ and click ‘Create Access’.
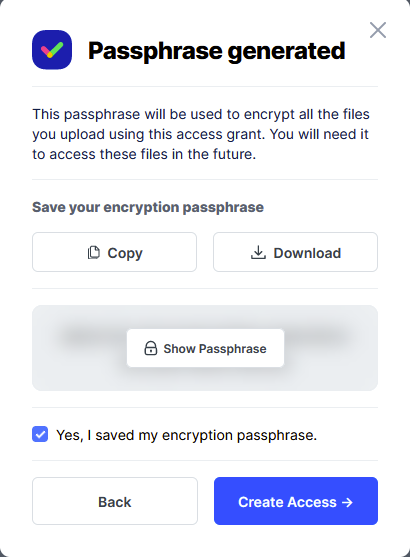
You will now be shown the new key, it is very important that you keep this safe—if you lose it you will lose access to the Bucket and it’s data. Keep it in a password manager or other safe place. Once you have saved it click Create Access again.
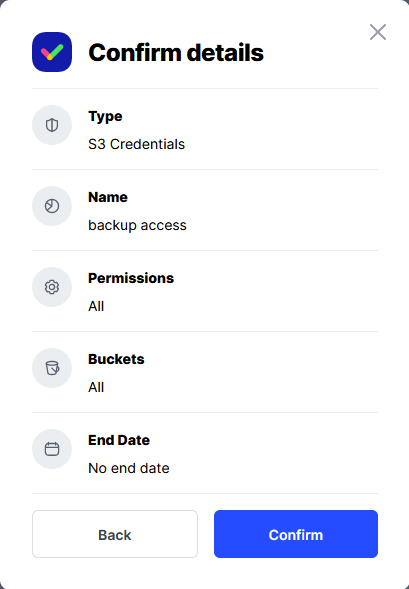
The next screen will just ask you to confirm the settings, click ‘Confirm’
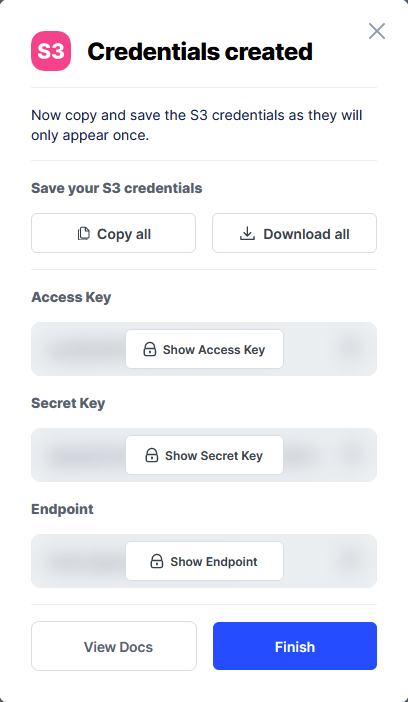
The final screen will now give you the credentials required to access the bucket using Hyperbackup. Just like before keep these safe, download all items and make note of what each of them are for. Click Finish.
We have now completed our setup on the Storj site and can head over to Hyper Backup.
Hyper Backup Setup
Now we can create our backup using the credentials we have collected so far. I am going to assume you already have Hyper Backup installed and have an understanding of its basic settings.
Backup Destination
Open Hyper Backup and from the ‘Backup Destination’ options select ‘S3 Storage’ and click ‘Next’

Backup Destination Settings
On the next screen we will enter all the details we obtained earlier, I have laid these out in the table and screenshot below
| Setting | Information to select/enter |
|---|---|
| S3 Server | Custom Server URL |
| Server Address | S3 Endpoint (URL) |
| Signature Version | v4 |
| Request Style | Path-Style |
| Access Key | S3 Access Key |
| Secret Key | S3 Secret Key |
| Bucket Name | Click the drop-down and your bucket should appear |
| Directory | You can change this to whatever you like, it will be the name of the directory inside the bucket. |
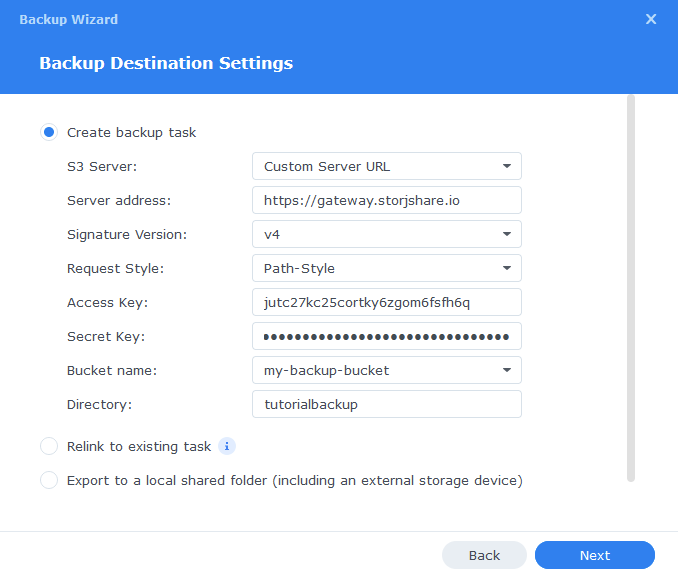
You can now click ‘Next’.
Data Backup and Application Backup
You will be able to specify the shares and applications you want to include in the backup. I have not included these screens as it is up to you what to include.
Backup Settings
You will now need to specify a few additional settings, I have laid them out in the table below:
| Setting | Option to use |
|---|---|
| Task | Give the backup a name |
| Enable Task Notification | You can decide if you want notifications |
| Enable file change detail log | This is off by default it will increase the size of your backups if turned on but will log all file changes between backup sessions so up to you if you need this or not. |
| Compress backup data | Leave this on to save some space assuming the files being backed up are compressible. |
| Enable Transfer Encryption | Leave this on |
| Multipart Upload Part Size | Change this from 512MB to 64MB |
| Enable Backup Schedule | Up to you on the schedule |
| Enable integrity check schedule | Up to you if you want to do schedule checks to ensure the backup is good (this will consume some bandwidth) |
| Enable client-side encryption | This option is up to you whether you enable it. I personally enable it so I control the key for the data when it is at rest in Storj. While the bucket is encrypted if you access it via the WebUI Storj have to have a copy of the key to enable you to see the contents of the Bucket. |
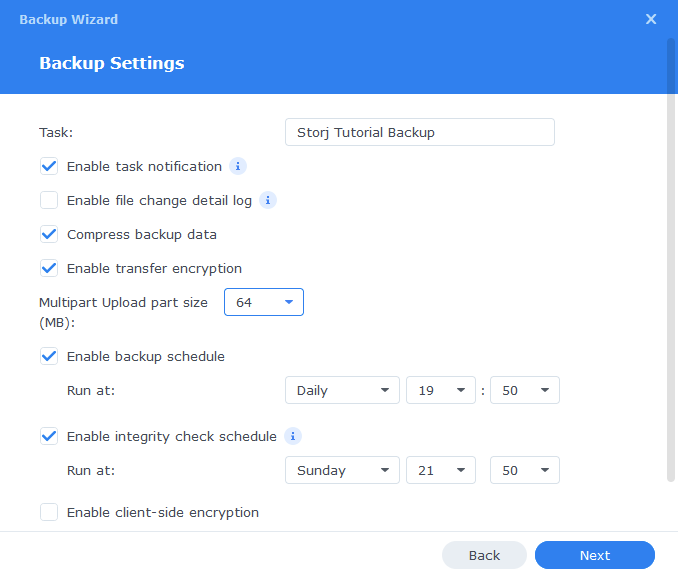
Now click ‘Next’
Rotation Settings
These settings are completely up to you based on the data you are backing up, I personally use ‘Smart Recycle’ and then adjust the Max versions according to my needs.
Click on Done and you will be given the option to start your first back up immediately or you can wait until the schedule you specified.
Final Words
You will be able to browse backup itself from within Hyper Backup just like any other backup target including seeing previous versions of your files and doing restores. You can also see the files via the Storj website by clicking on your bucket and entering the encryption passphrase. (see the demo below, this is not the client side key you set in the final section but the one you created when setting up the Bucket.)
You are now complete, you can repeat the steps to create additional buckets and s3 credentials for additional backup targets.
Looking for some help, join our Discord community
If you are struggling with any steps in the guides or looking to branch out into other containers join our Discord community!

Buy me a beverage!
If you have found my site useful please consider pinging me a tip as it helps cover the cost of running things or just lets me stay hydrated. Plus 10% goes to the devs of the apps I do guides for every year.


[…] as I discovered on DrFrankenstrien’s Tech Stuff, here is how to create a StorJ S3 Bucket (you can start a StorJ account with 25GB free for 30 […]
thanks for the tutorial. I got storj working via hyperbackup s3 but is it possible to get it connected via Cloud Sync? Having trouble with that, can’t find the buckets no matter what i do.
Hey – I have not tried to be honest – let me have a go over the weekend and come back to you!
you forgot to come back
Hey apologies for not coming back sooner – So I tried this morning using the Custom S3 provider however it was not initially connecting – however it looks like Cloudsync doesn’t like the provided address https://gateway.storjshare.io, so I removed the https:// and it immediately connected and listed my buckets. You can then continue and set up the sync just like you would normally, make sure to reflect the part size etc like the guide.
After reading your post, I did try StorJ with Hyper Backup on my NAS. It’s not working due to “authentication failed”. Weird as I see the Bucket in the first scree of the Wizard…. It’s probably an issue on my side, but what ? Any idea ? I hope otherwise the Storj community will be able to help. I did post my issue here : https://forum.storj.io/t/autenthication-failed-when-configuring-synology-hyper-backup/29143
Hi – Initially I was thinking it would be odd for it not to work as I recently just double checked it was working guide wise..
I read your post and glad its working 🙂
would love to see your write up on hosting a storj node via container manager & docker compose
A couple of us on Discord had nodes running but to be honest the earnings don’t make it worth it as the the market is saturated. While it was interesting to set you need to be running it for a minimum of 9 months before you even get a small payout. Feel free to jump on Discord and our old thread is still kicking about.