Important or Recent Updates
| Historic Updates | Date |
|---|---|
| Updated guide for Container Manager | 22/05/2023 |
| Moved from UI setup to Project Setup which is more flexible and easier to maintain. Added an addition element to the compose to restrict the container from gaining additional privilege. | 25/10/2023 |
| Added FlareSolver to the Extras section of the guide | 10/11/2023 |
| Guide amended to integrate Flaresolverr as a core piece of the project | 09/12/2023 |
| Merged the VPN version of the guide into this one as we will now proxy Prowlarr into our GlueTUN container. This means you can have just specific indexers go via the VPN connection. | 03/07/2025 |
What is Prowlarr and FlareSolverr?
Prowlarr is an application that combines your various indexers for Torrents and Usenet into one place, it then syncs all the indexer settings automatically with Sonarr, Radarr etc. FlareSolverr is an additional proxy which helps bypass Cloudflare protection that many indexers use.
This guide now has some additional steps on how to connect Prowlarr to GlueTUN and how to proxy specific indexers via your VPN connection if required.
Let’s Begin
In order for you to successfully use this guide please complete these two guides and come back here.
Folder Setup
Let’s start by getting some folders set up for the containers to use. Open up File Station create the following.
/docker/projects/prowlarr-flaresolverr-compose
/docker/prowlarr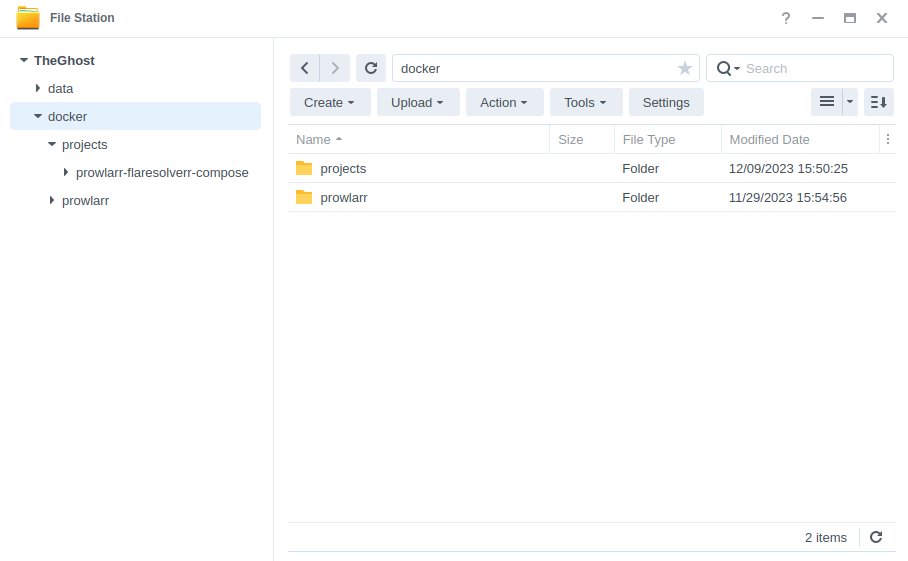
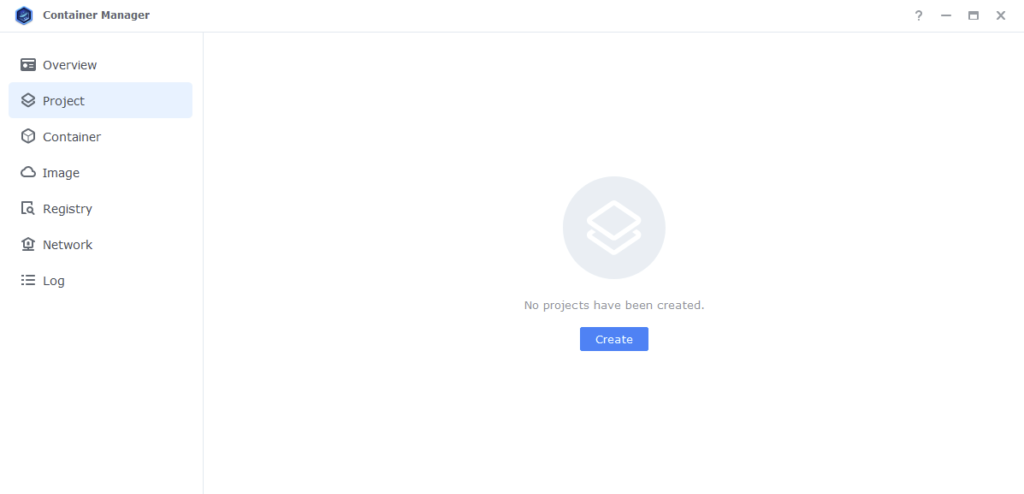
Container Manager
Next we are going to set up a ‘Project’ in Container Manager. Open up Container Manager and click on Project then on the right-hand side click ‘Create’.
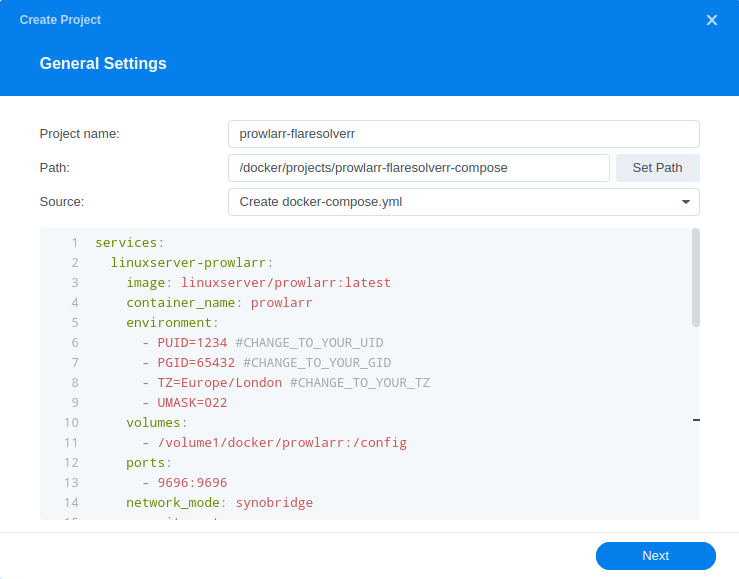
In the next screen we will set up our General Settings, enter the following:
| Section | Setting |
|---|---|
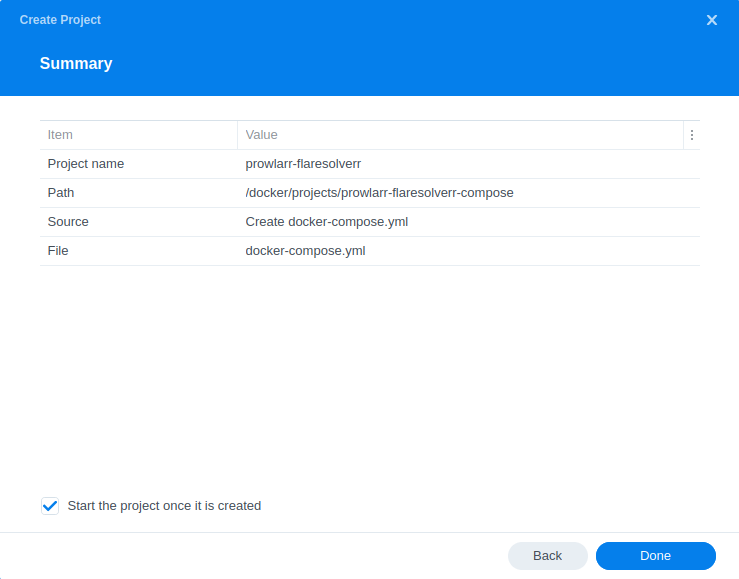
| Project Name: | prowlarr-flaresolverr |
| Path: | /docker/projects/prowlarr-flaresolverr-compose |
| Source: | Create docker-compose.yml |
Next we are going to drop in our docker compose configuration copy all the code in the box below and paste it into line ‘1’ just like the screenshot.
What on earth is a Docker Compose?
Docker Compose allows us to define how Docker should set up one or more containers within a single configuration file. This file is yaml formatted and Container Manager uses the Projects feature to manage them.
services:
  linuxserver-prowlarr:
    image: linuxserver/prowlarr:latest
    container_name: prowlarr
    environment:
      - PUID=1234 #CHANGE_TO_YOUR_UID
      - PGID=65432 #CHANGE_TO_YOUR_GID
      - TZ=Europe/London #CHANGE_TO_YOUR_TZ
      - UMASK=022
    volumes:
      - /volume1/docker/prowlarr:/config
    ports:
      - 9696:9696/tcp
    network_mode: synobridge
    security_opt:
      - no-new-privileges:true
    restart: always

  flaresolverr:
    image: flaresolverr/flaresolverr:latest
    container_name: flaresolverr
    environment:
      - TZ=Europe/London #CHANGE_TO_YOUR_TZ
    ports:
      - 8191:8191
    network_mode: synobridge
    security_opt:
      - no-new-privileges:true
restart: alwaysEnvironment Variables
We need to make some changes in order for the container to have the correct permissions to save its configuration files and to have access to your media.
| Variable | Value |
|---|---|
| PUID | (required) The UID you obtained in the user setup guide should be entered here |
| PGID | (required) The GID you obtained in the user setup guide should be entered here |
| TZ | (required) Your timezone wikipedia.org/wiki/List_of_tz_database_time_zones |
Click ‘Next’
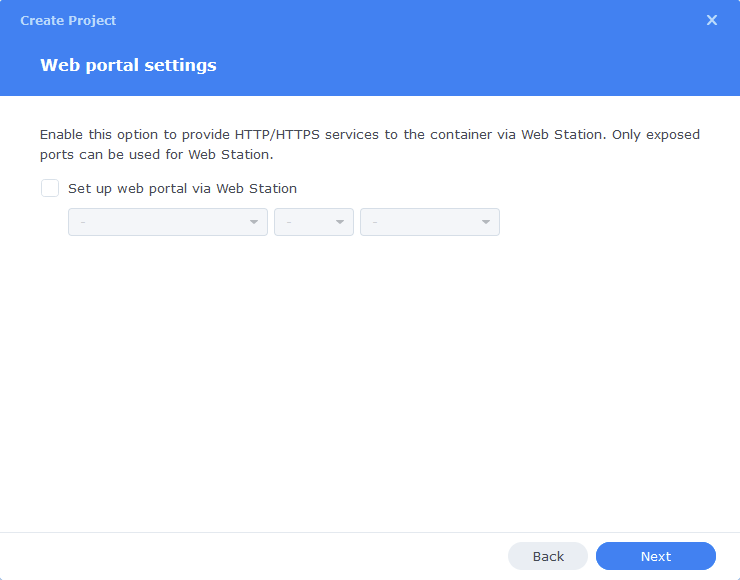
You do not need to enable anything on the ‘Web portal settings’ screen click ‘Next’ again.
On the final screen click ‘Done’ which will begin the download of the container images and once downloaded they will be launched!
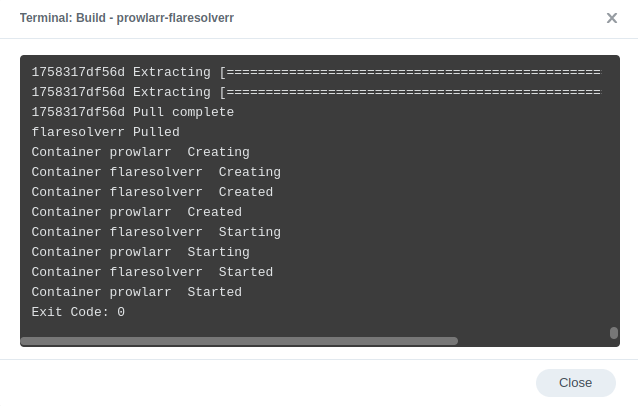
The image will now be downloaded and extracted. You should see ‘Code 0’ when it has finished.
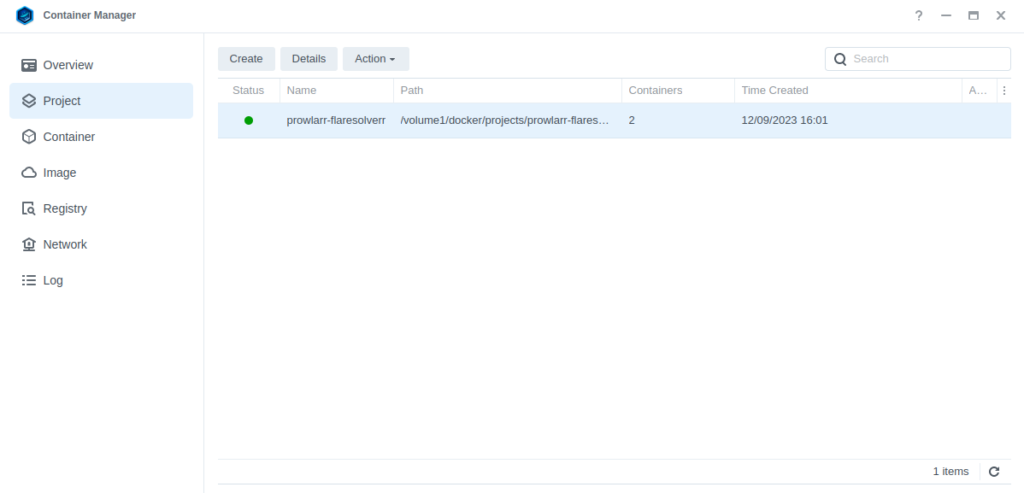
The Project should now be running with a Green status
Firewall Exceptions
(Skip if you don’t have the Firewall configured)
If you have the Synology Firewall enabled please see this additional guide for further info on exceptions and correct set up.
Container set up complete
You should now be able to access Prowlarr via the IP of your NAS followed by the port 9696
e.g. 192.168.0.40:9696
FlareSolverr Setup
Once you have set up Prowlarr and the Indexers you want to use, you can then add FlareSolverr to the ones that require it.
Go to Settings > Indexers > Click + then select FlareSolverr
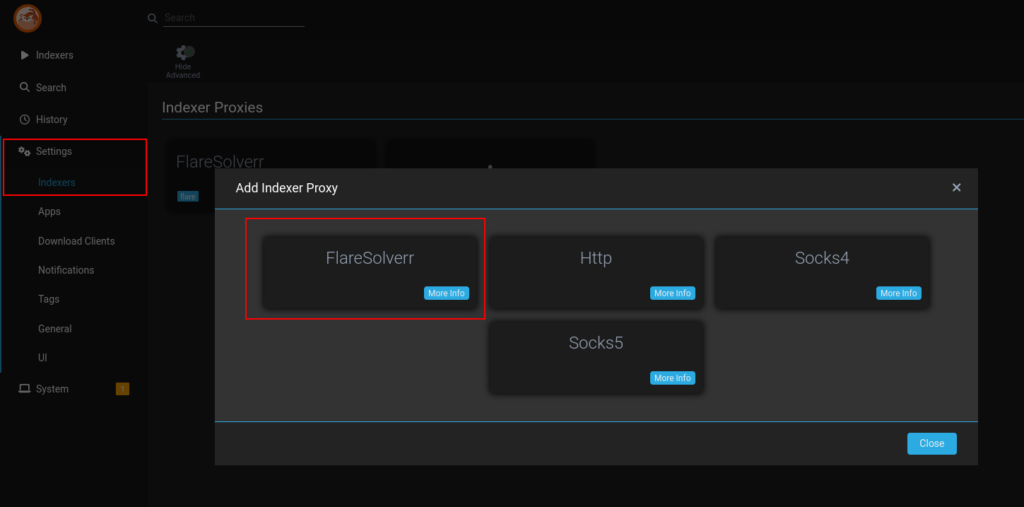
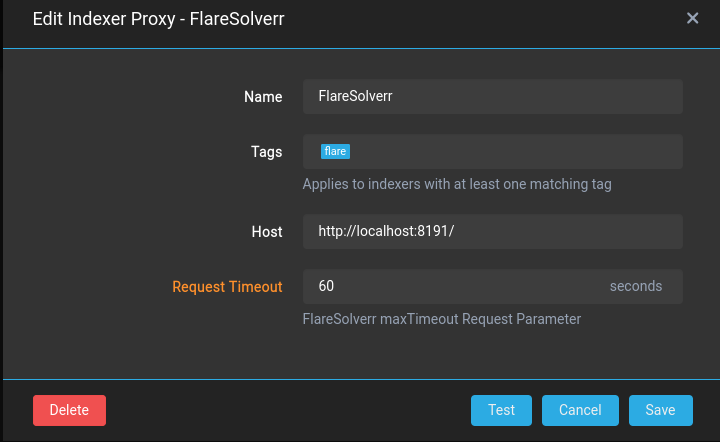
Once added enter the details as per the screenshot below – ensure you keep note of the ‘Tags’ as this is what you will add to an actual indexer to tell it to use FlareSolverr.
There are 3 possible connection options to use, try from top to bottom.
http://localhost:8191/
http://172.20.0.1:8191/
http://YOUR-NAS-IP:8191/
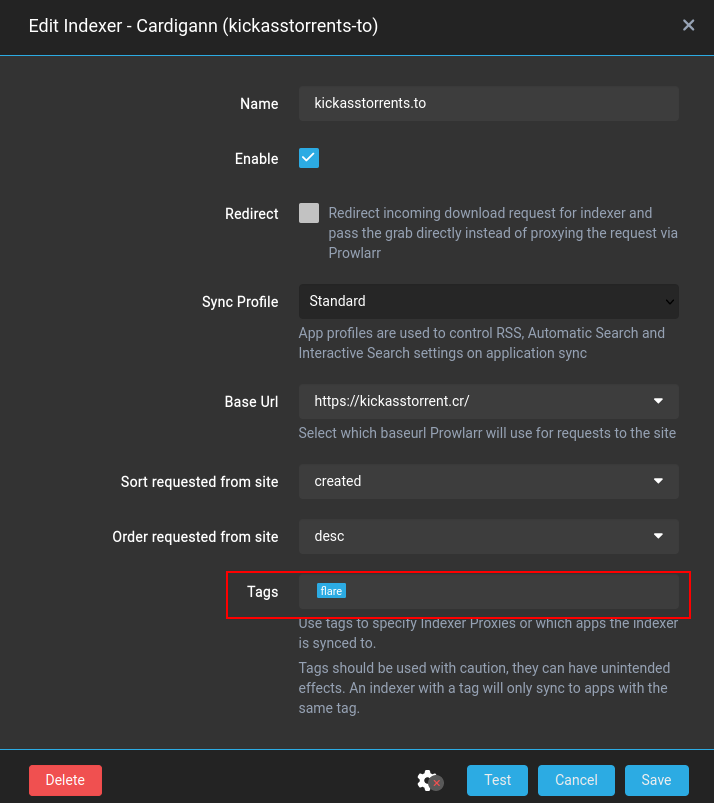
You then tag each indexer that requires FlareSolverr
GlueTUN VPN HTTP Proxy Setup
We can now look at setting up our http proxy to use for some or all of our indexers. This makes the assumption you already have a healthy GlueTUN connection already in place using my other guides.
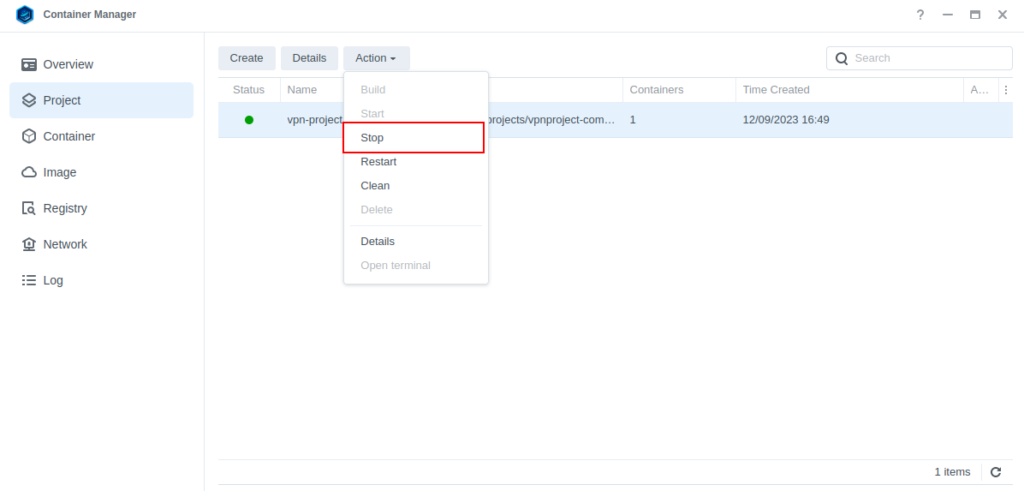
Open up container manager and in the Project section select the `vpn-project` then Action > Stop.
Once the project has stopped click into it and select the YAML Configuration tab, you need to make a couple of edits.
In the ports section we are adding the http proxy port, and then we enable it by adding an environment variable and setting a username and password.
    ports:
- 8888:8888 #port for http proxy environment:
- HTTPPROXY=on
- HTTPPROXY_USER=username
- HTTPPROXY_PASSWORD=secretpasswordIt should look like the below image once edited with your own username and password

You can now Save and Build the VPN Project, and we can move onto the next stage of set up.
Back into Prowlarr we are going to set up the proxy, head into Settings then Indexers. Click on the + to add the Proxy
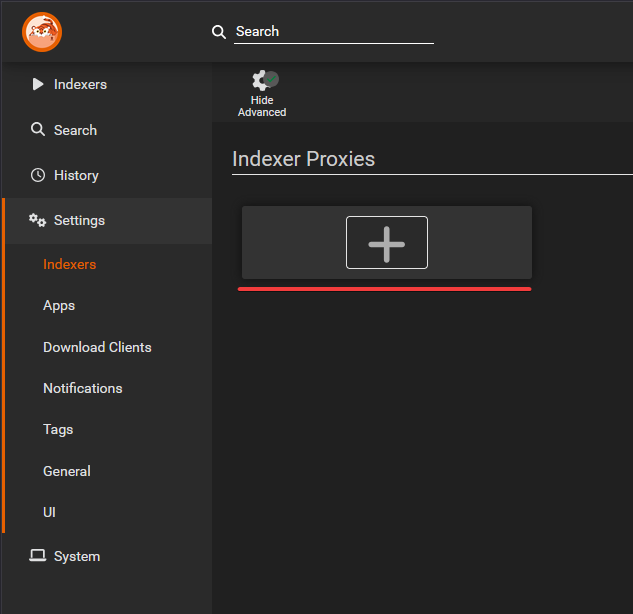
Next select Http from the available options
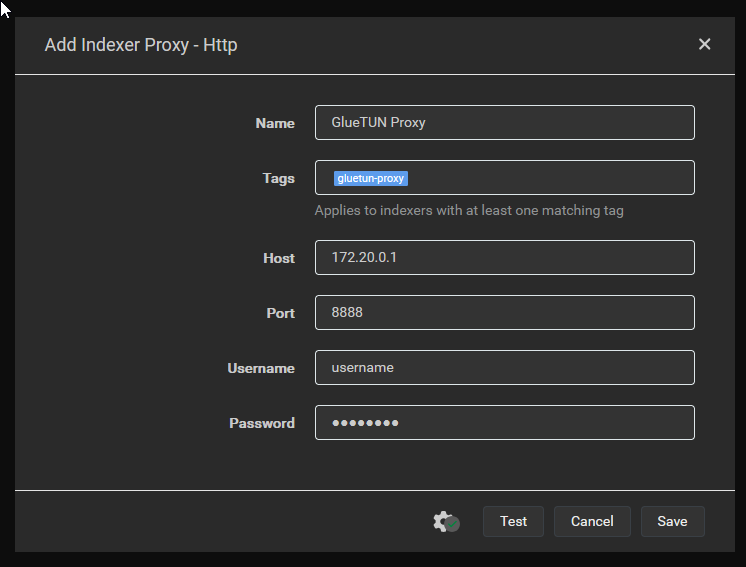
Now we are going to add the following settings
| Option | Setting |
|---|---|
| Name | GlueTUN Proxy |
| Tags | gluetun-proxy |
| Host | 172.20.0.1 (Synobridge IP) or your NAS IP |
| Port | 8888 |
| Username | Your Username |
| Password | Your password |
It should look like the below and when you click test it should pass successfully.
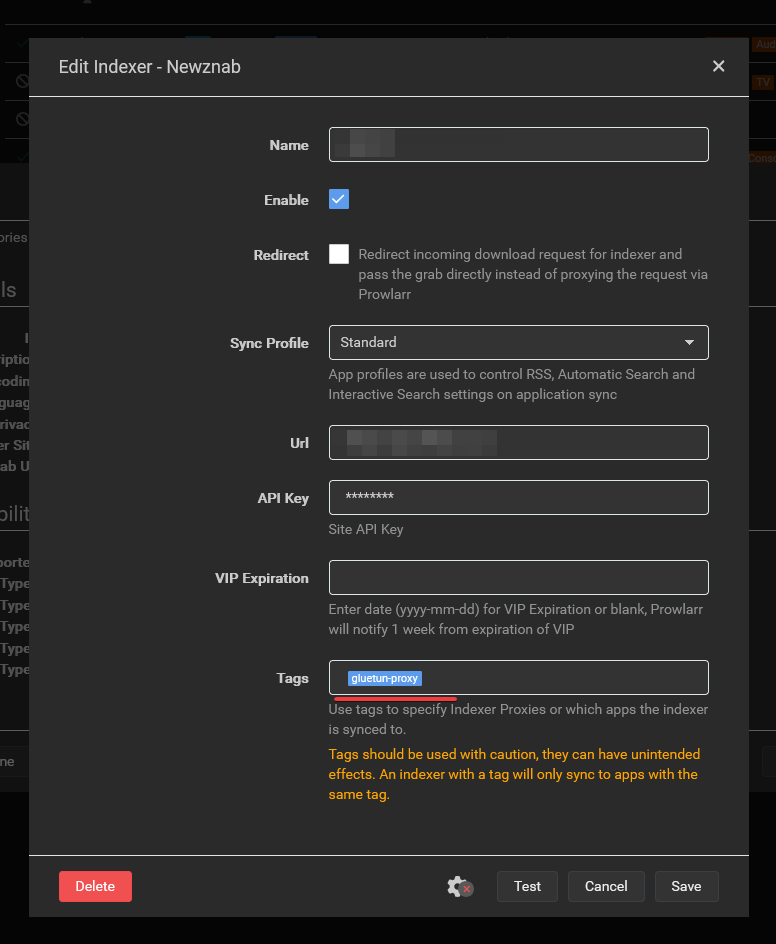
The Proxy is now ready to use – you can either add it to any new indexers when setting them up or editing an existing indexer and adding the tag we created, this tells Prowlarr to use the Proxy
That’s it you are all set up – keep in mind that GlueTUN will need to be active and healthy for the Indexers to fuction correctly after making these changes.
FAQ
Prowlarr can’t connect to my Arrs or Download Client
When setting up the connection between Prowlarr and Radarr/Sonarr/Lidarr some users have reported getting a time-out when using the NAS IP. If this happens try using the Gateway IP of the Synobridge network, which should be ‘http://172.20.0.1’. (you can see this in the Container Manager UI in Networks)
Looking for some help, join our Discord community
If you are struggling with any steps in the guides or looking to branch out into other containers join our Discord community!

Buy me a beverage!
If you have found my site useful please consider pinging me a tip as it helps cover the cost of running things or just lets me stay hydrated. Plus 10% goes to the devs of the apps I do guides for every year.


Please ignore my question. I found the other page and got it working. Thank you
Nice one 🙂
Can this be integrated into the qBittorrent with GlueTUN VPN project ?
I have prowlarr, as well as the other arrs, in that project.
Thank you