
Last updated on 24 April 2025
Important or Recent Updates
| Historic Updates | Date |
|---|---|
| New guide Published | 18/03/2023 |
| Swapped to using the version direct from Tailscale | 20/03/2023 |
| Fixed the Routes and Subnets command as seems to run differently depending on some configs | 27/03/2023 |
| Amended wording relating to exit nodes and DNS | 09/04/2023 |
| Changed the Tailscale Up command to use the DNS servers specified in the admin console – amended the DNS section accordingly (thanks Roy) | 10/12/2023 |
| Screenshot updates based on latest workflow confirmed still working correctly in live setup | 03/01/2024 |
| Added WireGuard Kernel Module Install steps | 02/02/2025 |
| Removed the WireGuard Kernel Module steps – Apologies I didn’t realise that Tailscale is Userspace only. | 24/04/2025 |
What is Tailscale?
Tailscale is very clever, it’s a VPN mesh network that allows you to use all your local network resources such as your NAS, all your Docker containers and even other devices on your network remotely.
This guide is based on the official documentation here which covers the basics however I received enough questions via Discord and email that I felt it warranted a step-by-step walkthrough.
This will take you through the steps to get Tailscale running on your NAS and then accessing via an Android mobile.
Note: For anyone who likes to follow along in video format this video recently released by Alex from Tailscale is great!
Let’s Begin..
Installing Tailscale
The first step is to install the Tailscale Package (believe it or not we are not using Docker!!)
You have a couple of options here, either install the current version via the Package Centre or grab the latest version direct from Tailscale.
We are going to get the latest version in this guide, if you ever want to update either check back on newer versions via the link above or eventually the Package Centre version will catch up!
Open the link above and grab the version of the of package which works with your model of NAS. Most + models will use the version shown in the screenshot (you can find out of what type of CPU your NAS has here)

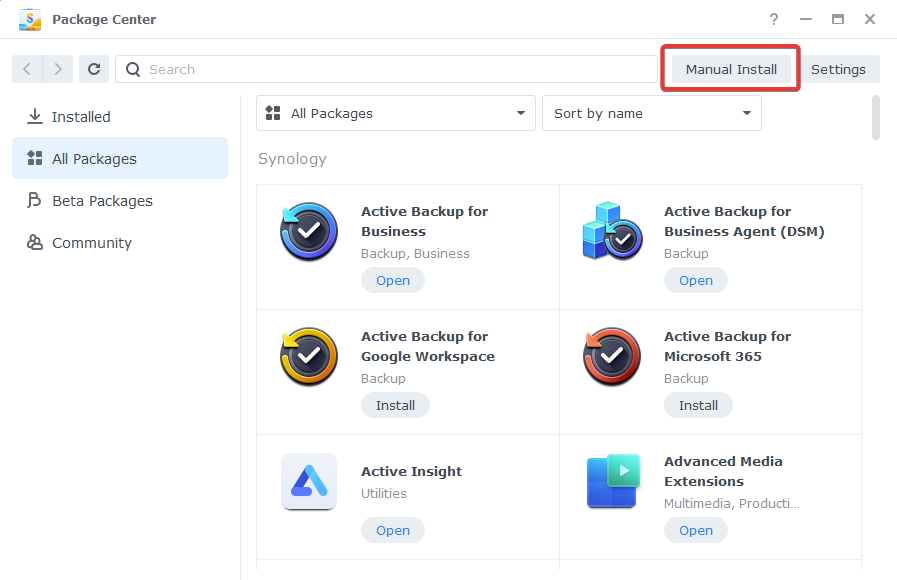
Once downloaded pen up the Package Centre and Click on ‘Manual Install’ on the top right. Then browse to your downloaded package and click Next.
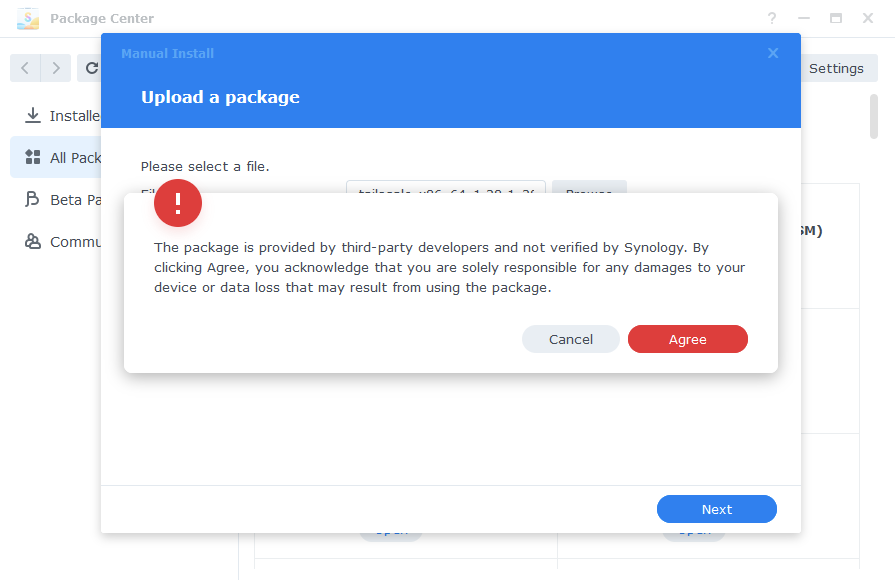
You will be asked to accept all responsibility by installing this package, of course we will agree!
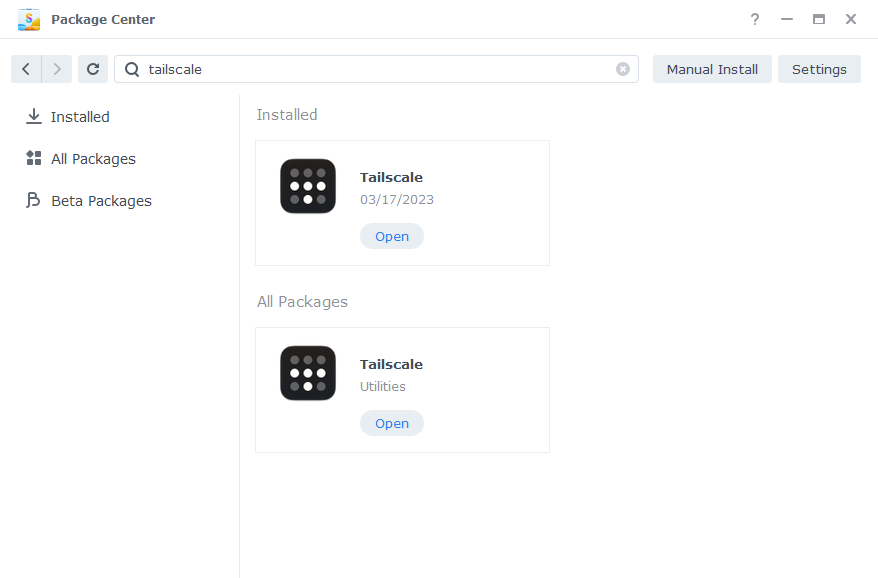
Once the package has finished either find it in the list or search for it in the top bar and click Open.
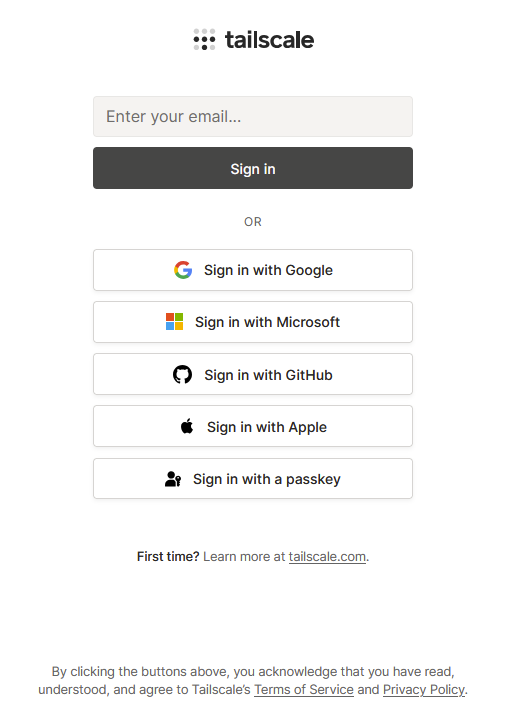
A new browser window will open, and it will ask you to Log In to your Tailscale account
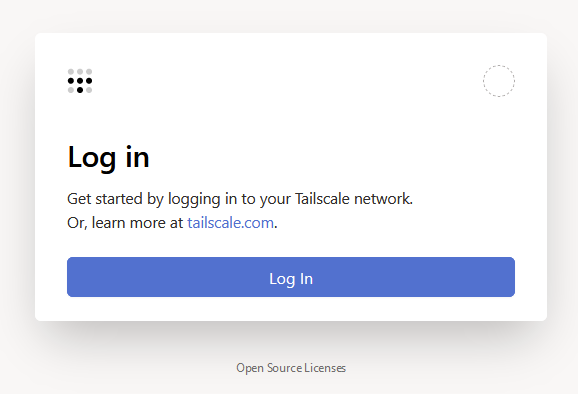
Click log in, and you will be taken to the next screen with different options to log in – Tailscale uses sign ins via a number of providers Google, Microsoft, GitHub etc select the one you prefer and login. You will use this to sign in on all devices going forward.
Once you have signed in you will see the screen below which is confirming the details of the device being added to your account. Click ‘Connect’.
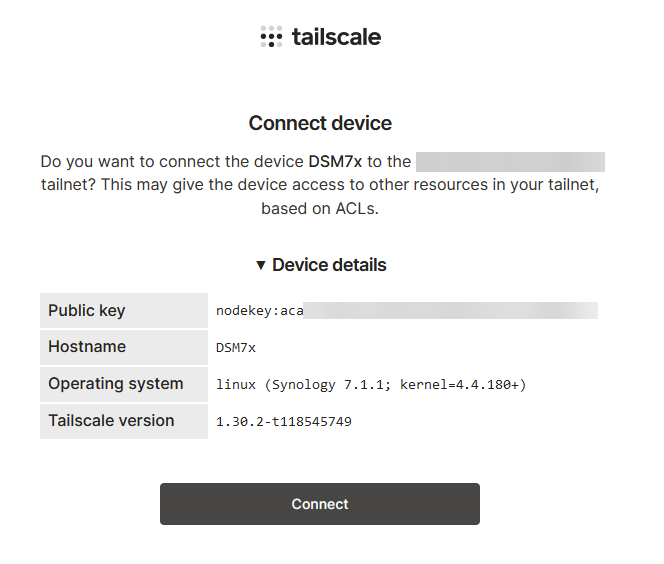
You can now visit https://login.tailscale.com/admin/, and you will see your NAS in the list of your devices – I have blurred out my other devices in the screenshot, but you can add up to 25 for free.
You will see that you NAS has been assigned an IP address on the Tailscale network. We want to be able to access all our services via their original IP and ports rather than having to remember a new IP address. So lets carry on…

Enabling Outbound Connections on DSM7 and up
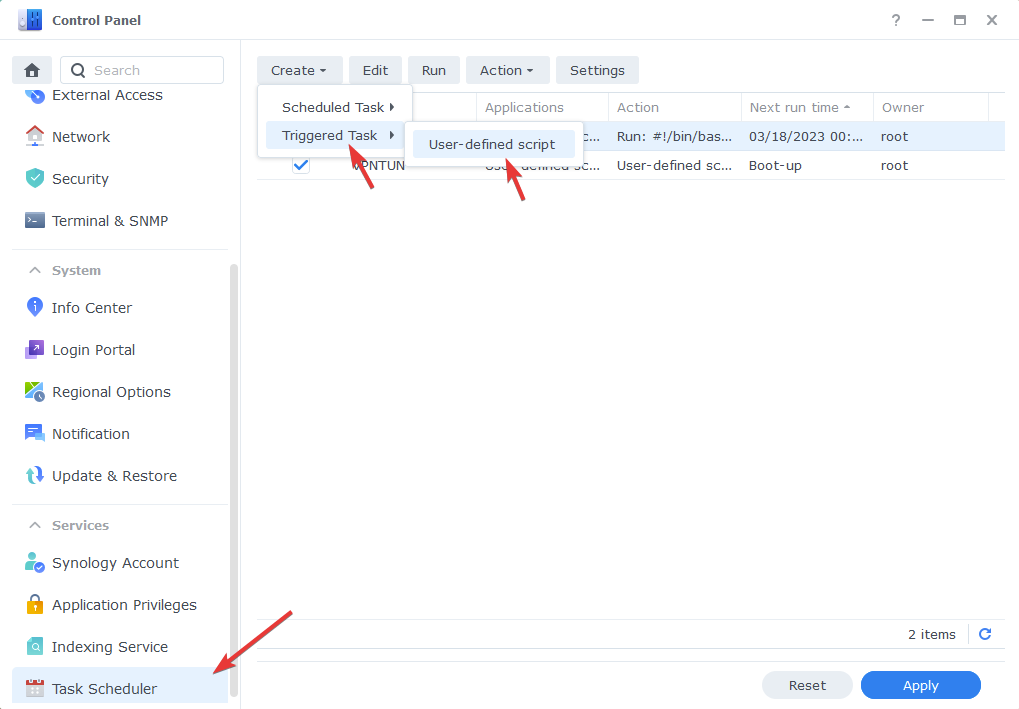
In order for our containers and apps running on DSM to have outbound access to the Tailscale network we need to enable this via a boot up command. This is nice and easy as we can use the Task Scheduler in the Control Panel.
So open up Control Panel > Task Scheduler > Create Task > Triggered Task > User-Defined script
In the Create Task window that appears enter the following information.
| Section | Setting |
|---|---|
| Task Name: | tailscale-outbound |
| User: | root |
| Event: | Boot-up |
| Pre-task: | Leave this blank |

Now click the ‘Task Settings’ tab and enter the code below in the ‘User-defined Script’ section
/var/packages/Tailscale/target/bin/tailscale configure-host; synosystemctl restart pkgctl-Tailscale.service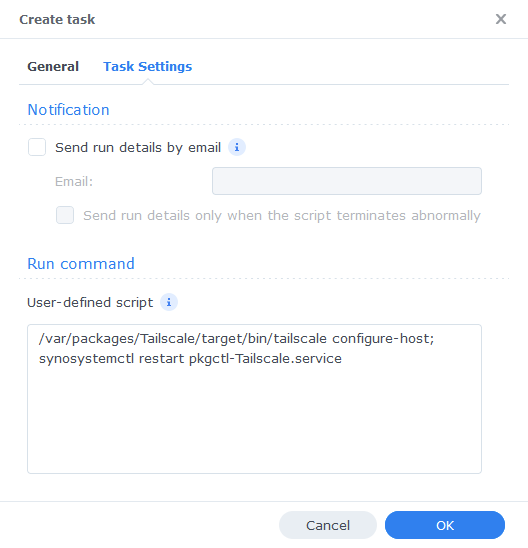
Now click ‘OK’ you will be warned about running scripts as a root user, you can safely click the scary Red OK button.
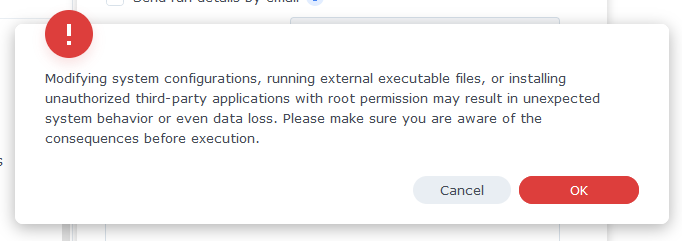
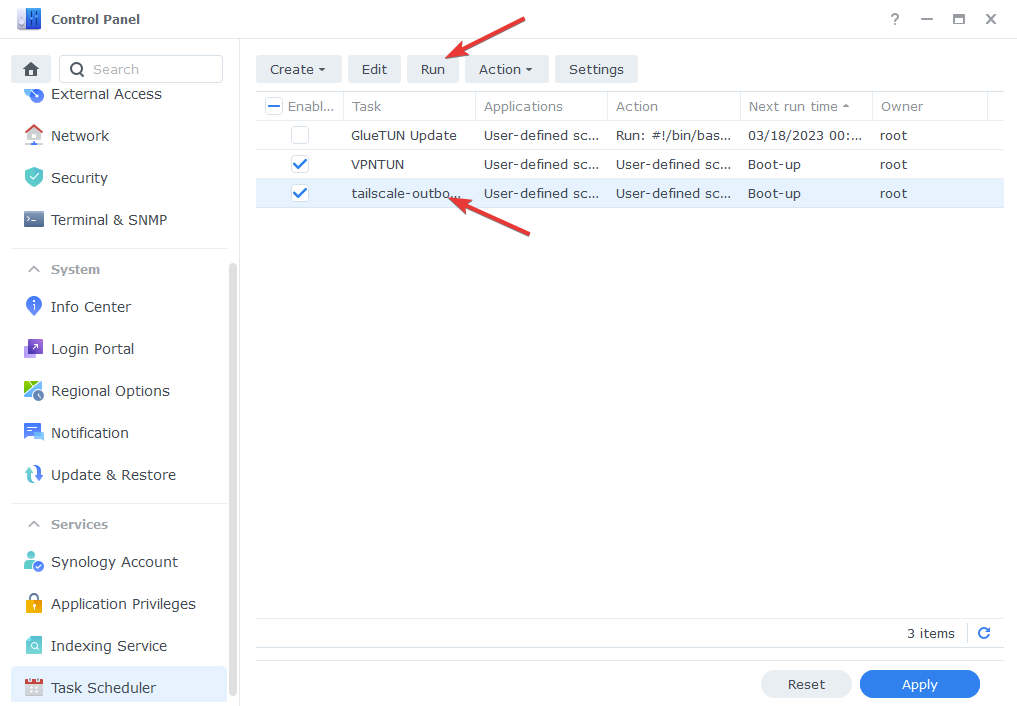
The final step for this section is to run the script, it will then run on each reboot automatically, just select the task from the list and then click ‘Run’ and a then say ‘Yes’ to the pop-up.
Subnets, Routes, and Exit Nodes
So one more step to set up on the NAS side of things, we now need to enable the following items:
- Subnets – (Advertise Routes) In order for us to access other devices on our network we will allow the Tailscale connection to look across the network
- Exit Node – By default your internet traffic will go via the connection on the device you are using. For example if you are using your mobile on 4g when you go to Google.com this is going directly from your mobile connection. However, if you enable the Exit Node feature you can route your traffic via your NAS and out of your home internet connection. If you have Ad-Guard or PiHole in place this also means your ad blocking works as well!
You can do this next part in two ways either via SSH or for simplicity I am going to show how via Task Scheduler.
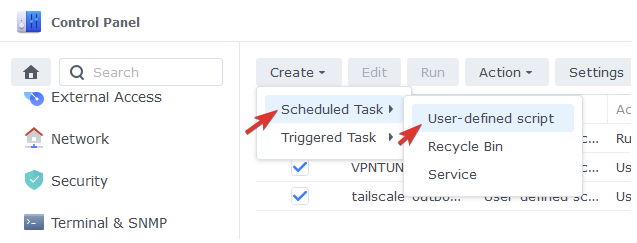
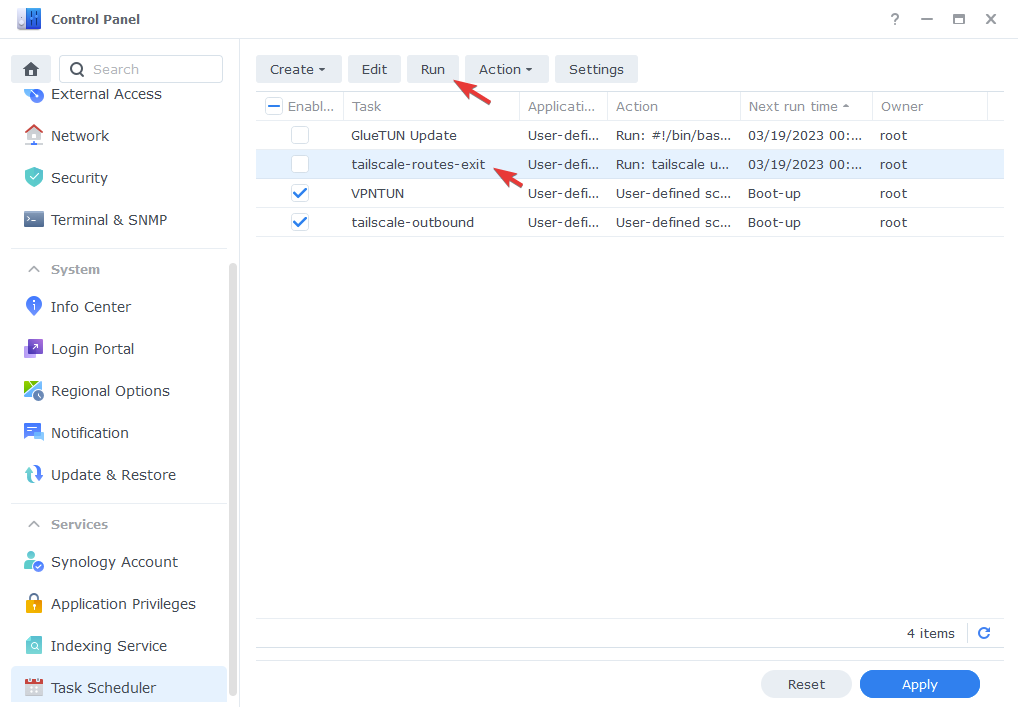
Go back to the Task Scheduler in Control Panel and Click Create > Scheduled Task > User-defined script.
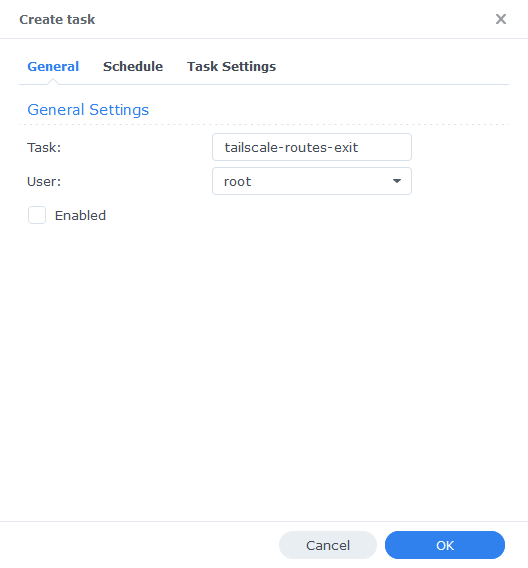
Next we set the following options:
| Section | Setting |
|---|---|
| Task Name: | tailscale-routes-exit |
| User: | root |
| Enabled: | Unticked |
Nothing need to be amended on the Schedule tab, then in the Task Settings tab enter the code below into the User-defined script section.
Before you do this though you need to edit the –advertise-routes=192.168.0.0/24, this must correspond to your own local subnet! The easiest way to figure out this is by taking your NAS IP address for example 192.168.0.79 and changing the final digit after the . to 0 ( 192.168.0.0)
Also, the –accept-dns=true will tell Tailscale to use the DNS servers set in the Admin Console we will visit this a bit later.
tailscale up --accept-dns=true --advertise-exit-node --advertise-routes=192.168.0.0/24 --reset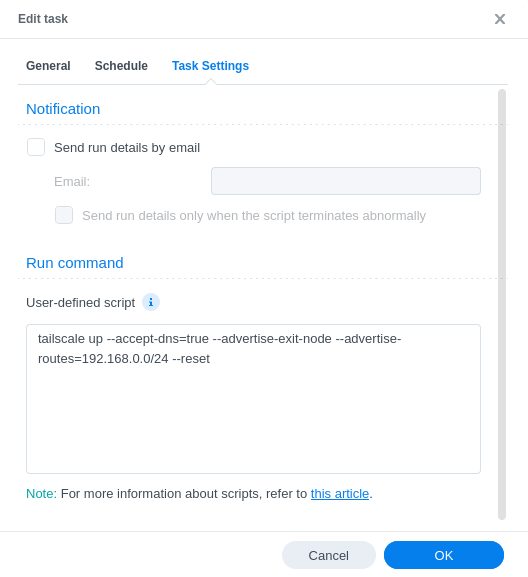
Now press OK and again as per the last section accept the warning. You will then need to run the command by selecting it from the list and pressing ‘Run’. This is everything completed on the NAS side of things!
Some users have reported that these settings don’t immediately appear in the Admin Console – So a reboot may be required for them to appear.
Tailscale Admin Amendments
We are now going to make a couple of changes in the Tailscale admin panel. Head back to https://login.tailscale.com/admin/ you will notice our NAS shows the extra enabled features of Subnets and Exit node.
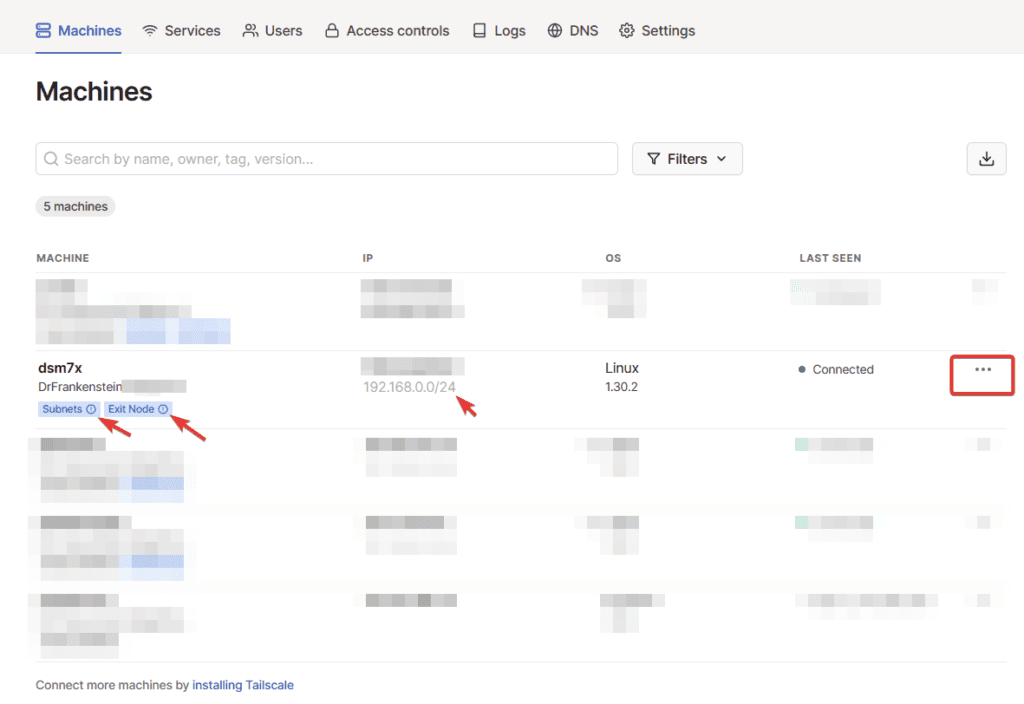
Click on the three dots next to your NAS and click on ‘Disable Key Expiry’ this will mean you don’t need to manually renew encryption keys every few months.
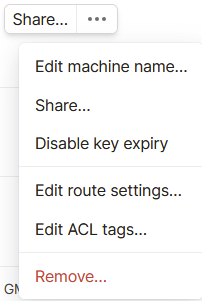
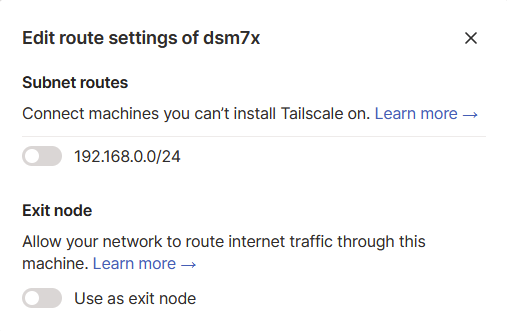
Then click the three dots again and select ‘Edit route settings..’ and you will see the screen below. Turn on both the ‘Subnet routes’ and ‘Exit Node.’ These will allow you to access devices and applications on your local network and enable the ability to route your internet traffic through the NAS.
Network wide ad-blocking / DNS
Our final step in the Admin Panel is to make sure we have some DNS servers in place, otherwise you will not have internet access via Tailscale.
In the video below I add local IPs for AdGuard or Pi-hole if you are not using those either add your preferred DNS provider(s) or select from the built-in ones.
In your Tailscale admin panel click DNS from the top section

Next scroll down to the Nameservers section and as per the video below click ‘Add Nameserver’ then select either from the drop-down list or Custom if you want to add the IP address of your Adguard or Pi-hole instance.
Mobile Setup
(03/01/2025 – Updated images coming shortly but the gist is the same)
We are into the final stretch! Now the NAS is set up and our network running we can start adding more devices, I am using an Android phone as an example in this guide. However, adding an iPhone or Laptop, or any other device such as a remote NAS is pretty much the same.
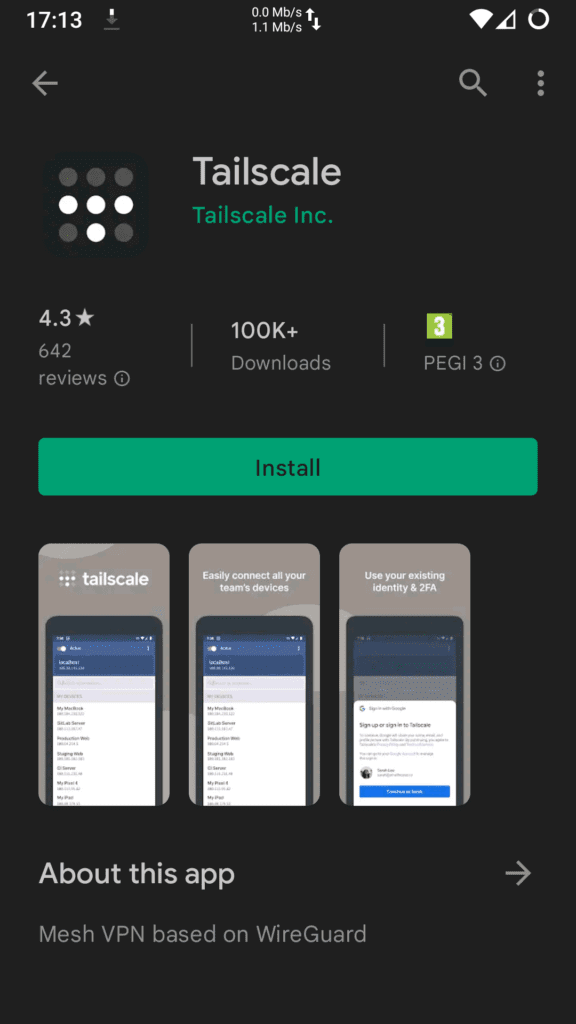
The first step is to download the Tailscale app from the Google Play Store or you can install directly from Tailscale. I am not showing these steps as they should be self-explanatory.
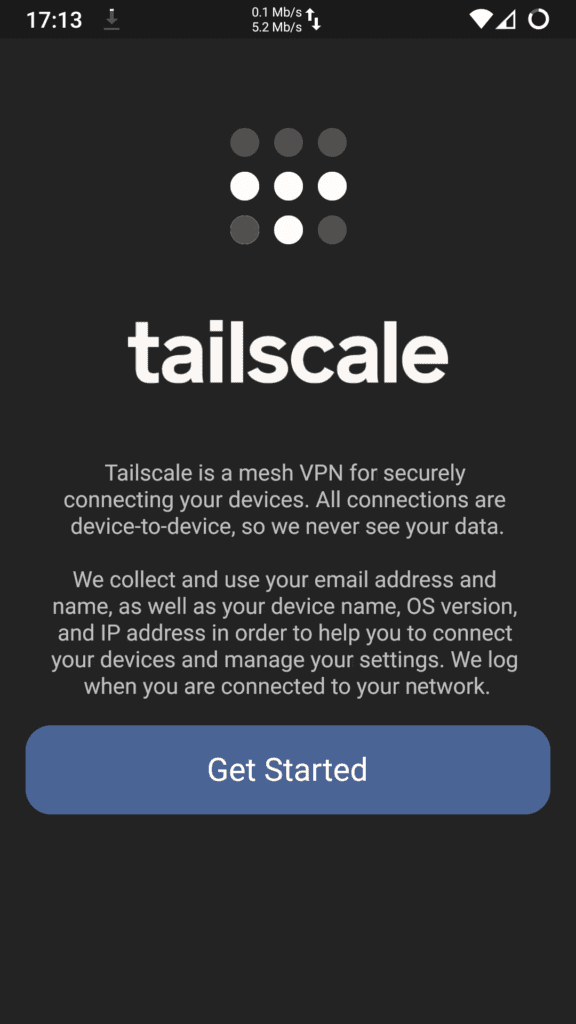
Once installed open up the app, and it will ask you to sign in, use the same account you used earlier and follow the steps (not showing these as it varies slightly per account type)
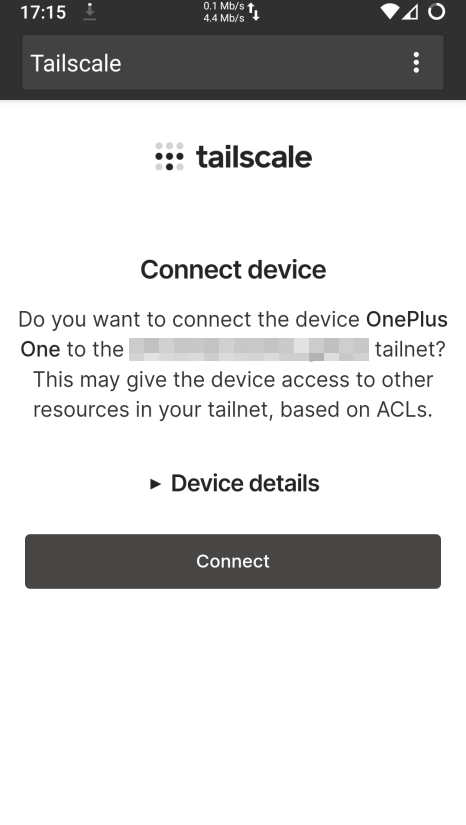
Next you will see a screen to add the device to your account just press Connect.
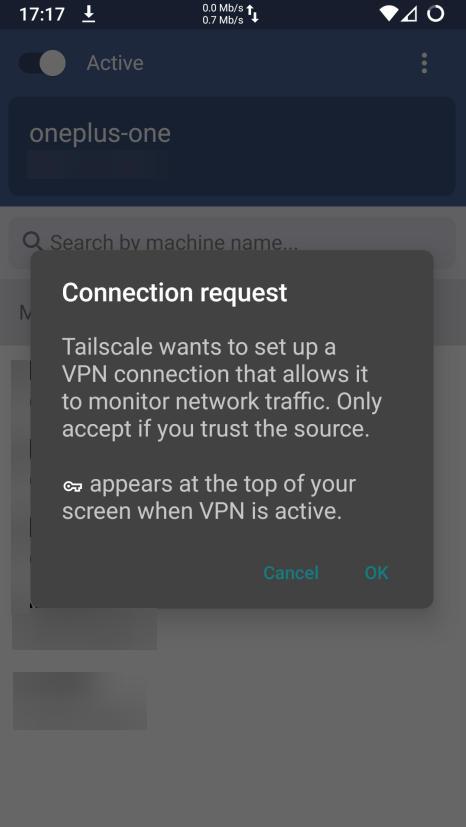
You will now see a list of your devices on the Tailscale network – You can now turn on Tailscale at the top left of the app – accept the permission to set up a VPN connection when it appears.
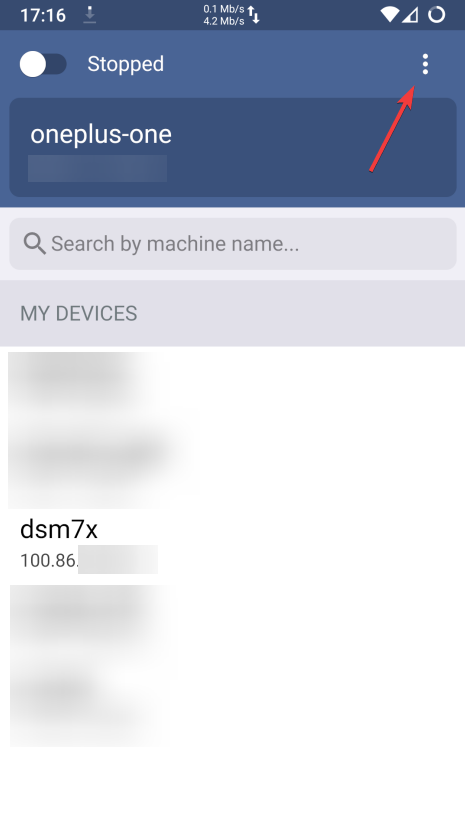
The final step!
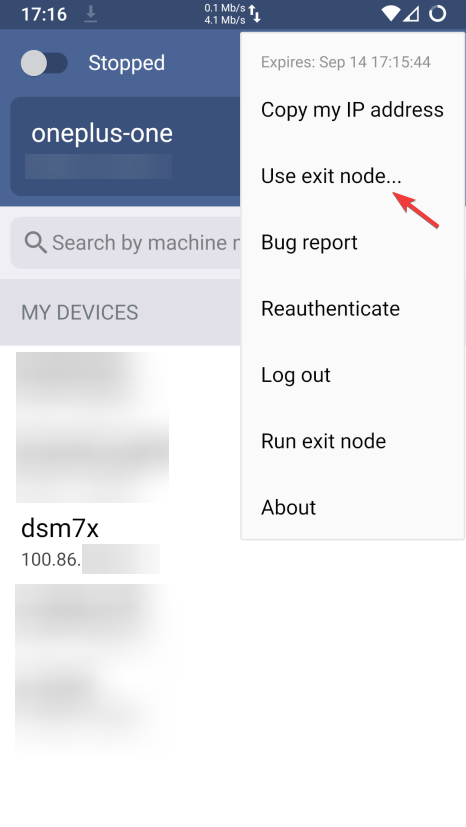
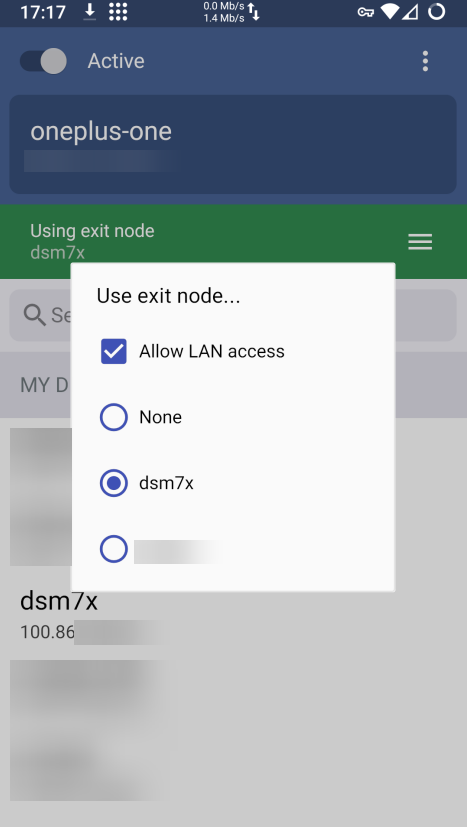
We need to select our exit node and turn on subnet access. Just click the three dots and choose ‘Use exit node…’ In the screen that appears select your NAS and tick the Allow LAN access box. (The Allow LAN access does not appear on iPhone)
– Note some users have reported that using the Exit Node meant that Adblocking did not work for their setup, so you may need to leave this option off. This means that while your Internet traffic will continue via your local 4G/5G or WiFi Connection DNS will be handled by your PiHole or Adguard. –
That’s it! You can now access all your services via a mobile connection or Wi-Fi on someone else’s network – all end-to-end encrypted!
GlueTUN as Exit Node
A few people have requested this in the comments and some on Discord already set this up. So here are the basic steps to add a Tailscale exit node that uses the VPN connection. You layer this compose below into your existing GlueTUN compose and then just generate a Auth Key.
Generate an Auth Key
– Name the key
– Set to 90 day expiry (You will have to renew this)
– Set as Pre-approved
– Leave other options un-ticked/defaults
Once added you need to turn on the Exit node Route in your Tailscale Admin Panel
  tailscale:
    image: tailscale/tailscale:latest
    container_name: tailscaled-vpn
    environment:
      - TS_ACCEPT_DNS=true
      - TS_AUTHKEY=tskey-auth-kucksj1CNTRL-
      - TS_EXTRA_ARGS=--advertise-exit-node
      - TS_HOSTNAME=nas-vpn
      - TS_STATE_DIR=/volume1/docker/gluetun
    cap_add:
      - NET_ADMIN
      - sys_module
    volumes:
      - /volume1/docker/gluetun:/volume1/docker/gluetun
      - /dev/net/tun:/dev/net/tun
      - /var/lib:/var/lib
    network_mode: service:gluetun
    restart: unless-stopped
Looking for some help, join our Discord community
If you are struggling with any steps in the guides or looking to branch out into other containers join our Discord community!

Buy me a beverage!
If you have found my site useful please consider pinging me a tip as it helps cover the cost of running things or just lets me stay hydrated. Plus 10% goes to the devs of the apps I do guides for every year.


The ONLY guide that helped! I tried official guides, other guides, even AI. Thank you Dr.!
No probs glad it worked for you 🙂
Great guide thanks! I followed the Tailscale guide (“Remotely access your Synology from anywhere with Tailscale” on the Tailscale youtube channel). As a result I enabled MagicDNS, enabled HTTPS Certificates, generated a new certificate and set that as the default on my synology.
I’ve also completed your setup here. Everything works as expected. In particular, I can access my Synology at the url of my tailnet as opposed to the nas IP address. I have a secure browser connection when doing this.
But, none of the arrs apps will do this. They will all work remotely when using the nas IP address. But if I try to use the tailnet url (eg: [my-tailnet].ts.net:8989 for sonarr) I get a “The server with the specified hostname could not be found. NSURLErrorDomain” error in the browser.
I’m sure there is some additional setup required here, but I’m not technical enough 🙂
Is this something you would be willing to add to this tutorial?
Again, these tutorials are much appreciated!
Apologies for the late reply – IRL stuff has been quite crazy recently!
Yeah, the cert is for the overall domain (machine) – once you venture off to other ports it becomes invalid. However, you should still be able to connect to the app even if unsecure. You may be using the overall tailnet address you need to make sure it’s the machine e.g mysynology.magic-beans.ts.net:8989
I have been trying to hunt down a easy-to-follow guide for how to do TLS on all containers etc. – I think people are exposing a proxy such as Nginx Proxy Manager to the tailnet and using it to proxy the address to the container.
For example https://alexklibisz.com/2024/09/07/accessing-docker-compose-application-tailscale-tls
Great tutorial !!
For those who can’t connect after installing and opening the Synology package, try ssh into the NAS and sudo tailscale up
https://tailscale.com/kb/1131/synology#troubleshooting
Thanks for the tip!
Does this still work? I have ther kernel module installed and it works flawless through gluetun via docker. But tailscale itself still has high cpu usage when moving media remote. I have a DS224+
Hey – so in hindsight it may not be making any difference as it actually just uses Userspace version.. The problem I have had is my connection is not fast enough to really tax things..
https://tailscale.com/blog/throughput-improvements
https://tailscale.com/blog/more-throughput
So I will remove the section and make mention of that it will Userspace mode