Last updated on 6 April 2025
Please note if you are using DSM7.2 or higher you should use the Container Manager version of this guide from the menu.
This guide has reached the end of its updates as most people are now on the latest DSM update - This guide is correct as of 08/12/2023 however no further updates will be added.
| Update | Date |
|---|---|
| Updated the environment variables from ‘FTLCONF_REPLY_ADDR4’ to ‘FTLCONF_LOCAL_IPV4’ | 10/10/2022 |
What is Pi-hole?
If you are looking to get advertising and tracking blocked across all the devices on your network a Pi-hole will have you covered. It’s a locally hosted Domain Name Server and uses block lists to stop adverts.
Let’s Begin
Couple of things to note and common questions:
- Pi-hole is not able to block YouTube ads
- You will need to change the DNS settings either on your Router or whatever device is managing your DHCP/DNS settings
- You will not be able to use this in conjunction with the DHCP server built into DSM if you have that enabled you will need to turn it off before continuing.
In order for you to successfully use this guide please complete these two steps first.
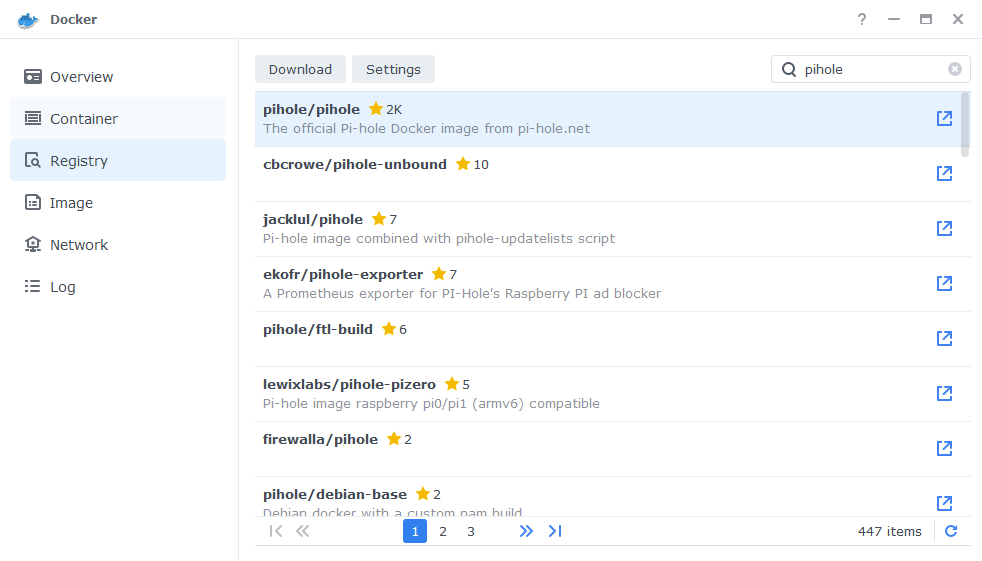
Downloading the Pi-hole Image
Open up Docker within DSM and navigate to the ‘Registry’ section and search for ‘pihole’ in the search box. Download the official version.
The pop-up box will ask which version you want to download, make sure you choose ‘Latest’ from the list of available versions.
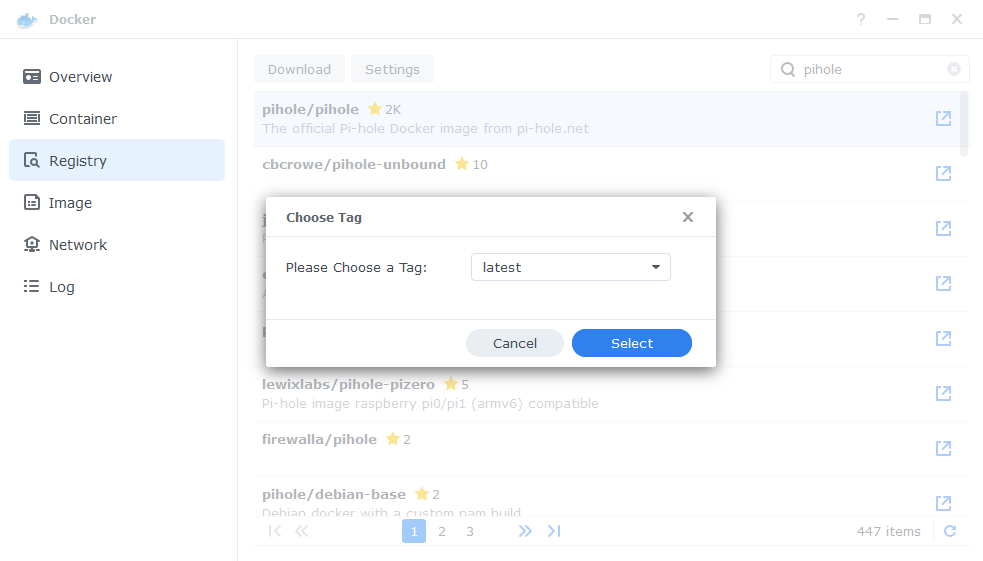
You can check the status of the download over on the ‘Image’ tab.
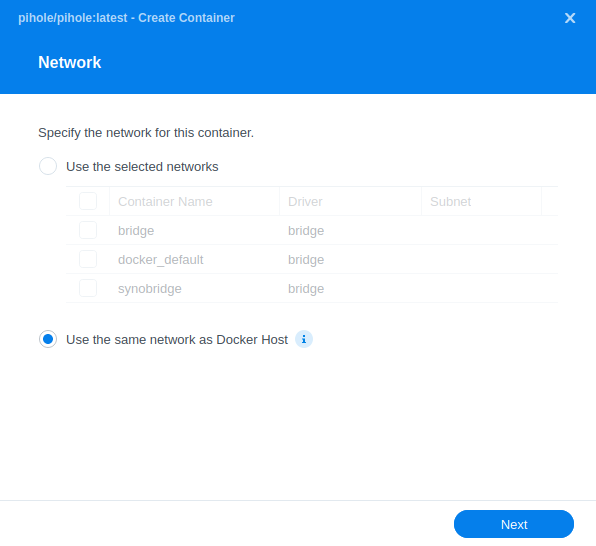
Setting up the container
In Docker click on the ‘Image’ tab, in the list of your containers select the ‘PiHole’ image and click on ‘Launch’
The first screen will ask how you want to set up the Docker network, to keep things simple we will be using the Docker Host option which means we will not need to set up any additional ports. Click Next once you have selected the option.
General Settings
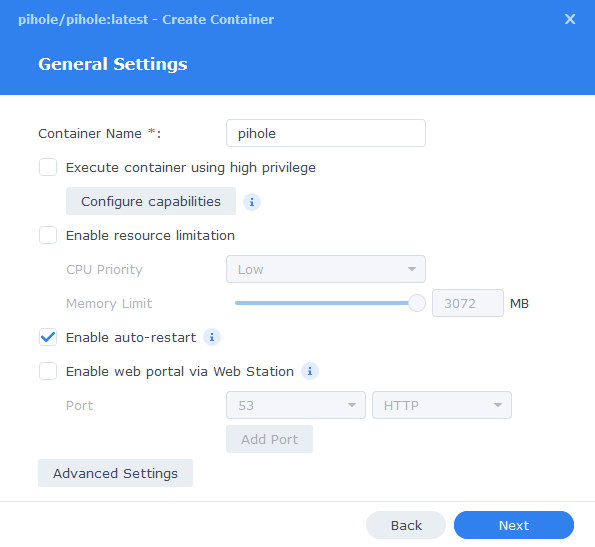
Next you will be greeted with the General Settings screen, this is where you can start specifying some of your preferences.
You can change the name of the container to anything you like, and you may want to enable Auto Restart as this will ensure Pi-hole starts automatically if you reboot your NAS.
You will also notice a Configure capabilities button — don’t change anything in here!
Keep in mind if you turn off your Diskstation or stop the container you will lose internet access as there will be no way for devices to resolve DNS queries.
Next up we are going to click on the ‘Advanced Settings’ button, this will take you to a new window with a number of tabs which we are going to work through.
Environment
Next we are going to set up a some environment variables that docker will use to allow the container to access our local file system by telling it the IDs to use for file permissions
For each of the items in the table below you will need to click on ‘Add’ button then type each of the below in the ‘variable’ and ‘value’ sections.
| Variable | Value |
|---|---|
| PIHOLE_UID | The UID you obtained in the user setup guide |
| PIHOLE_GID | The GID you obtained in the user setup guide |
| WEB_UID | The UID you obtained in the user setup guide |
| WEB_GID | The GID you obtained in the user setup guide |
| TZ | Your timezone wikipedia.org/wiki/List_of_tz_database_time_zones |
| WEBPASSWORD | A password of your choice for the Pi-hole web interface |
| DNSMASQ_USER | pihole |
| DNSMASQ_LISTENING | local |
| WEB_PORT | 8000 |
Once you have entered the above scroll down the Environment Variables and you will be able to see one called FTLCONF_LOCAL_IPV4 you need to enter the IP address of your NAS.
| Variable | Value |
|---|---|
| FTLCONF_LOCAL_IPV4 | Enter the IP of you NAS |
Links / Execution Command
You do not need to set up anything on these tabs.
Press ‘Save’ to go back to the initial setup screen, then press ‘Next’
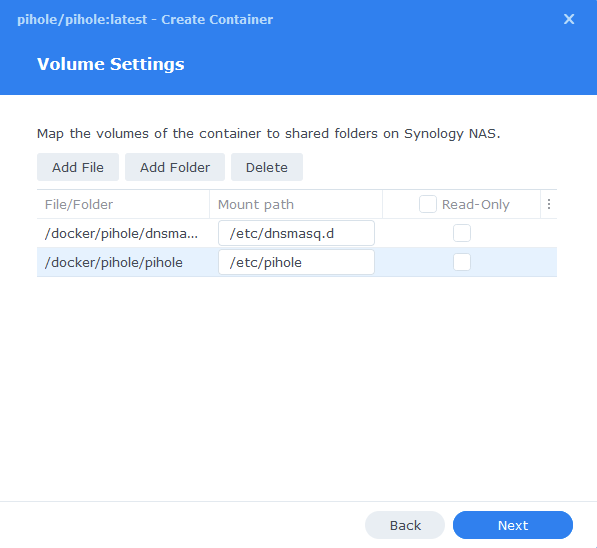
Volume Settings
We will now be specifying the directories where Pi-hole will store its configuration files.
We first click on ‘Add folder’ so we can create some folders for the config files to live, first create one called ‘pihole’ inside your /docker share.
Then within that folder create two new folders called ‘dnsmasq.d’ and ‘pihole’
You will now add each of these folders in line with the table / screenshot below
| File/Folder | Mount Path |
|---|---|
| /docker/pihole/dnsmasq.d | /etc/dnsmasq.d |
| /docker/pihole/pihole | /etc/pihole |
Click Next to move to the final screen.
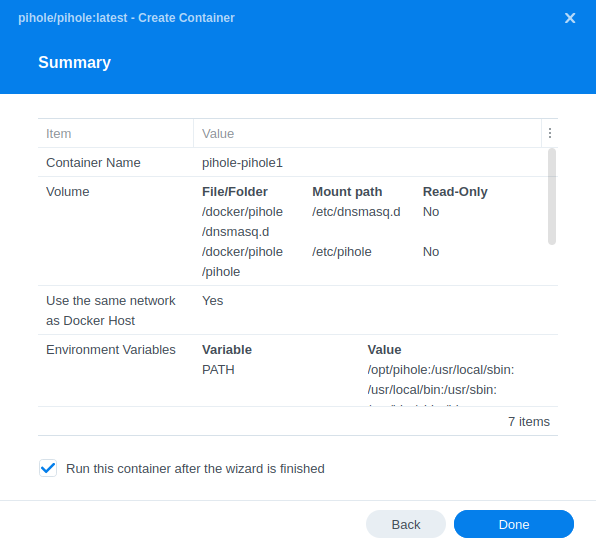
Summary
You have now completed the container setup.
You will be shown an overall summary of the settings we have specified, this is a good time to double-check everything is correct. Finally, click on Done and the container should start to boot.
After about 30 seconds or so you should then be able to access the Pi-hole web interface via you NAS IP followed by port 8000, and log in with the password you set earlier.
e.g. 192.168.0.46:8000

You will now need to add the IP address of your NAS as your DNS address in your router or other DHCP server. It can take some time for all of your devices to move over the new DNS settings so be patient, and you will gradually start to see your stats begin to start.
Also note as we are not using Pi-hole as the DHCP server you will not be able to see the names of the devices in the statistics just their IP addresses.
That’s it!
| Historic Updates | Date |
|---|---|
| New guide released | 20/09/2021 |
| Fixed a typo in the Environment Variables and added note around DHCP | 25/11/2021 |
| Additional environment variable added to fix a start-up error due to changes in the 2022.01 release and onward of PiHole. | 14/01/2022 |
| Environment Variables updated to the latest requirements – Now runs as your locally created docker user rather than root | 07/04/2022 |
| Updated screenshots and steps for DSM7.1 | 11/06/2022 |
| Restored the guide to 11/06 network setup due to an error on my part and updated environment variables | 22/08/2022 |
Looking for some help, join our Discord community
If you are struggling with any steps in the guides or looking to branch out into other containers join our Discord community!

Buy me a beverage!
If you have found my site useful please consider pinging me a tip as it helps cover the cost of running things or just lets me stay hydrated. Plus 10% goes to the devs of the apps I do guides for every year.


Selecting [show all] in Recent Queries, and not only the first 100 returns an error with the header [An unknown error occurred while loading the data].
I have found some information relating this to be caused by to little allocated PHP memory. I just have no idea how to expand this. If I did know, I wouldn’t need your awesome guide.
Can someone please help here ?
Hey not come across this before, just went down the rabbit hole and found quite a few other threads and no solid permanent solutions! However v6 when that eventually lands apparently will.
However, the temp fix which will need to be applied after each update
Open up the container in Container Manager > Action > Open Terminal then run this command which will increase the limit from 128M to 1024M (1GB)
sed -i ‘s/memory_limit = 128M/memory_limit = 1024M/g’ /etc/php/7.4/cgi/php.ini
This is applied to the file but you will need to ‘restart’ the container not rebuild it as that will erase the change
Thank you very much for your time to make this step by step manual!
I have everyting up and running, but if i want to use the Pihole ipadress as DNS in a openVPN file it does not work. dhcp-option DNS 192.168.1.99(piholeIP)
If i connect to my vpn without this dhcp-option, everyting works as it should. I’m only not able to visit my pihole webinterface. I think it has something to do with mcvlan. Is there something i miss?
In the Pihole interface i already set dns to listen to all origins.
I hope you can help me out.
Thank you!
I am just making the guide a split – either on or off the MACVLAN as by default the NAS won’t be able to use the DNS of the PiHole. If you want to use it with your VPN you will need to drop into Bridge mode.
Thank you for your reply.
I like the macvlan idea actualy.
Maybe i can run the vpn server from my router. I was thinking of switching to wireguard anyway.
Great guide! This made it very easy for me to switch from a Pi-Zero to a container. I did find one additional environment variable that I had to set. The variable was INTERFACE and on my Synology the value was ovs_eth0
I also ran into a situation with the latest upgrade to DSM 7.2 where the previous Docker app was removed in favor of Container Manager, which wouldn’t have been a big deal, except for the fact that I had the DNS configuration for the NAS set to the default, which then created a circular dependency, stopping the NAS from fully updating (the Docker app was deleted before Container Manager was installed). A quick switch to manual configuration for the DNS servers using 8.8.8.8 and 8.8.4.4 and things were back up and running again.
Hey thanks for the feedback – I have an updated guide for DSM7.2 here, on that one I get you to update the default DNS entries.
https://drfrankenstein.co.uk/2023/05/14/pi-hole-in-container-manager-on-a-synology-nas/
Noted on the Interface – this didn’t come up in my testing as an issue or on my live install at the time I know its VM Manager renaming the devices. I will get a note added.