Last updated on 6 July 2025
Important or Recent Updates
| Historic Updates | Date |
|---|---|
| New DSM7.2 Container Manager Update (Beta/RC) | 26/04/2023 |
| Added watchtower labels to the compose to allow updates and changed the proxies to off by default | 06/05/2023 |
| Removed the Watchtower ‘Depends On’ Labels as they do not successfully update the GlueTUN container. Added an Exclusion label to the GlueTUN container, so it can just be manually updated. | 11/05/2023 |
| Update includes: Firewall Input Ports for when your provider offers port forwarding, also a note in relation to volumes and added PUID/PGID settings for GlueTUN | 14/06/2023 |
| Update for Wireguard Kernel Module Install which reduces overall CPU usage for Wireguard connections Please note if you previously followed this guide you can follow the new section to update your existing set up. | 21/09/2023 |
| Added Health checks to dependent containers | 25/09/2023 |
| Added an addition element to the compose to restrict the container from gaining additional privileges and umask environment variable | 25/10/2023 |
| Swapped YAML to use Wireguard by default (Thanks Bob) (Thanks Andy for the original suggestion) | 22/01/2024 |
| Added – UPDATER_PERIOD=24h variable in order to ensure the latest server lists for your provider all pulled once a day | 27/04/2024 |
| Added pre-configured settings for AirVPN and Proton VPN including steps to get the details for these providers | 20/12/2024 |
| General bits of re-write, added generic WireGuard and OpenVPN compose | 27/12/2024 |
| Edited the ProtonVPN compose as I had the wrong lines for WireGuard in it Apologies. | 29/12/2024 |
| Removed the depends_on for gluetun as its not required | 04/01/2024 |
| Further ProtonVPN updates now that 3.40 GlueTUN has been released it now can use the default ProtonVPN Compose rather than a Custom compose. | 31/01/2025 |
| While not really good for torrents I have added N0rdVPN (OpenVPN) compose as we get a lot of people stuck in long contracts with them looking for help on Discord | 07/04/2025 |
| Removed the ports for for the Shadowsocks and Proxy as they are rarely used and if you need them they are easily re-added, changed ProtonVPN compose to use Quad9 for DNS rather than Cloudflare as this has caused some issues with some Private trackers. | 20/06/2025 |
What are Deluge and GlueTUN?
Deluge is a lightweight torrent downloader, it has a number of built-in plugins to help organise your downloads and a full web interface, GlueTUN is the Docker container that has pre-configured VPN connections for numerous VPN providers.
Before you start check the GlueTUN Wiki to see if your provider is on the supported list.
Also, if you are yet to choose a provider have a look at AirVPN which has nice easy port forwarding and is P2P friendly. This is my affiliate link if you fancy signing up.
Useful external links for this guide
GlueTUN Wiki
GlueTUN Docker GitHub
Linuxserver Deluge Container GitHub
Deluge Forums
Let’s Begin
In this guide I will take you through the steps to get Deluge up and running in Docker and a separate GlueTUN VPN container. By having a separate container for the VPN connection we can use it in the future for other applications.
As the Synology DSM GUI does not support some of the functions we need for this tutorial we will be using Docker Compose. This is not as complicated as it might seem!
In order for you to successfully use this guide please complete the three preceding guides
- Docker Package, SSD and Memory Recommendations
- Step 1: Directory Setup Guide
- Step 2: Setting up a restricted Docker user
- Step 3: Setting up a Docker Bridge Network (synobridge)
Folder Setup
Let’s start by getting some folders set up for the containers to use. Open up File Station create the following.
/docker/projects/vpnproject-compose
/docker/gluetun
/docker/deluge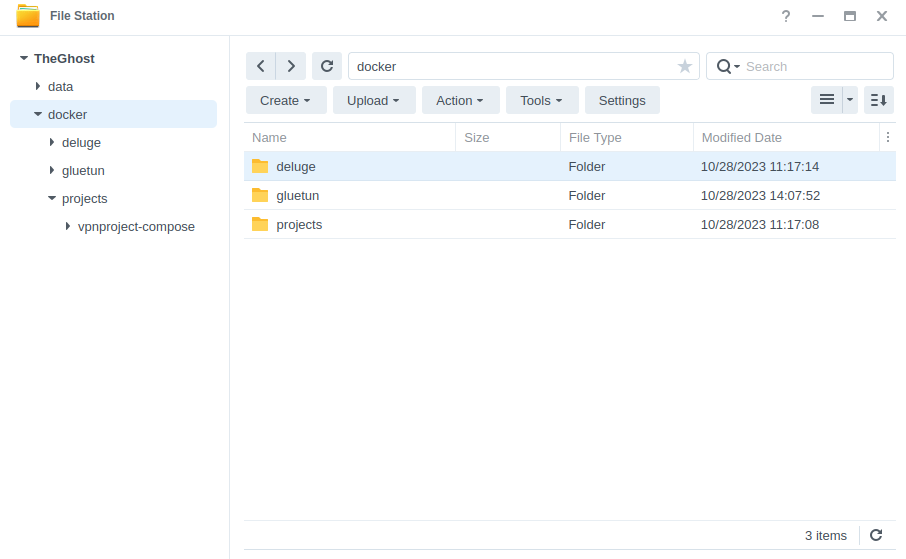
Setting up the TUN start up script
In order for the VPN connection to work we need to make sure the TUN Interface is available to make the connection to a VPN provider. In order to ensure it is available even after a reboot we will set up a small script.
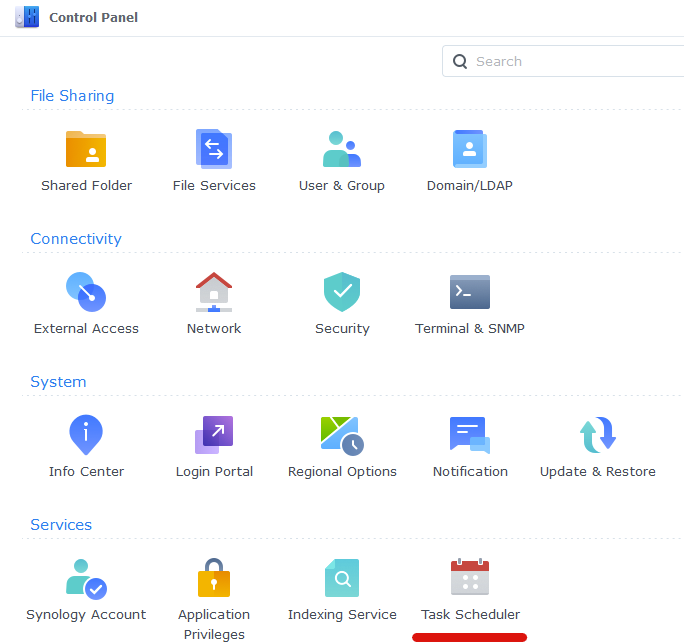
Open up Control Panel and then click on Task Scheduler
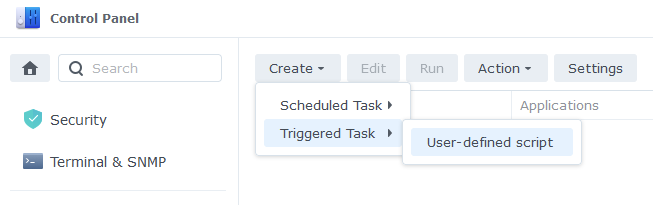
Next click on Create, Triggered Task then User Defined Script.
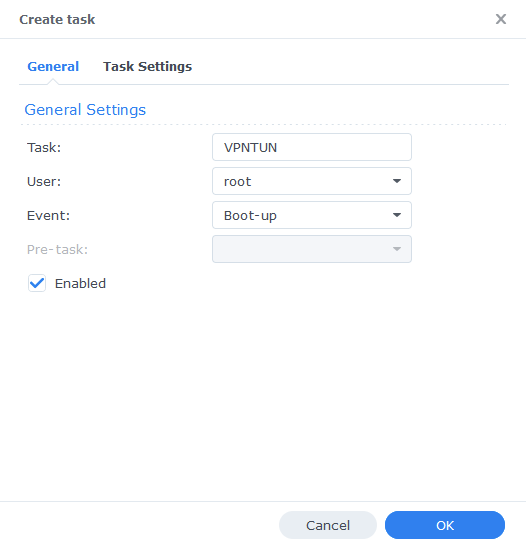
Enter the following:
| Section | Setting |
|---|---|
| Task: | VPNTUN |
| User: | root |
| Event: | Boot-up |
| Enabled | Tick |
On the Task Settings tab copy and paste the code below in the ‘User-Defined script’ section. It will look like screenshot.
#!/bin/sh -e

insmod /lib/modules/tun.ko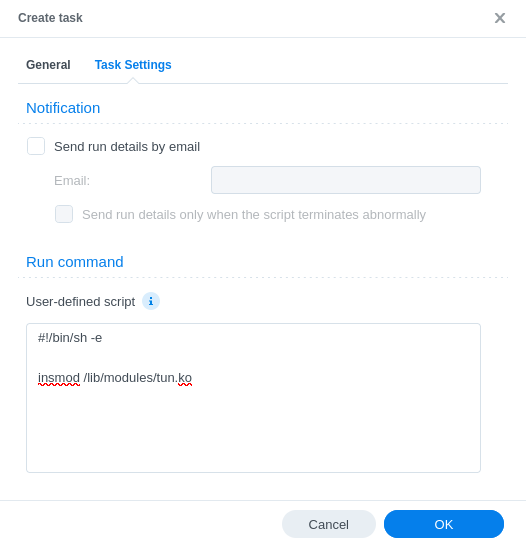
You can now press OK and agree to the warning message. Next run the script which will enable the TUN device.
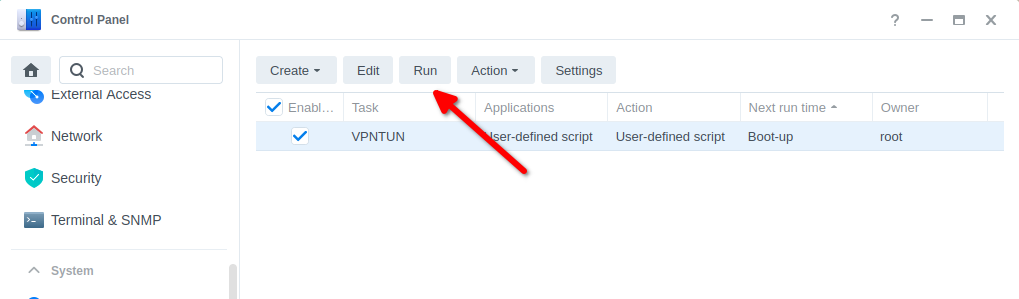
You can now move on to the next step.
Wireguard Kernel Module (not required for OpenVPN)
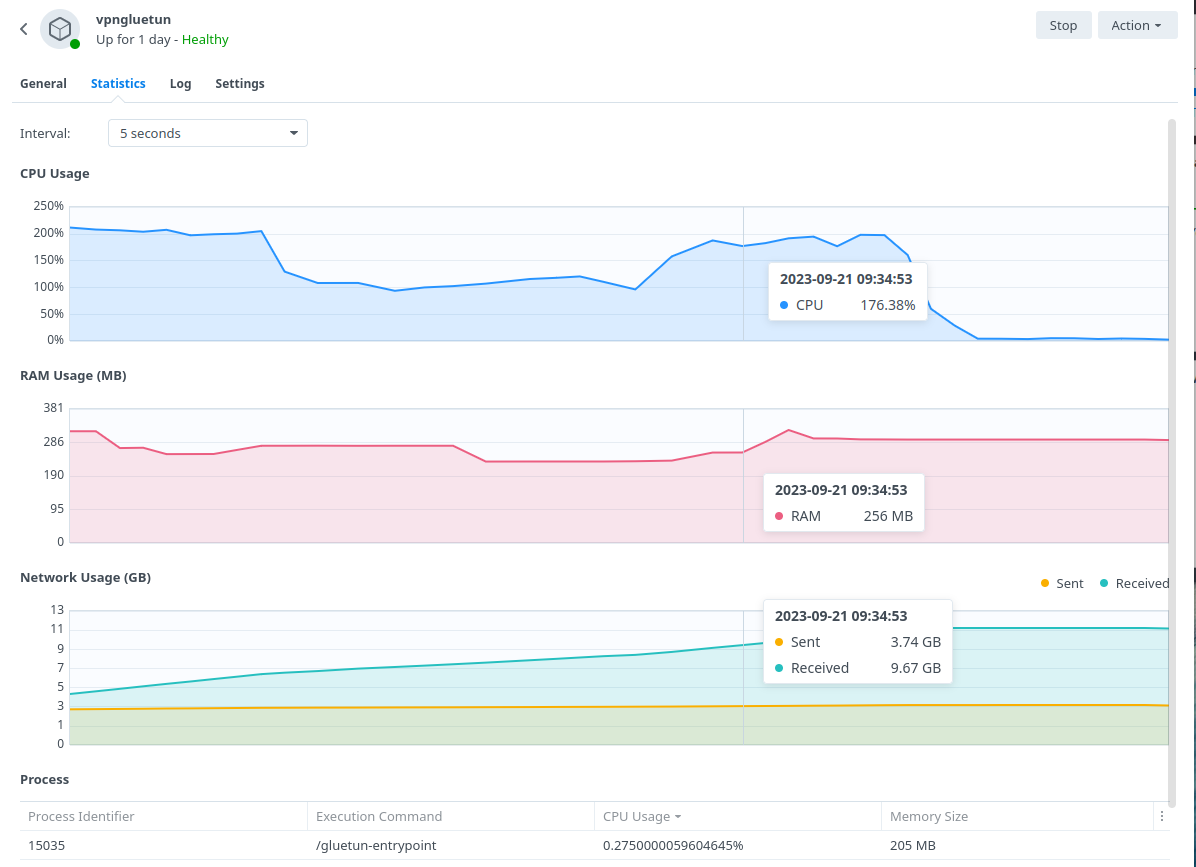
The default Gluetun Wireguard setup uses the ‘Userspace’ implementation of Wireguard which requires higher CPU resources. For example a 40MiB/s download via qBittorrent uses up to 176% in CPU (1.7 Cores) on my 1821+.
By installing the appropriate Kernel Module this reduces down to 1 or 2% which frees up the CPU for other tasks.
BlackVoid.club have put together a Kernel Module for Synology which allows Gluetun to use the lower level Kernel to perform Wireguard duties make sure you drop them a thanks as this would not be possible without them!

While on first glances it looks like a long installation process the page details a number of methods. I recommend having a read taking note of warnings and also if you want to build your own module it tells you how.
The TLDR is below.
- Find your model of NAS under the correct DSM version section (If you are following this guide it will be 7.2 or above) and download the pre compiled .spk file
- Head into Package Center and click ‘Manual Install’ on the top right and install the .spk file and untick the box to run after install
- Reboot
- SSH Into your NAS (Just like in the User Setup guide) and elevate yourself to root by typing
sudo -iand entering your password - Enter this command and press enter to start up the module
/var/packages/WireGuard/scripts/start
You should now be able to see the WireGuard package running in Package Center. Please note while I will try my best to support in relation to this module I may have to refer you on if it is a specific technical issue.
On to the next part.
Container Manager Project (aka Docker Compose)
Next we are going to set up a ‘Project’ in Container Manager, a project is used when you want multiple containers to all be loaded together and often rely on each other to function. In our case we want Deluge to load and talk to the GlueTUN VPN container.
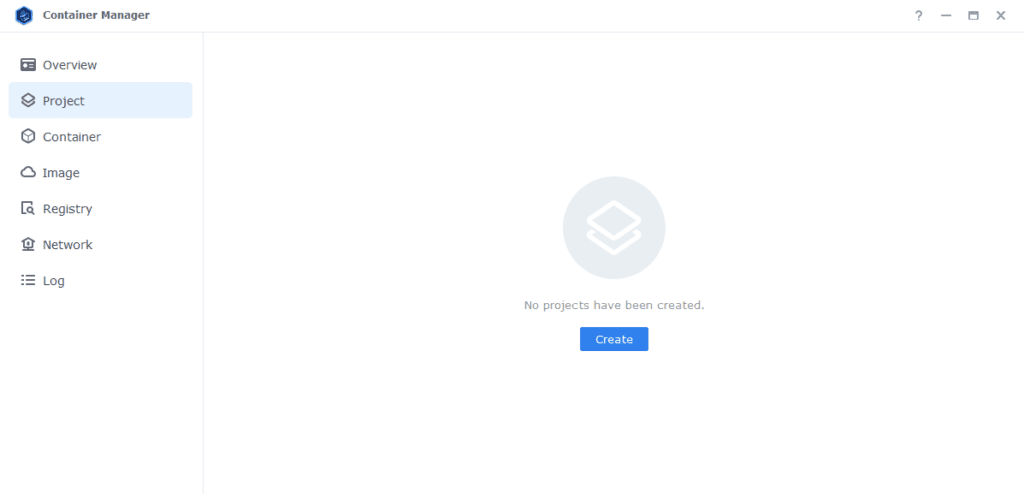
Open up Container Manager and click on Project then on the right-hand side click ‘Create’
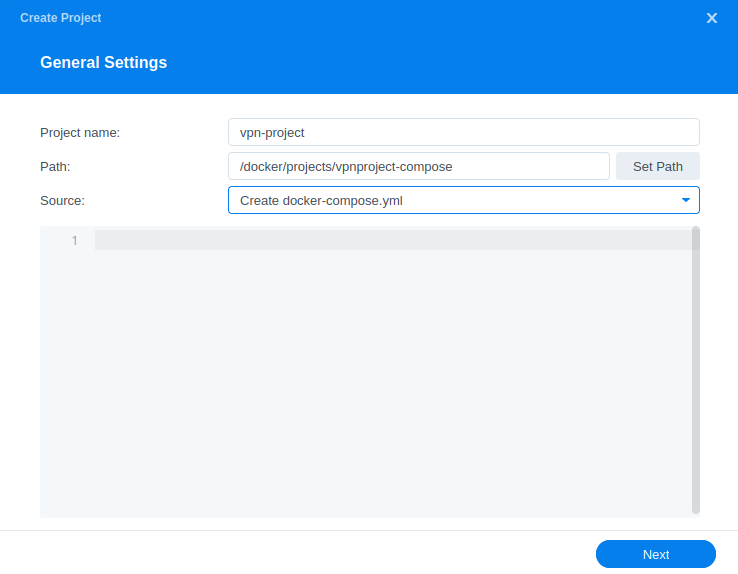
In the next screen we will set up our General Settings, enter the following:
| Section | Setting |
|---|---|
| Project Name: | vpn-project |
| Path: | /docker/projects/vpnproject-compose |
| Source: | Create docker-compose.yml |
OK we are now going to drop in our Docker Compose configuration (YAML) – You will find below some presets – A basic WireGuard or OpenVPN setup which covers the majority of providers, but I have also provided some standard WireGuard presets for AirVPN and ProtonVPN, select the one that is appropriate for you.
See the GlueTUN Wiki for your specific provider steps or amendments
Docker Compose Presets
Standard OpenVPN Preset
services:
  gluetun:
    image: qmcgaw/gluetun:latest
    container_name: gluetun
    cap_add:
      - NET_ADMIN
    devices:
      - /dev/net/tun:/dev/net/tun
    ports:
      - 8112:8112/tcp # port for deluge
    volumes:
      - /volume1/docker/gluetun:/gluetun
    environment:
      - PUID=1234 #CHANGE_TO_YOUR_UID
      - PGID=65432 #CHANGE_TO_YOUR_GID
      - TZ=Europe/London #CHANGE_TO_YOUR_TZ
      - VPN_SERVICE_PROVIDER=NAMEOFYOURPROVIDER
      - VPN_TYPE=openvpn
      - OPENVPN_USER=abc
      - OPENVPN_PASSWORD=abc
      - SERVER_COUNTRIES=VPNSERVERCOUNTRY #Change based on the Wiki
      - HTTPPROXY=off #change to on if you wish to enable
      - SHADOWSOCKS=off #change to on if you wish to enable
      - FIREWALL_OUTBOUND_SUBNETS=172.20.0.0/16,192.168.0.0/24 #change this in line with your subnet see note on guide.
#      - FIREWALL_VPN_INPUT_PORTS=12345 #uncomment this line and change the port as per the note on the guide
      - UPDATER_PERIOD=24h
    network_mode: synobridge
    labels:
      - com.centurylinklabs.watchtower.enable=false
    security_opt:
      - no-new-privileges:true
    restart: always

  linuxserver-deluge:
    image: linuxserver/deluge:latest
    container_name: deluge
    environment:
      - PUID=1234 #CHANGE_TO_YOUR_UID
      - PGID=65432 #CHANGE_TO_YOUR_GID
      - TZ=Europe/London #CHANGE_TO_YOUR_TZ
      - DELUGE_LOGLEVEL=error #optional
      - UMASK=022
    volumes:
      - /volume1/docker/deluge:/config
      - /volume1/data/torrents:/data/torrents
    network_mode: service:gluetun # run on the vpn network
    security_opt:
      - no-new-privileges:true
restart: alwaysStandard WireGuard Preset
services:
  gluetun:
    image: qmcgaw/gluetun:latest
    container_name: gluetun
    cap_add:
      - NET_ADMIN
    devices:
      - /dev/net/tun:/dev/net/tun
    ports:
      - 8112:8112/tcp # port for deluge
    volumes:
      - /volume1/docker/gluetun:/gluetun
    environment:
      - PUID=1234 #CHANGE_TO_YOUR_UID
      - PGID=65432 #CHANGE_TO_YOUR_GID
      - TZ=Europe/London #CHANGE_TO_YOUR_TZ
      - VPN_SERVICE_PROVIDER=NAMEOFYOURPROVIDER
      - VPN_TYPE=wireguard
      - WIREGUARD_PRIVATE_KEY=YOUR-PRIVATE-KEY
      - WIREGUARD_PRESHARED_KEY
      - WIREGUARD_ADDRESSES=10.x.x.x
      - SERVER_COUNTRIES=VPNSERVERCOUNTRY #Change based on the Wiki
      - HTTPPROXY=off #change to on if you wish to enable
      - SHADOWSOCKS=off #change to on if you wish to enable
      - FIREWALL_OUTBOUND_SUBNETS=172.20.0.0/16,192.168.0.0/24
#      - FIREWALL_VPN_INPUT_PORTS=12345
      - UPDATER_PERIOD=24h
    network_mode: synobridge
    labels:
      - com.centurylinklabs.watchtower.enable=false
    security_opt:
      - no-new-privileges:true
    restart: always

  linuxserver-deluge:
    image: linuxserver/deluge:latest
    container_name: deluge
    environment:
      - PUID=1234 #CHANGE_TO_YOUR_UID
      - PGID=65432 #CHANGE_TO_YOUR_GID
      - TZ=Europe/London #CHANGE_TO_YOUR_TZ
      - DELUGE_LOGLEVEL=error #optional
      - UMASK=022
    volumes:
      - /volume1/docker/deluge:/config
      - /volume1/data/torrents:/data/torrents
    network_mode: service:gluetun # run on the vpn network
    security_opt:
      - no-new-privileges:true
restart: alwaysAirVPN WireGuard Preset
How to obtain your Wireguard Details from AirVPN
- Login to your AirVPN account and go to the Client Area
- Click on
VPN Devicesand create a new device namedGlueTUN(you can name this anything) - Back in the Client Area select
Config Generatorand select the following- Linux
- Turn on WireGuard
- Choose the newly created
GlueTUNdevice - Select your preferred Server or Region
- Click Generate and download the config file.
From the downloaded config file use the follow parts and populate them into the compose below.
- Address = 10.141.x.x/32 #Nothing after this part
- PrivateKey = uFdxxxxxxxxxxxxxxxx
- PresharedKey = 4s2xxxxxxxxxxxxxxxxxxxx
In addition, there are some extra variables you can add to tell GlueTUN to use a specific Country, Region, Server etc. See this on the GlueTUN wiki and add based on your preferences.
Next you will want to set up port forwarding, so back in the Client Area, select Manage Ports and request a random port ensuring you turn on P2P and then assign the port to your GlueTUN device.
You will now enter this port number into the section of the compose labelled Firewall Input Ports, make a note of this port number as you will set it as the Listening Port for the torrent client during its setup process. You can now continue with the guide to make the other general edit.
services:
  gluetun:
    image: qmcgaw/gluetun:latest
    container_name: gluetun
    cap_add:
      - NET_ADMIN
    devices:
      - /dev/net/tun:/dev/net/tun
    ports:
      - 8112:8112/tcp # port for deluge
    volumes:
      - /volume1/docker/gluetun:/gluetun
    environment:
      - VPN_SERVICE_PROVIDER=airvpn
      - VPN_TYPE=wireguard
      - WIREGUARD_PRIVATE_KEY=
      - WIREGUARD_PRESHARED_KEY=
      - WIREGUARD_ADDRESSES=
      - TZ=Europe/London
      - PUID=1234
      - PGID=65432
      - HTTPPROXY=off
      - SHADOWSOCKS=off
      - FIREWALL_OUTBOUND_SUBNETS=172.20.0.0/16,192.168.0.0/24
      - FIREWALL_VPN_INPUT_PORTS=12345
      - UPDATER_PERIOD=24h
    network_mode: synobridge
    labels:
      - com.centurylinklabs.watchtower.enable=false
    security_opt:
      - no-new-privileges:true
    restart: always

  linuxserver-deluge:
    image: linuxserver/deluge:latest
    container_name: deluge
    environment:
      - PUID=1234 #CHANGE_TO_YOUR_UID
      - PGID=65432 #CHANGE_TO_YOUR_GID
      - TZ=Europe/London #CHANGE_TO_YOUR_TZ
      - DELUGE_LOGLEVEL=error #optional
      - UMASK=022
    volumes:
      - /volume1/docker/deluge:/config
      - /volume1/data/torrents:/data/torrents
    network_mode: service:gluetun # run on the vpn network
    security_opt:
      - no-new-privileges:true
    restart: always
ProtonVPN WireGuard Preset
Please ensure you have a Paid subscription to ProtonVPN otherwise this compose will not function.
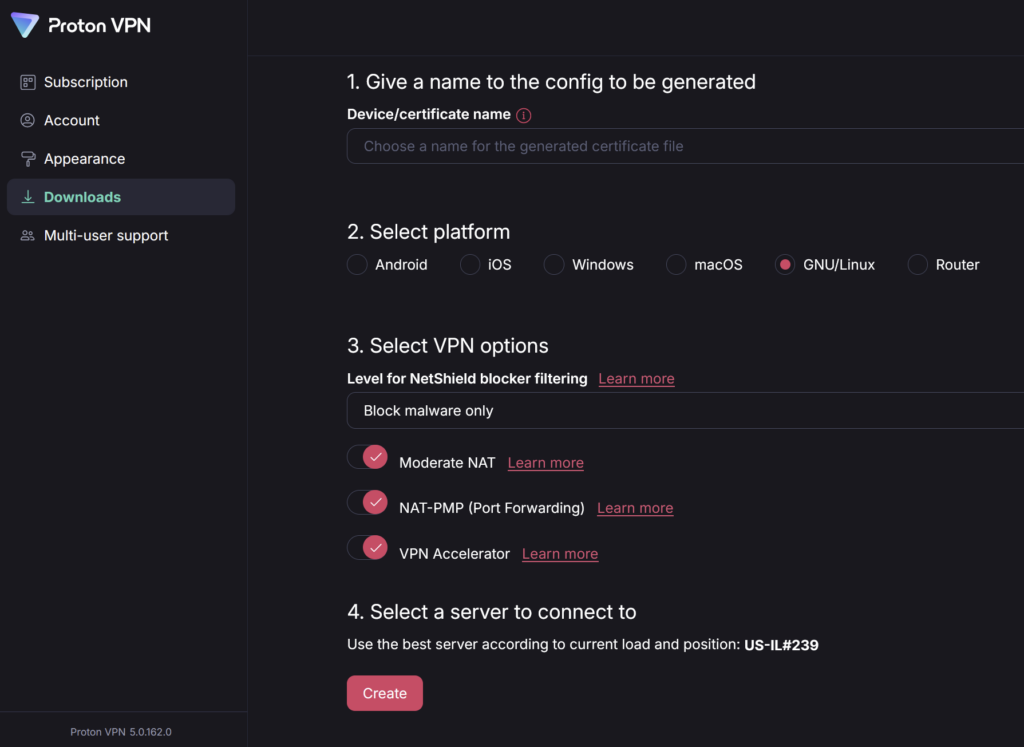
Thanks to Geebru on Discord for the settings and screenshots
- Use any name you like
- Select GNU/Linux
- Turn on the following
- Block malware only
- Moderate NAT
- NAT-PMP (Port Forwarding)
- VPN Accelerator
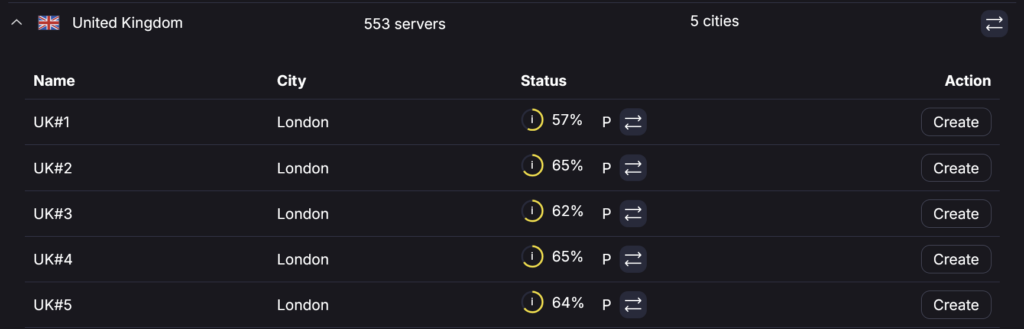
- Select a server that is physcially close to you and low usage
- Ensure its a P2P server (double left and right arrows)
You can then layer in the WireGuard details it provides you into the compose below.
(Note Proton Wireguard keys expire after 12 months so you will need to renew them after that period of time)
services:
  gluetun:
    image: qmcgaw/gluetun:latest
    container_name: gluetun
    cap_add:
      - NET_ADMIN
    devices:
      - /dev/net/tun:/dev/net/tun
    ports:
      - 8112:8112/tcp # port for deluge
    volumes:
      - /volume1/docker/gluetun:/gluetun
    environment:
      - PUID=1234 #CHANGE_TO_YOUR_UID
      - PGID=65432 #CHANGE_TO_YOUR_GID
      - TZ=Europe/London #CHANGE_TO_YOUR_TZ
      - VPN_SERVICE_PROVIDER=protonvpn
      - VPN_TYPE=wireguard
      - WIREGUARD_PRIVATE_KEY= #Your Key
      - SERVER_COUNTRIES= #Your Choice
      - PORT_FORWARD_ONLY=on
      - VPN_PORT_FORWARDING=on
      - DOT_PROVIDERS=quad9
      - HTTPPROXY=off
      - SHADOWSOCKS=off
      - FIREWALL_OUTBOUND_SUBNETS=172.20.0.0/16,192.168.4.0/24
      - UPDATER_PERIOD=24h
    network_mode: synobridge
    labels:
      - com.centurylinklabs.watchtower.enable=false
    security_opt:
      - no-new-privileges:true
    restart: always

  linuxserver-deluge:
    image: linuxserver/deluge:latest
    container_name: deluge
    environment:
      - PUID=1234 #CHANGE_TO_YOUR_UID
      - PGID=65432 #CHANGE_TO_YOUR_GID
      - TZ=Europe/London #CHANGE_TO_YOUR_TZ
      - DELUGE_LOGLEVEL=error #optional
      - UMASK=022
    volumes:
      - /volume1/docker/deluge:/config
      - /volume1/data/torrents:/data/torrents
    network_mode: service:gluetun # run on the vpn network
    security_opt:
      - no-new-privileges:true
    restart: always
N0rdVPN OpenVPN Preset
The #1 advertiser for VPNs – If you are still within your cooling off period I would recommend getting a refund and use a VPN provider who offers port forwarding such as AirVPN or ProtonVPN. If you are stuck with them you will have limited connectivity and will not be able to use private trackers.
You need to create Service Credentials for the Username and Password elements on the compose from within your Account.
services:
  gluetun:
    image: qmcgaw/gluetun
    container_name: gluetun
    cap_add:
      - NET_ADMIN
    devices:
      - /dev/net/tun:/dev/net/tun
    ports:
      - 8112:8112/tcp # port for deluge
    volumes:
      - /volume1/docker/gluetun:/gluetun
    environment:
      - PUID=1234 #CHANGE_TO_YOUR_UID
      - PGID=65432 #CHANGE_TO_YOUR_GID
      - TZ=Europe/London #CHANGE_TO_YOUR_TZ
      - VPN_SERVICE_PROVIDER=nordvpn
      - OPENVPN_USER= #From your Service Credntials
      - OPENVPN_PASSWORD= #From your Service Credentials
      - HTTPPROXY=off #change to on if you wish to enable
      - SHADOWSOCKS=off #change to on if you wish to enable
      - FIREWALL_OUTBOUND_SUBNETS=172.20.0.0/16,192.168.XX.XX/24 #change this in line with your subnet see note on guide.
    network_mode: synobridge
    labels:
      - com.centurylinklabs.watchtower.enable=false
    restart: unless-stopped

  linuxserver-deluge:
    image: linuxserver/deluge:latest
    container_name: deluge
    environment:
      - PUID=1234 #CHANGE_TO_YOUR_UID
      - PGID=65432 #CHANGE_TO_YOUR_GID
      - TZ=Europe/London #CHANGE_TO_YOUR_TZ
      - DELUGE_LOGLEVEL=error #optional
      - UMASK=022
    volumes:
      - /volume1/docker/deluge:/config
      - /volume1/data/torrents:/data/torrents
    network_mode: service:gluetun # run on the vpn network
    security_opt:
      - no-new-privileges:true
restart: alwaysDocker Compose General Edits
IDs and Timezone
First look for the lines below, they appear twice each, these control the containers access to our filesystem and also the user the containers run as.
| Variable | Value |
|---|---|
| PUID | (required) The UID you obtained in the user setup guide |
| PGID | (required) The GID you obtained in the user setup guide |
| TZ | (required) Your timezone wikipedia.org/wiki/List_of_tz_database_time_zones |
Ports and Proxies
In the top Gluetun section you will notice that we have some additional ports assigned for a http proxy and Shadowsocks Proxy – this means you can direct traffic from other devices or applications on your network through the container! If you want to use these change the following.
| Variable | Value |
|---|---|
| HTTPPROXY | off (default) on (enabled) |
| SHADOWSOCKS | off (default) on (enabled) |
Firewall Outbound Subnet
This section controls your ability to access the UIs of any containers running through the GlueTUN containers network.
- FIREWALL_OUTBOUND_SUBNETS=172.20.0.0/16,192.168.0.0/24The first part ‘172.20.0.0/16’ don’t edit as this is our ‘synobridge’ network and allows other containers such as Radarr to access the download client.
We need to change the second IP after the comma this allows us to access the WebUI and containers via out local network.
This IP address (subnet) is easy to figure out. If you NAS IP is 192.168.0.27 your subnet is 192.168.0.0/24 (notice I just changed the last number before the /24 to 0)
Firewall Input Ports
This part is # commented out by default, if your VPN provider offers port forwarding remove the # from the start of the line and change the port number(s) in line with the ones provided to you. This will also be the port used within the download client and will help overall connectivity.
If you do update this make sure you change the Listening Port in Deluge when setting up.
- FIREWALL_VPN_INPUT_PORTS=12345,56789Volumes
By default, I have assumed you have your config files stored on /volume1 if these are located on another volume amend these lines accordingly.
      - /volume1/docker/gluetun:/gluetun
      - /volume1/docker/deluge:/config
- /volume1/data/torrents:/data/torrents Watchtower Exclusion
You don’t need to change this, I added a label to avoid Watchtower automatically updating the GlueTUN container as it will always break the overall project which can be inconvenient if you are not around to fix it. You can update the container using the mini guide on the left menu of the site.
    labels:
- com.centurylinklabs.watchtower.enable=falseDocker Compose – Provider Specific Edits
This next bit is important and if you don’t pay attention to the details you will have a harder time connecting up to your VPN provider, if you used the pre-configured settings for AirVPN or Proton skip this section.
Open up the GlueTun Wiki and in the list find your provider.
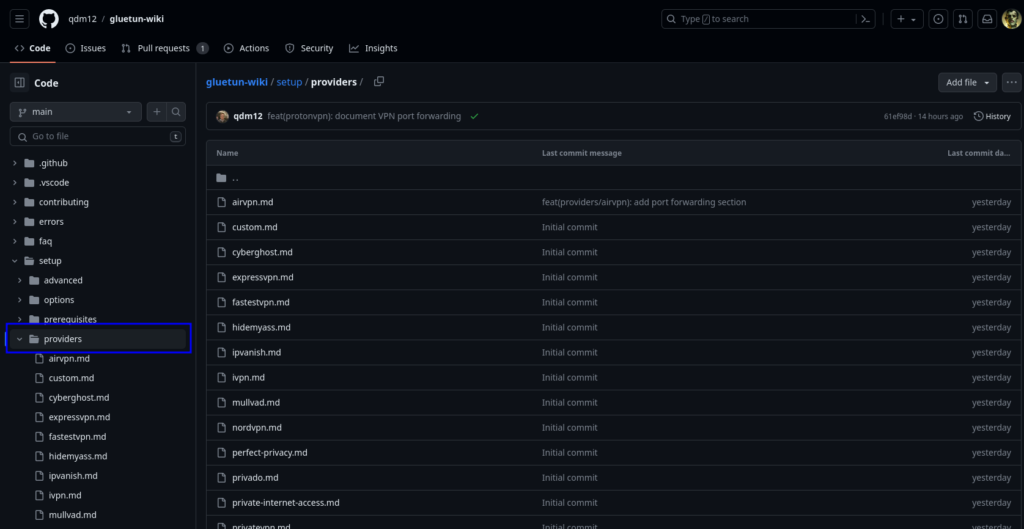
Let’s use AirVPN as our example.
On the page you will see a number of key sections highlighting the variables that work with AirVPN.
Note ignore the ‘docker run’ code its not relevant for what we are doing.
Read the compose section and make note of what is shown for either WireGuard or OpenVPN dependent on what you are using to connect and then make the same amendments to the compose you copied earlier.
Key differences are generally the SERVER_COUNTRIES / SERVER_CITIES or what keys are required and IP addresses etc.
I have provided some common defaults in the compose for you, but you need to amend them in line with your providers page.
If your provider is not supported, you can make a request on GitHub to add it, or you can follow the custom providers guidance on GlueTUNs WIKI.
Once you have checked for your provider, make the appropriate edits to the compose accordingly.
That completes the edits to the compose!
Click ‘Next‘
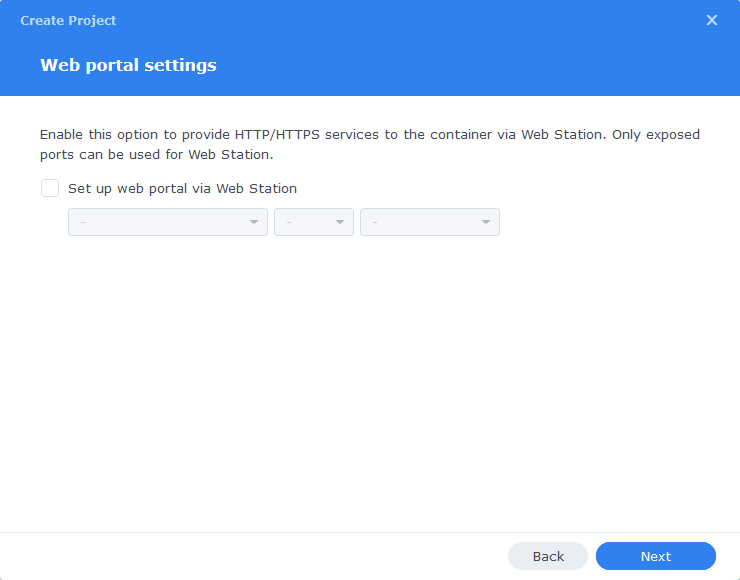
You do not need to enable anything on the ‘Web portal settings’ screen click ‘Next’ again
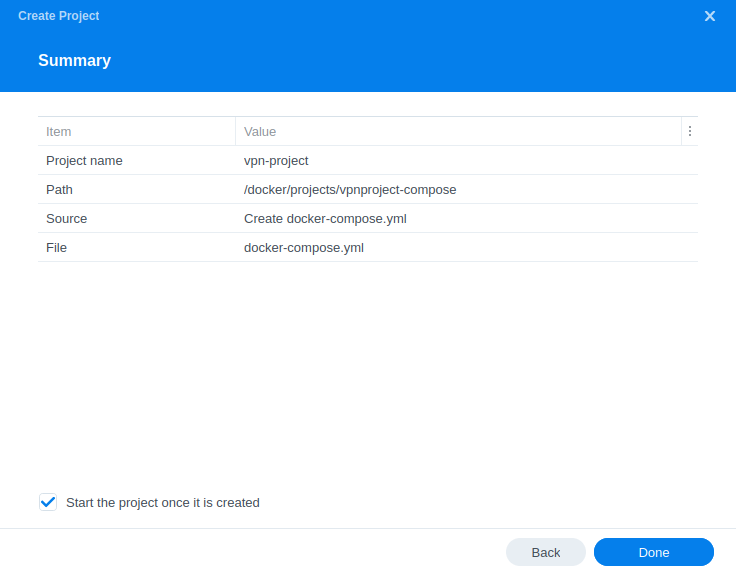
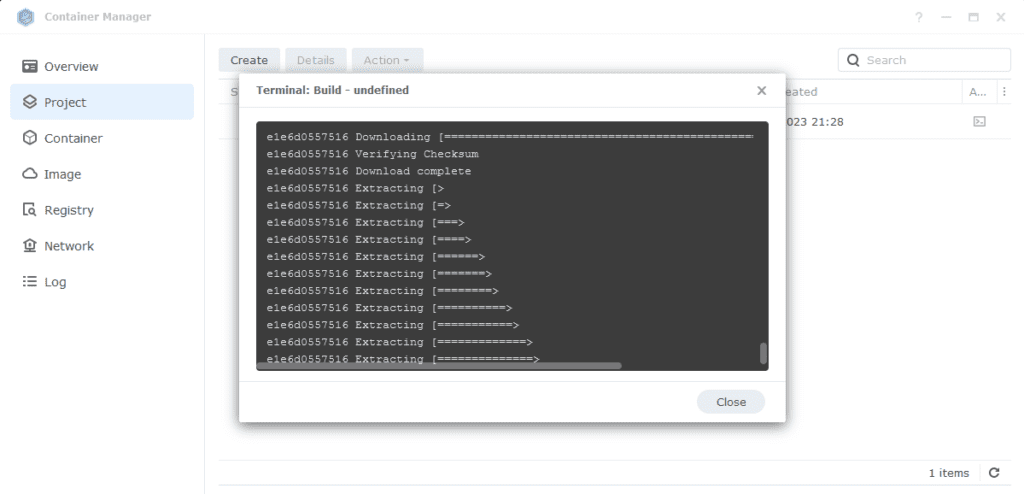
On the final screen click Done which will begin the download of the container images and once downloaded they will be launched!
The images will now be downloaded and extracted. You should see ‘Code 0’ when it has finished.
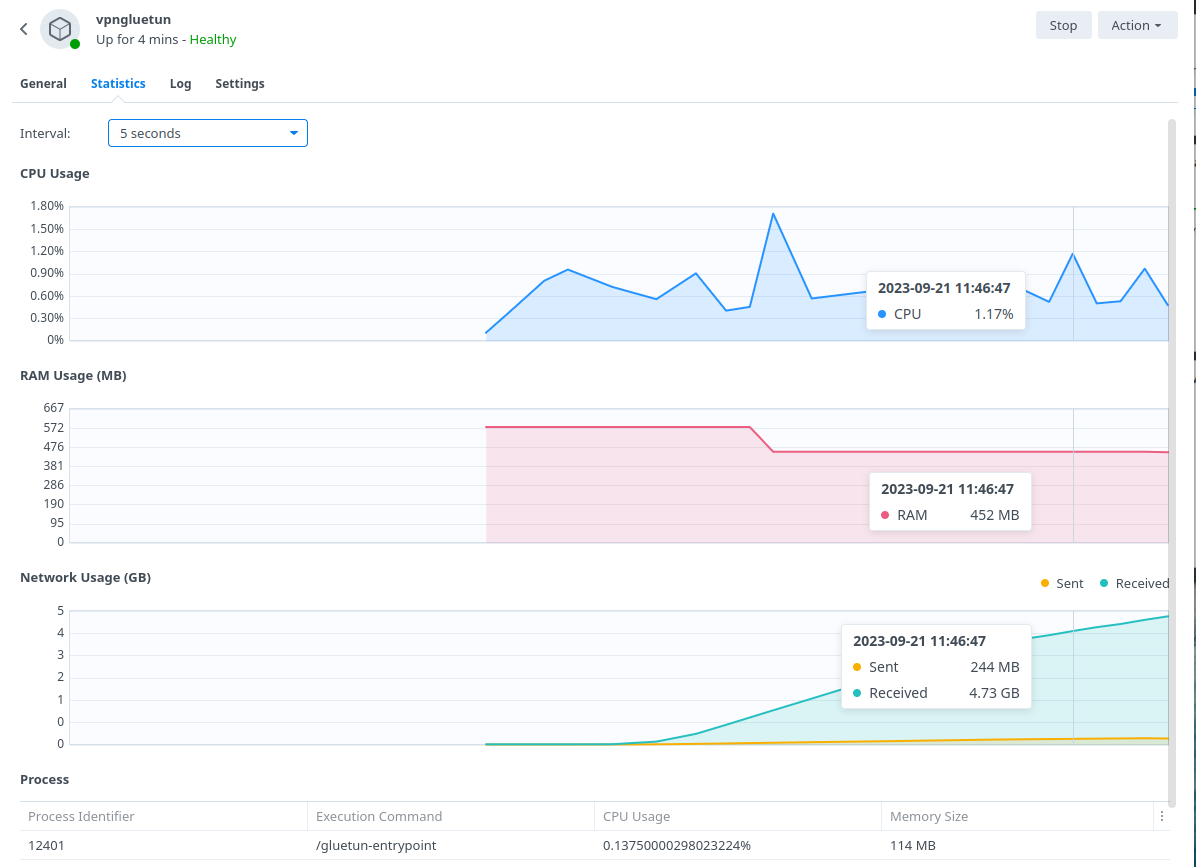
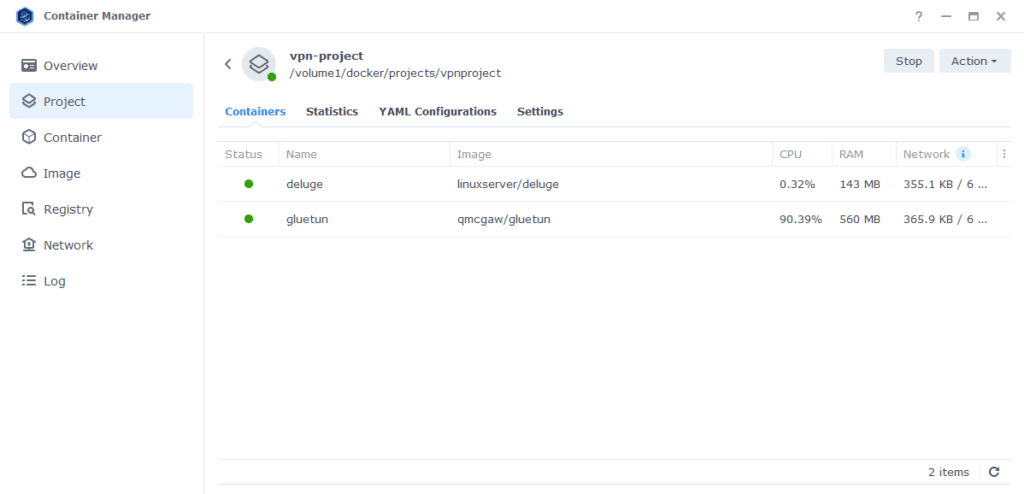
You will now see your vpn-project running both containers should have a green status on the left-hand side.
Firewall Exceptions
(Skip if you don’t have the Firewall configured)
If you have the Synology Firewall enabled please see this additional guide for further info on exceptions and correct set up.
Final Deluge Setup
As we have used /data/torrents as the mount point for our downloads we need to make sure Deluge uses this same file path.
We are going to do this by just changing the directory settings within Deluge.
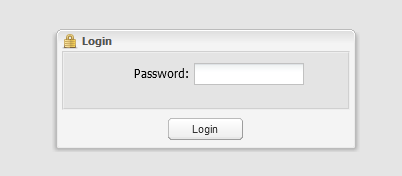
Open a new browser tab and go to your NAS IP address on port 8112 (e.g. 192.168.0.46:8112)
Deluge by default has the password of ‘deluge’ to access the web UI, you can change or remove this later in the settings.
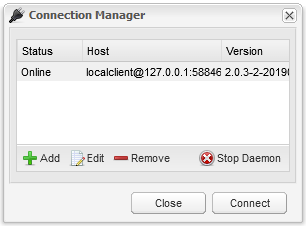
Next you will connect to the Deluge back end, just select the host and click connect, it will remember this going forward.
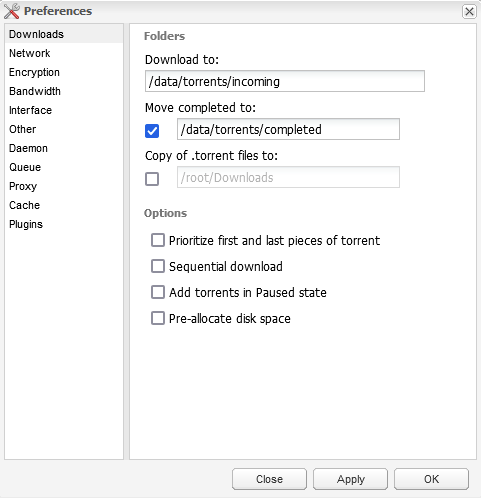
Now you are in the UI click on Preferences at the top of the screen, we are going to change the various folders to the settings shown in the screenshot/table below
| Option | From | To |
|---|---|---|
| Download to: | /root/Downloads | /data/torrents/incoming |
| Move complete to: | /root/Downloads | /data/torrents/completed |
Network
To be sure that Deluge only uses the TUN interface you next need to go to the Network options (second one down) and within the ‘Outgoing Interface’ enter ‘tun0’.
If your VPN provider has given you a port forwarding port then turn off the Use Random Port option and fill in the port you have been provided.

Plugins
There are a couple of plugins you will want to enable. (If you are looking for something to unpack torrents that are zipped then follow the Unpackerr guide)
- Autoadd – This allows you to pull in any torrents in the watch directory
- Label – This allows Radarr/Sonarr to assigned labels and pull downloads into subdirectories – no additional configuration required for this plugin
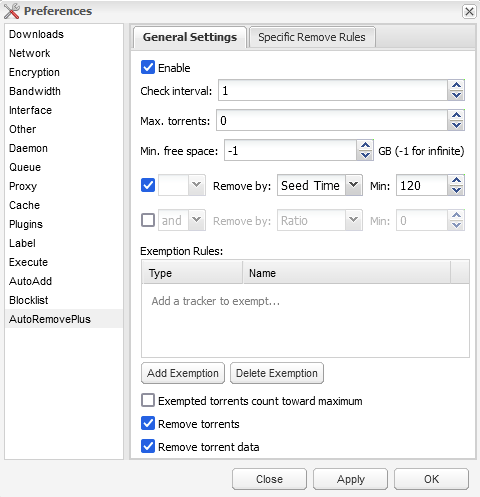
- Auto Remove Plus – Download the ‘AutoRemovePlus-2.0.0-py3.8.egg’ version from the Deluge forums and place it in the Plugins’ folder in /docker/deluge/plugins. It allows you to fine tune when to remove torrents and their associated data once downloaded. (You may need to stop and start the container for this to appear)

That’s it you are completely set up! I recommend having a quick read through the FAQ as it covers some questions you may have!
FAQs
Q: My GlueTUN is unhealthy what can I do?
A: The GlueTUN logs should be your first point of call, they will tell you if you have key issues with the configuration that are sometimes easily remedied. If you are still stuck leave a comment on this post, include the contents of your compose and also the log file (Use my PrivateBin https://paste.drfrankenstein.co.uk remove passwords or WireGuard keys!
Or Join Discord for some more immediate help..
Q: How can I update the GlueTUN containers?
A: See the Updating Containers section on the menu.
Q: How can I be sure the VPN connection is working?
A: Go to the TorGuard Check My Torrent IP site, right-click on the Green banner and copy the link (it’s a Magnet link) Then add this link into Deluge and start the torrent. Keeping the site open after a few seconds the site will show the IP address of the connection it finds. This will be of the VPN provider not your home IP. (Please note the torrent doesn’t actually download anything it’s purely doing an IP check)
Q: Everything seems to be connected but nothing is downloading.
Are you using TorGuard – If so they block torrents on their US servers. Change to another country – Also while you are at it, you may need to configure port forwarding in your TorGuard account.
Try grabbing the Ubuntu torrent as that is a sure fire way of testing as generally it has over 3k seeds.
Q: My container doesn’t seem to start on a reboot even with the TUN script.
A: I have seen this a few times and usually relates to the VPN not completing its connection fast enough before containers using the VPN start. You can try setting an additional startup script by doing the following.
Head into Control Panel and go to Task Scheduler Click Create > Triggered Task > User Defined Task
| Section | Setting |
|---|---|
| Task Name | DockerVPNBootUp |
| User | Root |
| Event | Boot Up |
| Pre Task | Select the VPNTUN script from the drop-down that you created at the start of the guide |
In the ‘Task Settings’ tab enter the following and then click Save
sleep 120
docker-compose -f /volume1/docker/projects/vpnproject-compose/compose.yaml down
wait
docker-compose -f /volume1/docker/projects/vpnproject-compose/compose.yaml up -dQ: I tried to start Deluge / qBittorrent manually, and it says ‘Container must join at least one network’
A: This is due to the Synology Container Manager GUI not understanding that the container will be on the GlueTUN ‘network’. You will need to start the container via the Project as it is part of the overall Project compose.
Q: How can I add additional services to the VPN container?
A: Adding additional containers to the VPN network is very easy. As you can see in the example below I have added Prowlarr to the bottom of the compose. The only amendments are that the ‘network_mode’ uses the Gluetun container and the ports for Prowlarr have been moved up to the Gluetun containers ports section.
Also see the separate Prowlarr guide on the left menu for setting up FlareSolver (In the Extras section)
      - 9696:9696 # add this to the ports section of GlueTUN
#add the below to the bottom of the compose
  linuxserver-prowlarr:
    image: linuxserver/prowlarr:latest
    container_name: prowlarr
    environment:
      - PUID=1234 #CHANGE_TO_YOUR_UID
      - PGID=65432 #CHANGE_TO_YOUR_GID
      - TZ=Europe/London #CHANGE_TO_YOUR_TZ
      - UMASK=022
    volumes:
      - /volume1/docker/prowlarr:/config
    network_mode: service:gluetun # run on the vpn network
    security_opt:
      - no-new-privileges:true
restart: alwaysHow can I use the Deluge ‘Thin Client’ aka Desktop Client?
This is fairly straight forward. First add the Daemon Port into the GlueTUN ports section so it is exposed and can be connected to.
- 58846:58846 #Deluge DaemonSave and Build the VPN Project, and then we need to allow a user access to the Deluge server.
Within /docker/deluge there is an AUTH file. Open this file using your favourite text editor and add a second line under the ‘localclient’
your-username:password1:10Changing the your-username to whatever username you want to use followed after the : by a password you want. Leave the :10 this grants access to the Daemon.
Save the file and you should now be able to connect.
More will be added as questions come up
Looking for some help, join our Discord community
If you are struggling with any steps in the guides or looking to branch out into other containers join our Discord community!

Buy me a beverage!
If you have found my site useful please consider pinging me a tip as it helps cover the cost of running things or just lets me stay hydrated. Plus 10% goes to the devs of the apps I do guides for every year.


I can’t get the WireGuard package to run. It installs correctly, it starts successfully and then it quits (says manyally stopped in the Package Center)…
Hi, double check you 100% have the correct package for your NAS version, and if it is try uninstalling… Reboot… Reinstall as per the instructions again.
Finally got it working. Redownloaded everything and it went through. Thanks!