Last updated on 23 September 2025
Important or Recent Updates
| Historic Updates | Date |
|---|---|
| Rewritten for Container Manager and config file updated | 08/07/2023 |
| Changed the image to pull from docker hub as the old cr.hotio.dev is being phased out Added additional security option to the compose to restrict the container from gaining new privileges | 25/10/2023 |
What is Unpackerr
Unpackerr monitors your torrent client’s completed download folders and when a compressed file requires ‘Unpacking’ from a Zip or RAR it will do it automatically for you. It will then notify Radarr and other arrs the download is ready.
Useful external links for this guide
Unpackerr Documentation
Unpackerr GitHub
Let’s Begin
In this guide I am going to take you through the steps to get Unpackerr up and running in Docker on your Synology NAS.
In order for you to successfully use this guide please complete these two additional guides
Folder Setup
Our next task is to set up a couple of folders for the config file and also the compose file
Open up File Station and go to the /docker share. Create a ‘projects’ then within this create a folder called ‘unpackerr-compose’. Then directly in the /docker share again create a ‘unpackerr’ folder

Config File Set up
In order to use Unpackerr we need to set up a number of variables in the config file, I have built a version with some pre-configured basics in line with the folder structure across the guides.
Download the pre-made config file below and save it into the newly created unpackerr folder.
Next up we are going to edit the file, so it can send notifications to the Arrs when it has completed its work.

Making your amendments
You can edit this file in a number of ways, but to keep the guide OS-agnostic we will be using the Synology Text Editor package which can be installed via Package Center.
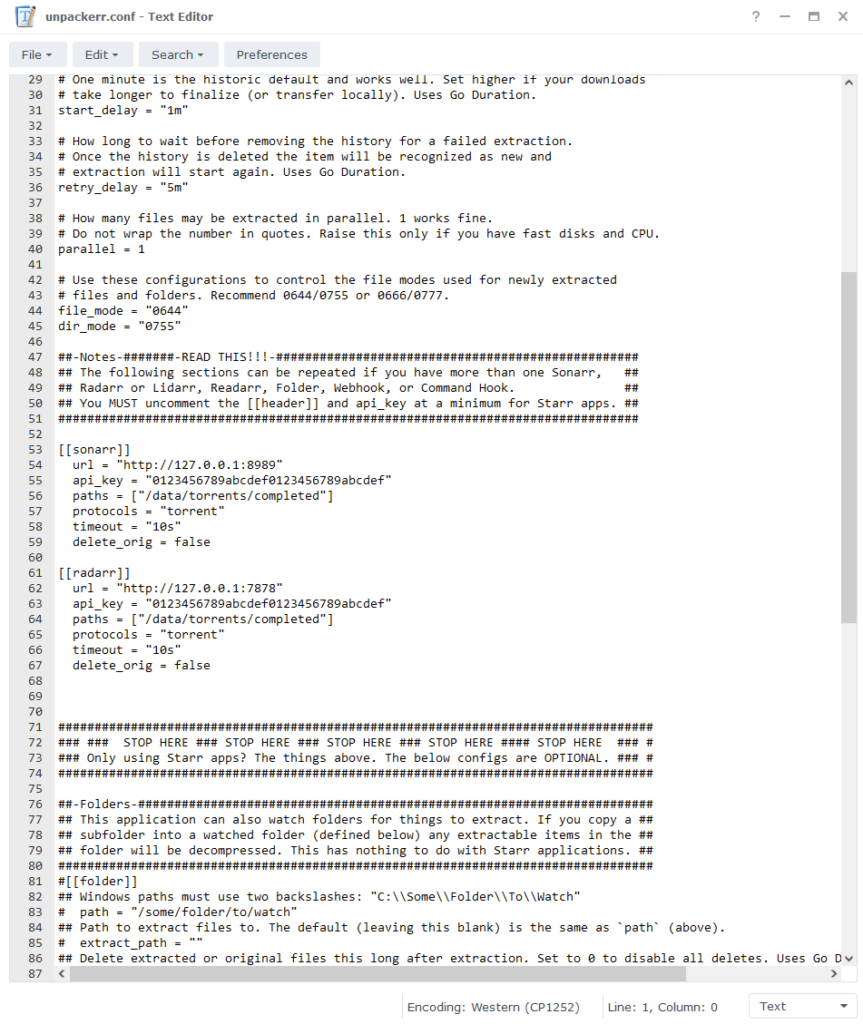
Open up the config file in Text Editor you will see its nicely broken down into sections.

In the first section you can amend the preferences to your own liking I have set some sane defaults already.
In the second section you can start adding in your settings for the Arrs. Due to Radarr and Sonarr being the most commonly used applications I have left them in the file already. You will need to edit the following lines on each.
| Settings | Variable to Use |
|---|---|
| url = “http://sonarr:8989” | This is the synobridge gateway IP you likely won’t need to change this, however you can also use your NAS IP. |
| api_key = “0123456789abcdef0123456789abcdef” | Your API key can be located in the Arrs settings pages (Settings > General) copy and paste it between the “” |
| delete_orig = false | If you want Unpackerr to delete the original compressed files when it has completed set this to ‘true’ |
If you are using other Arrs you can optionally copy the settings from below and add them into the config file and amend the same settings mentioned above accordingly
[[lidarr]]
  url = "http://lidarr:8686"
  api_key = "0123456789abcdef0123456789abcdef"
  paths = ["/data/torrents/completed"]
  protocols = "torrent"
  timeout = "10s"
delete_orig = false[[readarr]]
url = "http://readarr:8787"
api_key = "0123456789abcdef0123456789abcdef"
paths = ["/data/torrents/completed"]
protocols = "torrent"
timeout = "10s"
delete_orig = falseWe won’t be changing any of the settings in the final two sections of the config file for this guide. You can now save and exit the config file.
Container Setup
Next we are going to set up a ‘Project’ in Container Manager. Open up Container Manager and click on Project then on the right-hand side click ‘Create’.

In the next screen we will set up our General Settings.
‘Project Name’ will be ‘unpackerr’
‘Path’ click the button and select the folder we created earlier in ‘/docker/projects/unpackerr-compose’.
‘Source:’ change the drop-down to ‘Create docker-compose.yml’.

Next we are going to drop in our docker compose configuration, copy all the code in the box below and paste it into line ‘1’ just like the screenshot.
services:
  unpackerr:
    container_name: unpackerr
    image: ghcr.io/hotio/unpackerr
    environment:
      - PUID=1234 #CHANGE_TO_YOUR_UID
      - PGID=65432 #CHANGE_TO_YOUR_GID
      - TZ=Europe/London #CHANGE_TO_YOUR_TZ
      - UMASK=002
    volumes:
      - /volume1/docker/unpackerr:/config
      - /volume1/data:/data
    network_mode: synobridge
    security_opt:
      - no-new-privileges:true
    restart: unless-stopped
What on earth is a Docker Compose?
Docker Compose allows us to define how Docker should set up one or more containers within a single configuration file. This file is YAML formatted and generally saved as docker-compose.yml or compose.yml
Environment Variables
We are now going to amend some key variables to make sure the container has access to our folders and also knows where we are in the world. Don’t change any other settings other than those I mention.
PUID= – The UID you obtained in the user setup guide
PGID= – The GID you obtained in the user setup guide
TZ= – You will need to change this line to your own timezone code – you can find the correct list of ones to use on wikipedia.org/wiki/List_of_tz_database_time_zones
Once you have made the edits you can click ‘Next’
You do not need to enable anything on the ‘Web portal settings’ screen click ‘Next’ again.

On the final screen click ‘Done’ which will begin the download of the container images and once downloaded they will be launched!

Unpackerr will now be linked to Radarr/Sonarr etc and once a download has been completed that requires unpacking it will step in and do the work for you.
Looking for some help, join our Discord community
If you are struggling with any steps in the guides or looking to branch out into other containers join our Discord community!

Buy me a beverage!
If you have found my site useful please consider pinging me a tip as it helps cover the cost of running things or just lets me stay hydrated.


