Last updated on 6 April 2025
Please note if you are using DSM7.2 or higher you should use the Container Manager version of this guide from the menu.
This guide has reached the end of its updates as most people are now on the latest DSM update - This guide is correct as of 08/12/2023 however no further updates will be added.
| Update | Date |
|---|---|
| Amended the path to save the compose file – this is for security, so the container has no access to the file contents. | 14/04/2023 |
| removed the setup of a limited docker user as AdGuard has no method to map this user into the container | 04/07/2024 |
What is AdGuard Home?
AdGuard Home is a network-wide software for blocking ads and tracking. After you set it up, it’ll cover all your home devices it even includes a parental control solution, just like a PiHole it acts as your home network DNS server and will block advertising on any site you visit.
This guide will get you set up with AdGuard and cover some basic initial settings, I recommend checking out the documentation for all the various features available. Please note as DSM uses port 443 and 80 you will not be able to use DNS over HTTPS with this method. However, DNS over QUIC and DNS Crypt can be used in additional to standard DNS.
Let’s Begin
In order for you to successfully use this guide you will need to check that your Router allows you to change your network DNS servers, this is usually found in the DHCP settings. You will also want to make sure your NAS has an IP address manually assigned, so it doesn’t change.
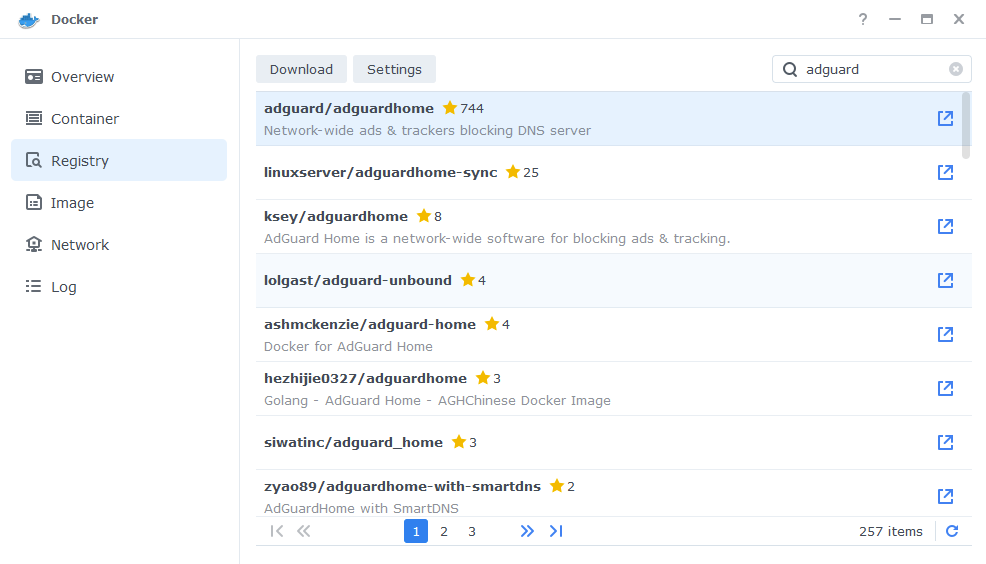
Downloading the AdGuard Image
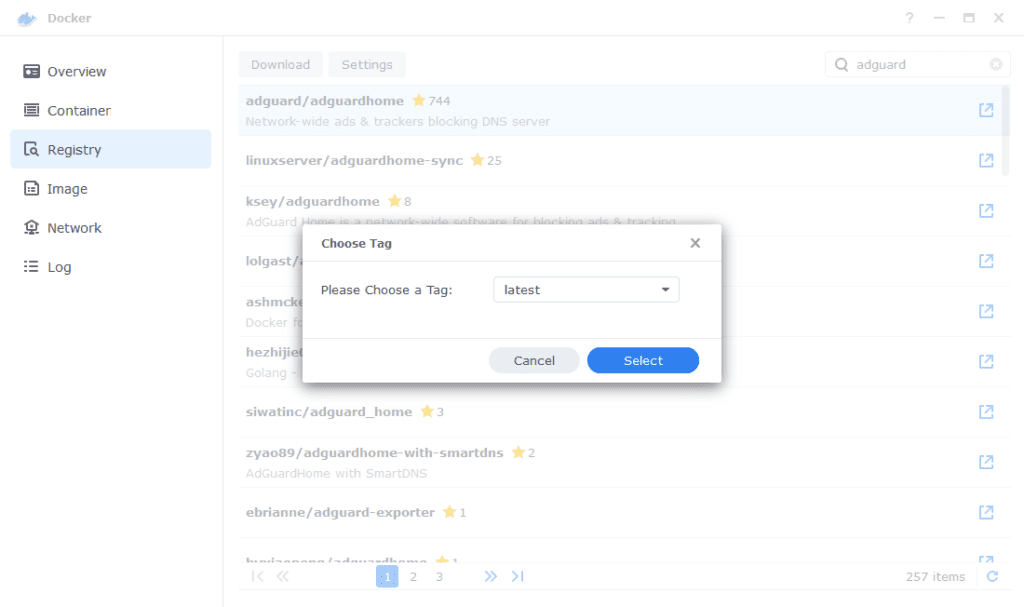
Open up Docker within DSM and navigate to the ‘Registry’ section and search for ‘adguard’ in the search box and download the ‘adguard/adguardhome’ version
The pop-up box will ask which version you want to download, make sure you choose ‘Latest’ from the list of available versions.
You can check the status of the download over on the ‘Image’ tab.
Setting up the container
In Docker click on the ‘Image’ tab, in the list of your containers select the ‘Adguard’ image and click on ‘Launch’
You will be greeted with the Network screen, we will be using the same network as Docker Host – this will allow AdGuard to see all the IPs of your devices allowing you to use the parental controls for specific IPs

General Settings
Next you will see the General Settings screen, this is where you can start specifying some of your preferences.
You can change the name of the container to anything you like, and you may want to enable Auto Restart as this will ensure AdGuard starts automatically if you reboot your NAS.
You will also notice a Configure capabilities button — don’t change anything in here!
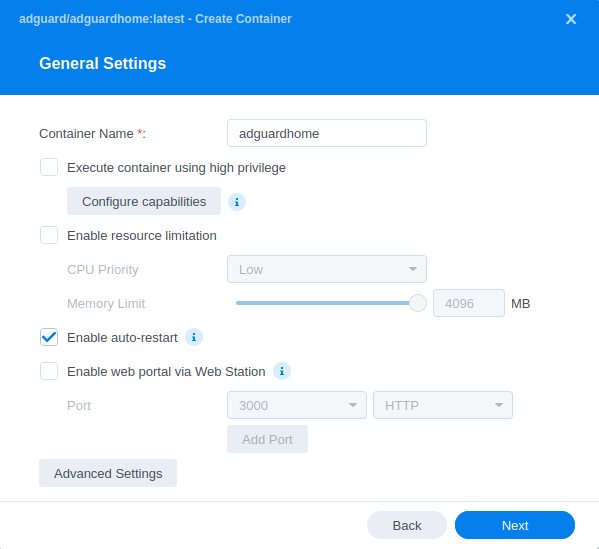
Believe it or not we don’t have anything else to do on this screen as no additional variables are required!
Click ‘Next’
Volume Settings
We can now specify where AdGuard will store its configuration files.
Click on ‘Add Folder’, select the ‘docker’ share and create a new sub-folder called ‘adguard’ then repeat this creating two additional subfolders called ‘work’ and ‘conf’.
It should look like the screenshot below.
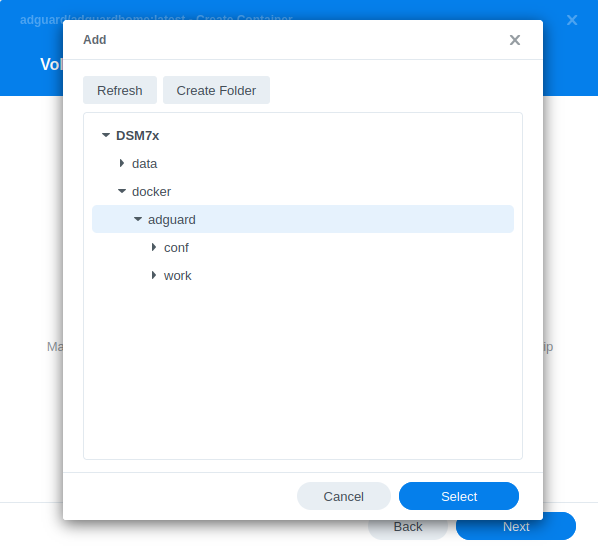
Now we will add these folders to the container. First select the ‘conf’ folder and click ‘Select’ this will add it to the list of folders shown in the Docker UI, click Select Folder again and then select the ‘work’ folder.
It should now look like the screenshot below:
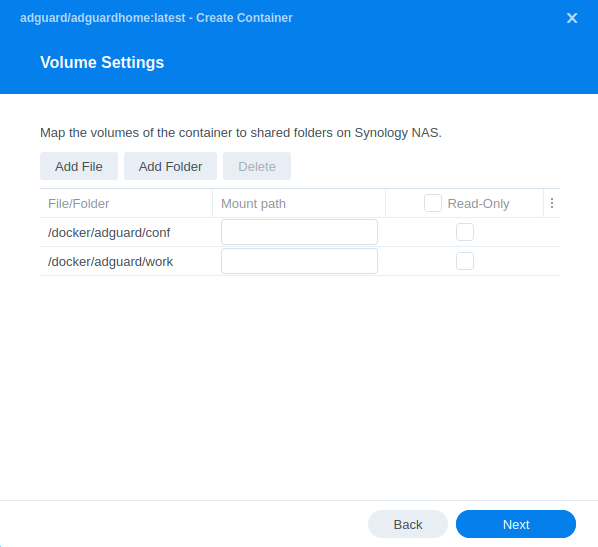
Next we are going to map these folders to paths inside the container, the table below shows the paths to use, you can copy and paste the ‘Mount Path’ in line with the screenshot.
| File/Folder | Mount path |
|---|---|
| /docker/adguard/conf | /opt/adguardhome/conf |
| /docker/adguard/work | /opt/adguardhome/work |
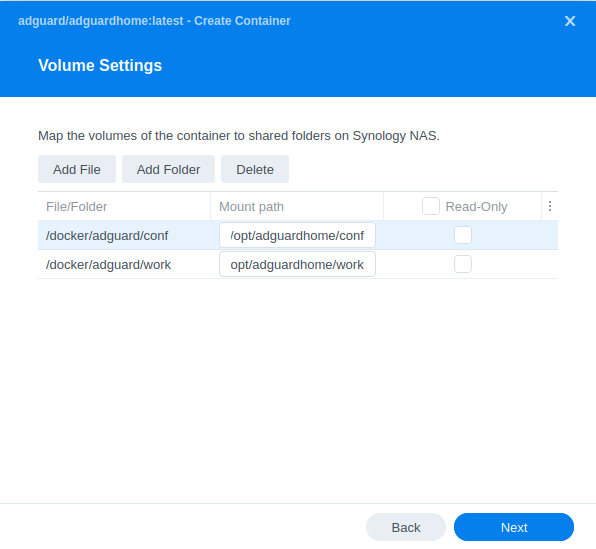
Click next to go to the final screen.
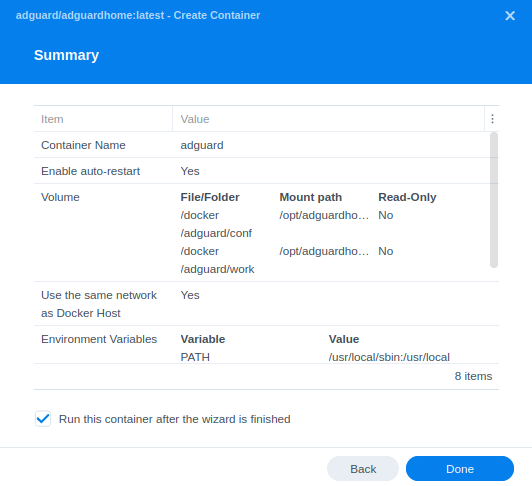
Summary
You have now completed the setup of the container.
You will be shown an overall summary of the settings we have specified, this is a good time to double-check everything is correct. Finally, click on Done and the container should start to boot.
You should now be able to access the web interface via the IP of your NAS followed by the port 3000
e.g. 192.168.0.30:3000
Initial Setup
You will now do some initial setup steps, Step 1 – click ‘Get Started’
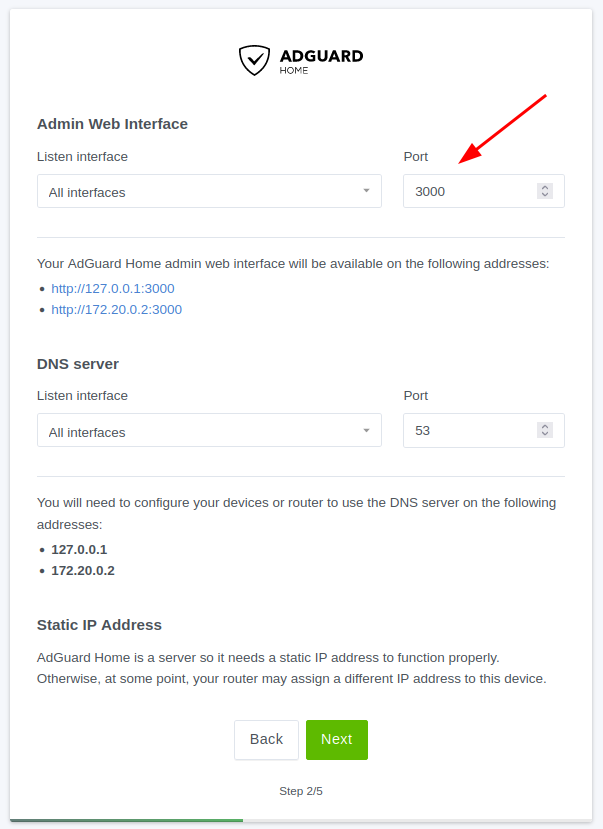
Step 2 – You will be asked to choose the network interfaces AdGuard will listen to for DNS requests and the Web Interface. Leave these set to ‘All Interfaces’ but change the Port for the Web Interface from 80 to 3000.
(Ignore the IP addresses shown on this screen as they are the internal Docker IPs)
Click ‘Next’
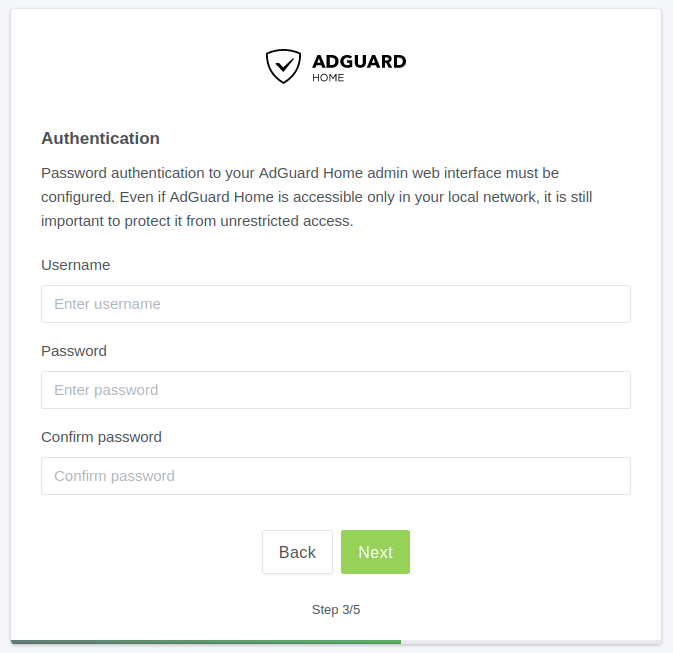
Step 3 – You will be required to set up a Username and Password to access the Web UI. Fill these in (You could follow the Vaultwarden guide to get a password manager setup if you don’t have one already)
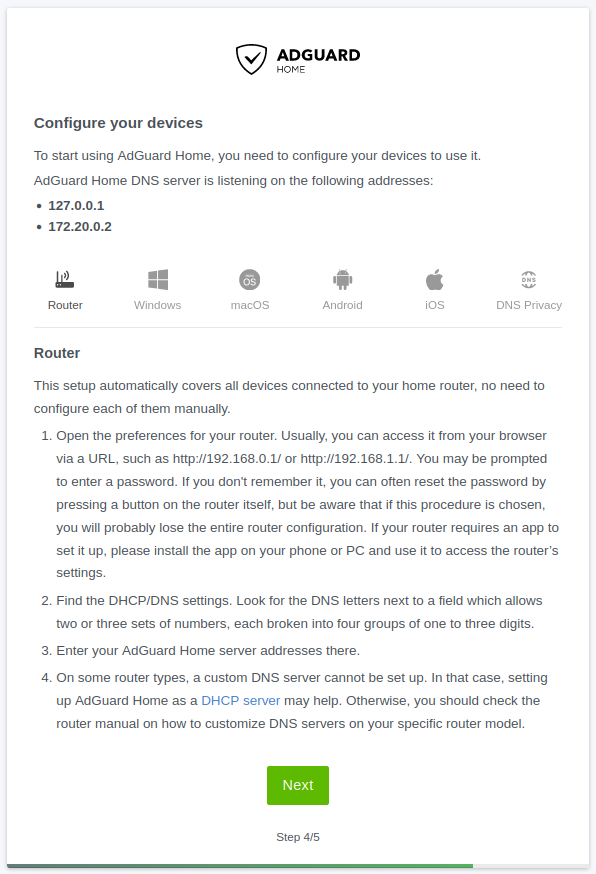
Step 4 – You can now configure your devices to use AdGuard Home – This is the point where you will need to check your Router documentation on how to change the DNS server settings.
Do not use the IP addresses shown on this screen it will be the IP address of your NAS. If your router has more than one DNS server section fill in both with the same IP otherwise your ad blocking will not always work.
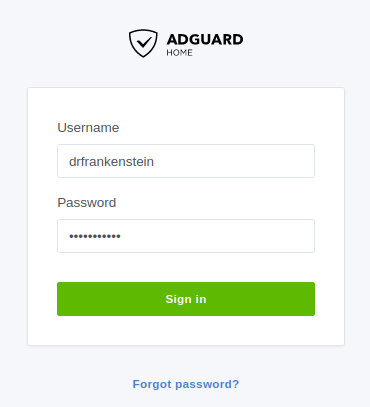
Click on Open Dashboard and you will be taken to the login screen.
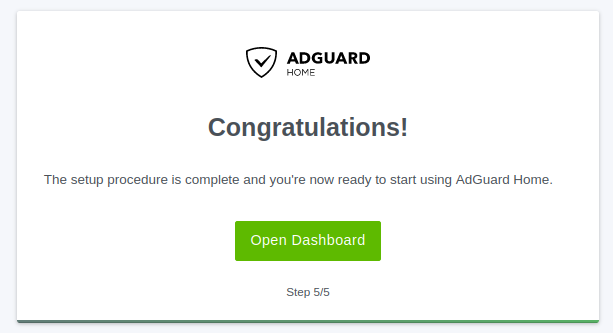
Now log in to your account.
Once your devices start to update with the new DNS server IP you will begin seeing traffic in your Dashboard. (This can take up to 24 hours)
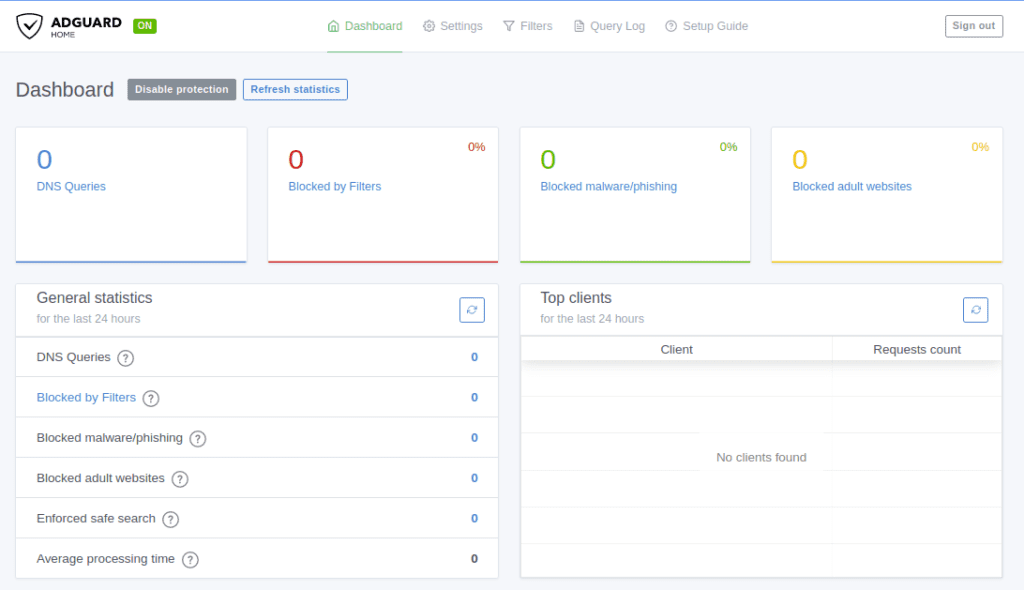
From here you can set up some initial settings such as additional ‘Filters’ (blocklists) or define additional upstream DNS providers who handle the requests that make it past the filters in Settings > DNS Settings.
More settings can be found here
You are ready to roll 🙂
| Historic Updates | Date |
|---|---|
| New guide Published | 31/12/2022 |
| Guide was briefly pulled to move the container to host mode to allow for each device IP to be seen | 04/01/2023 |
| Compose version number removed | 09/04/2023 |
Looking for some help, join our Discord community
If you are struggling with any steps in the guides or looking to branch out into other containers join our Discord community!

Buy me a beverage!
If you have found my site useful please consider pinging me a tip as it helps cover the cost of running things or just lets me stay hydrated. Plus 10% goes to the devs of the apps I do guides for every year.


what are my options if I do not want to use my NAS’s ip address?
Are you running DSM7.1? You could use the compose information in the newer version of the guide to use MACVLAN.
Thank you for that manual. Worked great!
I have setup Synology to use Let’sEncrypt. How can I connect to AdGuard using the Synology.me address?
Hey – Are you looking to use the actual ad-blocking or just being able to connect to the WebUI via that address?
Based on the AdGuard documentation, it seems like it’s unnecessary to enable this:
https://github.com/AdguardTeam/AdguardHome/wiki/Encryption
> It does not make much sense to configure DNS encryption inside of your own local network. The purpose of securing your DNS traffic is to secure it from third-parties that might be analyzing or modifying it. For instance, from your ISP.
>
> It means that you will need a server with a public dedicated IP address. There are plenty of cheap cloud servers providers: DigitalOcean, Vultr, Linode, etc. Just choose one, create a cloud server there, and install AdGuard Home on your server.
Correct me if I’m wrong?
Im a little confused here
“Do not use the IP addresses shown on this screen it will be the IP address of your NAS.”
Which addresses do I use for the DNS if I cant use the ones shown?
Am I supposed to use the IP address of my NAS? or are you saying here I shouldn’t use my NAS IP?
Sorry missing a comma in there, use the ip address of your NAS. The one shown on the screen is the Docker IP which won’t work.
I will tweak the wording.
My router (Eero) has an IPv4 Primary and IPv4 Secondary as well as an IPv6 Primary and IPv6 Secondary. Do I just input my NAS IP address for the IPv4 Primary and Secondary and leave the IPv6 entries blank? Thanks for your help with all of these guides!
Hey, yeah you can likely just disable teh ipv6 as on local home networks it’s not really needed. Leave them blank