
Please note if you are using DSM7.2 or higher you should use the Container Manager version of this guide from the menu.
This guide has reached the end of its updates as most people are now on the latest DSM update - This guide is correct as of 08/12/2023 however no further updates will be added.
| Update | Date |
|---|---|
| Added a note in relation to enabling the RCON port and if you expose it to the internet you MUST change the default password. | 22/04/2023 |
In this guide I am going to take you through the steps to get a Minecraft JAVA server up and running in Docker on a Synology NAS. If you are looking to host a server for a Console or Mobile you will want to see my Bedrock edition guide.
The fantastic documentation on how to use the server once it is running can be found here
https://docker-minecraft-server.readthedocs.io/en/latest/
Let’s Begin
In order for you to successfully use this guide please complete the setting up a docker user guide, or have your ID details to hand.
Step 2: Setting up a restricted Docker user
Step 3: Setting Up a Docker Bridge Network
Downloading the Container
Open up Docker within DSM and navigate to the ‘Registry’ tab and search for ITZG in the keyword box.
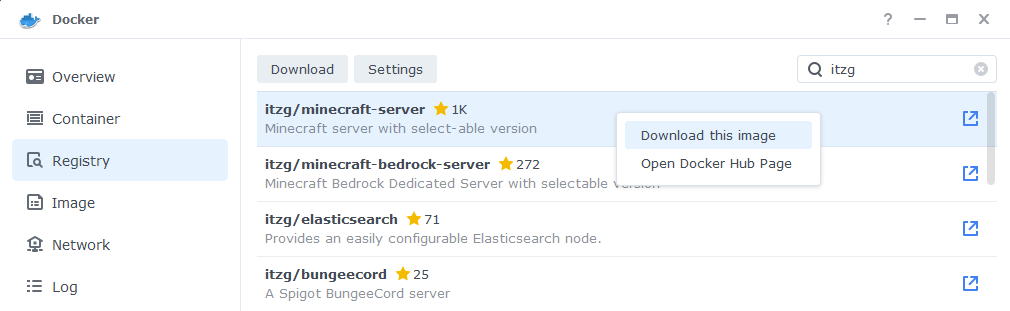
Within the results right click and download the ‘ITZG|Minecraft-Server’, When it asks which version number to download select the one that you require based on the table below
| Minecraft Version | Tag to Select |
| v1.18x and up | Latest or JAVA17 |
| v1.17x | JAVA16 |
| v1.16 and below | JAVA15 |
Setting up the container
Now we have downloaded the container and got hold of our user IDs we can move onto the next stage.
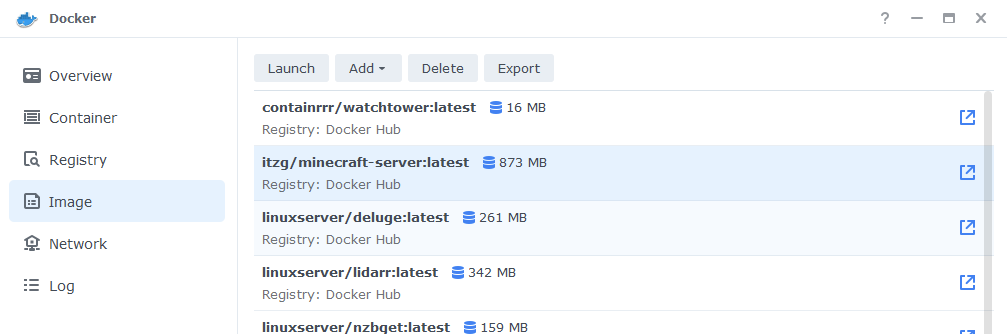
Go back into Docker and click on the ‘Image’ tab, in the list of your containers select the ITZG Minecraft server, and click on ‘Launch’
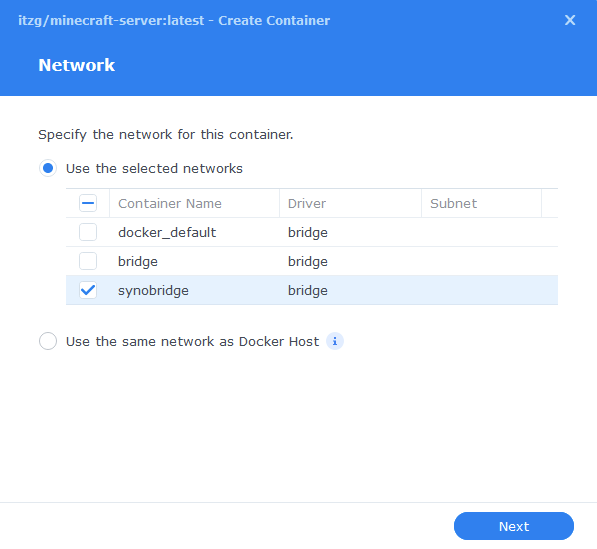
You will be greeted with the Network screen, we will be using the ‘synobridge’ network we created earlier select it from the list and click Next.
Next you will be greeted with the General Settings screen, this is where you can start specifying some of your preferences.
Minecraft can be fairly CPU heavy so if you are running the server on a lower specification Synology box you will probably want to set limits around the CPU priority or Memory Limit. This will ensure DSM is still usable when the server is running.
You can change the name of the container to anything you like, and you may want to enable Auto Restart as this will ensure the server starts automatically if you reboot your NAS.
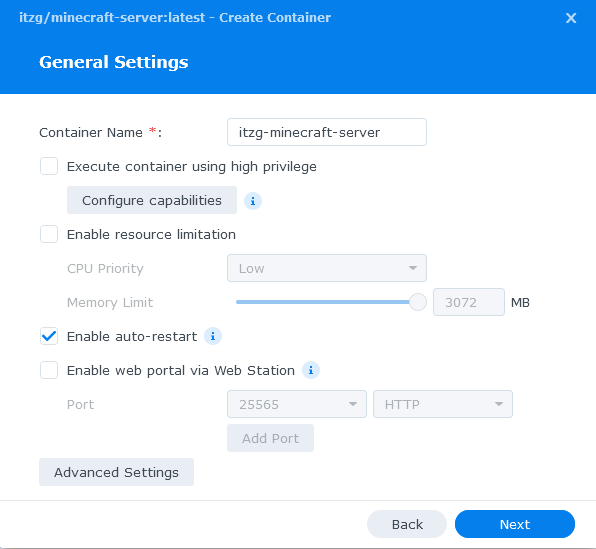
Next up we are going to click on the ‘Advanced Settings’ button, this will take you to a new window with a number of tabs which we are going to work through.
Environment Variables – GID, UID, Server Type and EULA
We are now going to set up the specific options for the server including what type of server you would like to run and even a specific version.
Each of the values below are added by clicking the ‘Add’ button at the top of the screen and then entering each of the values below
Please note if you decide to enable the RCON Port please change the default password especially if you open your server up to the Internet! See the GitHub for more details.
| variable | Value | Comment |
| UID | This will be prefilled with 1000 change it to the UID you obtained earlier | |
| GID | This will be prefilled with 1000 change it to the GID you obtained earlier | |
| EULA | TRUE | This accepts the Minecraft EULA, without this the server will not run |
| TYPE | SPIGOT | You can change this as per the list below |
| VERSION | LATEST | You can change this to any a specific version if you want e.g 1.13 |
| JVM_XX_OPTS | -XX:+UseG1GC -XX:+ParallelRefProcEnabled -XX:MaxGCPauseMillis=200 -XX:+UnlockExperimentalVMOptions -XX:+DisableExplicitGC -XX:+AlwaysPreTouch -XX:G1HeapWastePercent=5 -XX:G1MixedGCCountTarget=4 -XX:G1MixedGCLiveThresholdPercent=90 -XX:G1RSetUpdatingPauseTimePercent=5 -XX:SurvivorRatio=32 -XX:+PerfDisableSharedMem -XX:MaxTenuringThreshold=1 -XX:G1NewSizePercent=30 -XX:G1MaxNewSizePercent=40 -XX:G1HeapRegionSize=8M -XX:G1ReservePercent=20 -XX:InitiatingHeapOccupancyPercent=15 | These variables are used to increase the performance of the server – Copy and paste this exactly |
| MAX_MEMORY | 2G | Amend the number to the amount of memory you want to allocate to the server this will depend on your system or server type you are running |
Server Types
- VANILLA
- BUKKIT
- SPIGOT
- PAPER
- TUINITY
- MAGMA
- MOHIST
- CATSERVER
- SPONGEVANILLA
- FABRIC
See the full list here
Links / Execution Command
You do not need to set up anything on these tabs.
Press ‘Save’ to go back to the initial setup screen, then press ‘Next’
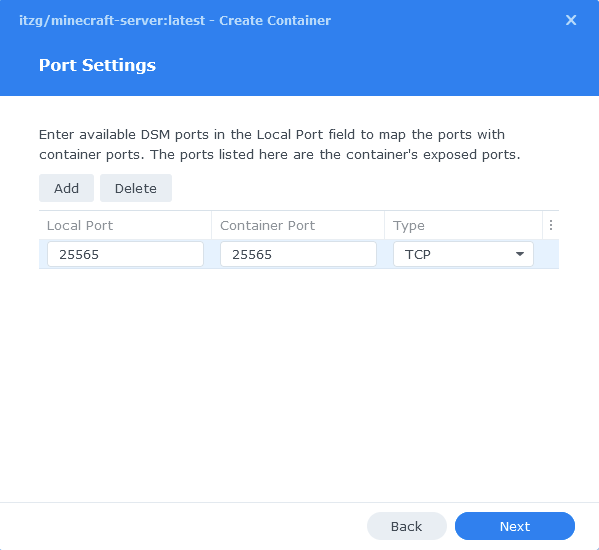
Port Settings
You will now see the Port Settings screen. You will need to type in the ‘Local Port’ to match the ‘Container Port’ shown on the right-hand side this will avoid the container being assigned random ports when it is started. When set press Next.
As per the earlier note if you decide to enable RCON you will need to add its port mapping here.
Volume Settings
We can now specify the directory where Minecraft will store its configuration files.
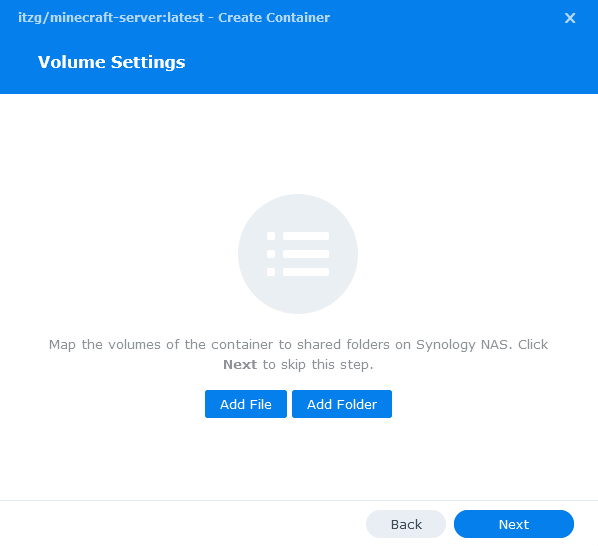
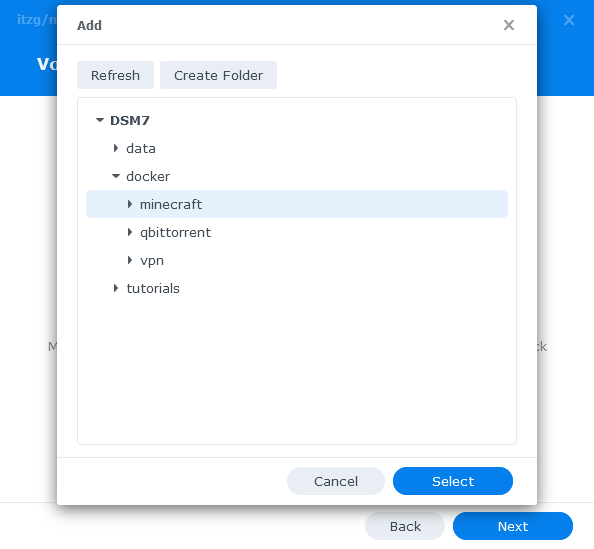
Click on Add Folder, click on the docker folder and create a new sub-folder called ‘minecraft’ select this folder and click ‘select’
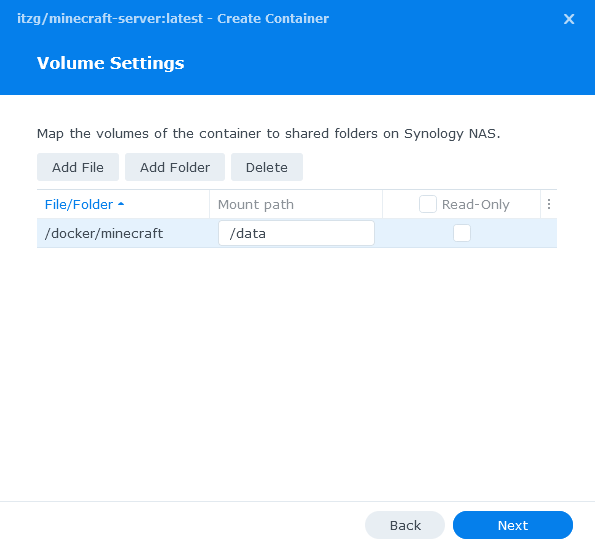
Now we need to specify where this folder will be mounted inside the container. As per the screenshot/table below, enter /data into the ‘Mount path’.
| File/Folder | Mount path |
|---|---|
| docker/minecraft | /data |
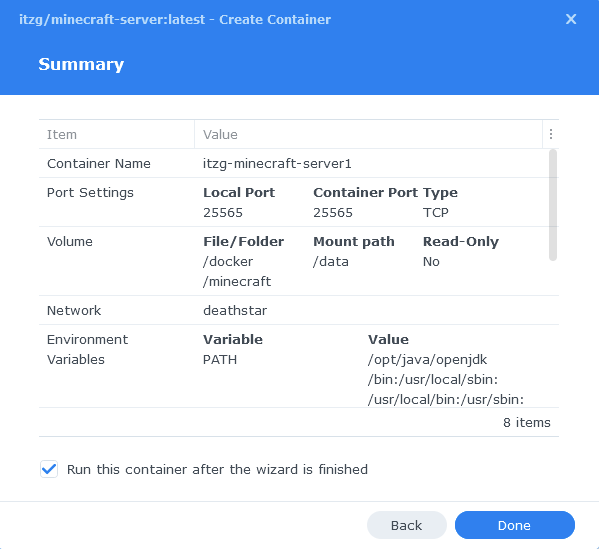
Click on Next and you will be taken to an overall summary screen, just do a quick sanity check to make sure the options are correct. If you want to launch the server immediately check the box and click on Done.
Server startup time
The first time the server launches it may take a few minutes for the server files to download and the world to be generated. You can track the progress by going into the ‘Containers’ tab and clicking on details for the Minecraft container, then either viewing the terminal or log tabs.
All other server settings can be configured using the standard Minecraft server.properties file, I won’t be covering that here as there are extensive other guides out there.
| Update History | Date |
| Added Docker Compose details | 03/05/2021 |
| Updated to show which version of the image to download | 09/06/2021 |
| Cleaned up the Environment Variables section and included some new JAVA optimisations | 24/11/2021 |
| Screenshots update to DSM7 and tweaked the guide wording | 22/01/2022 |
| DSM7.1 Update with new screenshots and steps | 24/05/2022 |
| Added new port settings and Docker Bridge Network | 23/07/2022 |
| Fixed the missing port settings section! | 16/11/2022 |
| Removed port 25575 (RCON) as could pose a security issue if exposed to the internet – You can add manually if required | 12/03/2023 |
| Compose version number removed 3.x not required, and some minor wording amendments. | 08/04/2023 |
| Amended the path to save the compose file – this is for security, so the container has no access to the file contents. | 14/04/2023 |
Looking for some help, join our Discord community
If you are struggling with any steps in the guides or looking to branch out into other containers join our Discord community!

Buy me a beverage!
If you have found my site useful please consider pinging me a tip as it helps cover the cost of running things or just lets me stay hydrated. Plus 10% goes to the devs of the apps I do guides for every year.


Missing a
minecraft/in the docker-compose command I thinksudo docker-compose -f /volume1/docker/minecraft.yml up -dshould be
sudo docker-compose -f /volume1/docker/minecraft/minecraft.yml up -dAlso, if you plan on running Geyser to get Bedrock clients able to connect you must forward udp to port 19132:
- 19132:19132/udpI didn’t realize docker wouldn’t send tcp & udp by default, should’ve known
Hey, thanks not sure how that slipped through I will get it fixed.
thank you 🙂 I’ve been loving these guides, saved me a lot of doc reading (and left enough info in to help me understand what’s going on), so I’m gratified to help you!
Hello, I have no problems running the server with the above tutorial. However, when I change the Type to Curseforge, it fails to run. I looked over the ITZG Github page & have tried adding different environment variables like CF_PAGE_URL, CF_SLUG but no luck.
Any suggestions?
Hey – I have had a quick read through the Github so it should be
TYPE = AUTO_CURSEFORGE
CF_PAGE_URL = https://www.curseforge.com/minecraft/modpacks/all-the-mods-8 (replace with the URL of the modpack)
https://github.com/itzg/docker-minecraft-server#running-a-server-with-a-curseforge-modpack
Great tutorial. Bought you coffee! Server is running. I can connect via local ip. What do I tell friends to let them connect? Which IP? Is synologyh quickconnect in play here? mystaticIP:portnumber? thanks.
Hey thanks for the coffee!
So you can forward port 25565 on your router to your NAS IP and then your friends can connect via your quickconnect / DDNS address 🙂
Really good tutorial but the problem I have I can join the server but my friends cannot join it did I do something wrong or it’s not working?
Thanks
Hey – I will get the guide updated with how to also have a reverse proxy address for the server as well.
If you check out the Overseerr guide in the interim and follow the section called ‘Part 2 – DDNS, SSL and Reverse Proxy’ and when choosing a proxy name use minecraft.yourDDNSname.me and use port 25565 instead of 5055.
can u explain it a little bit more detailed because if I have made it right what you have explained it still not working
Thanks : )
Can you reach out via my contact page or Discord (top option on the menu) it will be easier than via the comments.
I did it I contacted you on discord ‘Noobhoch12#1189’
I’ve followed this guid 100%, but I’m unable to connect to the server at all. It starts up and i can see in the console that the server is running like it should. Any suggestions?
Hey, I am not sure how but the step in the guide that directs which ports to assign seems to have vanished!
Edit the container and in the Port Settings make sure you change the Local Ports to 25565 and 25575, so they line up with the Container Ports.
That would be my initial guess, I will get the guide fixed ASAP!