Last updated on 28 February 2025
Important or Recent Updates
| Update | Date |
|---|---|
| New guide now that NZBGet is under development again | 18/12/2023 |
What is NZBGet?
NZBGet is an efficient, open-source Usenet software designed for downloading binary content from Usenet newsgroups. No matter how simple or complex your setup is, NZBGet is a lightweight application that has been optimized for speed and performance on any device.
Useful external links for this guide
NZBGet Documentation
NZBGet Container GitHub
Let’s Begin
In this guide I will take you through the steps to get NZBGet up and running in Container Manager. We will be using the new Projects (Docker Compose) feature to get this running as it will save you time vs manual setup using the normal UI
In order for you to successfully use this guide please complete the three preceding guides
- Docker Package, SSD and Memory Recommendations
- Step 1: Directory Setup Guide
- Step 2: Setting up a restricted Docker user
- Step 3: Setting up a Docker Bridge Network (synobridge)
Folder Setup
Let’s start by getting some folders set up for the containers to use. Open up File Station create the following.
/docker/projects/nzbget-compose
/docker/nzbget
Container Manager
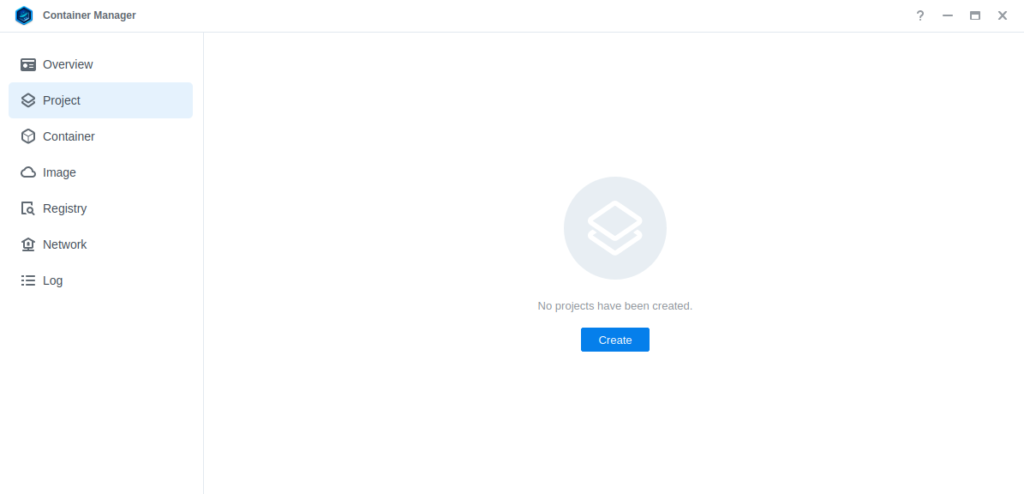
Next we are going to set up a ‘Project’ in Container Manager. Open up Container Manager and click on Project then on the right-hand side click ‘Create’.
In the next screen we will set up our General Settings, enter the following:
| Section | Setting |
|---|---|
| Project Name: | nzbget |
| Path: | /docker/projects/nzbget-compose |
| Source: | Create docker-compose.yml |
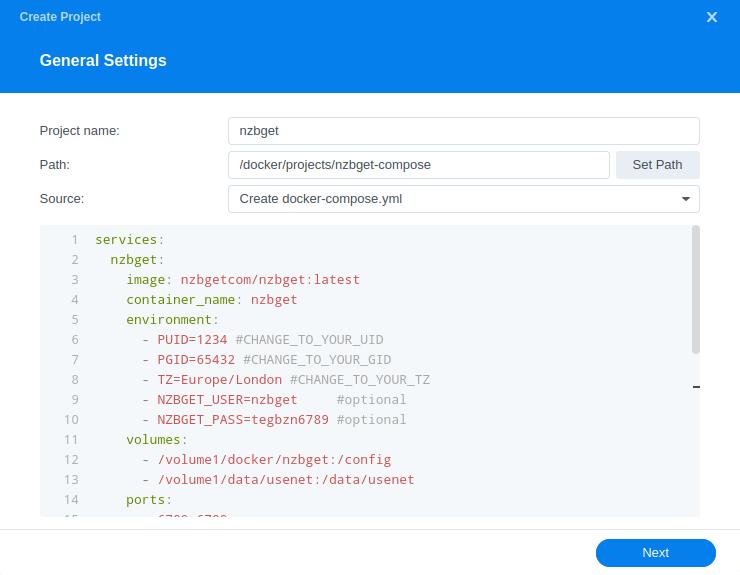
Next we are going to drop in our docker compose configuration, copy all the code in the box below and paste it into line ‘1’ just like the screenshot.
services:
  nzbget:
    image: nzbgetcom/nzbget:latest
    container_name: nzbget
    environment:
      - PUID=1234 #CHANGE_TO_YOUR_UID
      - PGID=65432 #CHANGE_TO_YOUR_GID
      - TZ=Europe/London #CHANGE_TO_YOUR_TZ
      - NZBGET_USER=CHANGEME #WEBUI LOGIN
      - NZBGET_PASS=CHANGEME #WEBUI PASSWORD
    volumes:
      - /volume1/docker/nzbget:/config
      - /volume1/data/usenet:/data/usenet
    ports:
      - 6789:6789/tcp
    network_mode: synobridge
    security_opt:
      - no-new-privileges:true
    restart: always
Environment Variables
We are now going to amend some key variables to make sure the container has access to our folders and also knows where we are in the world. Don’t change any other settings other than those I mention.
| Variable | Value |
|---|---|
| PUID | (required) The UID you obtained in the user setup guide |
| PGID | (required) The GID you obtained in the user setup guide |
| TZ | (required) Your timezone wikipedia.org/wiki/List_of_tz_database_time_zones |
| NZBGET_USER | Change your username |
| NZBGET_PASS | Change your password |
Once you have made the edits you can click ‘Next’
You do not need to enable anything on the ‘Web portal settings’ screen click ‘Next’ again.

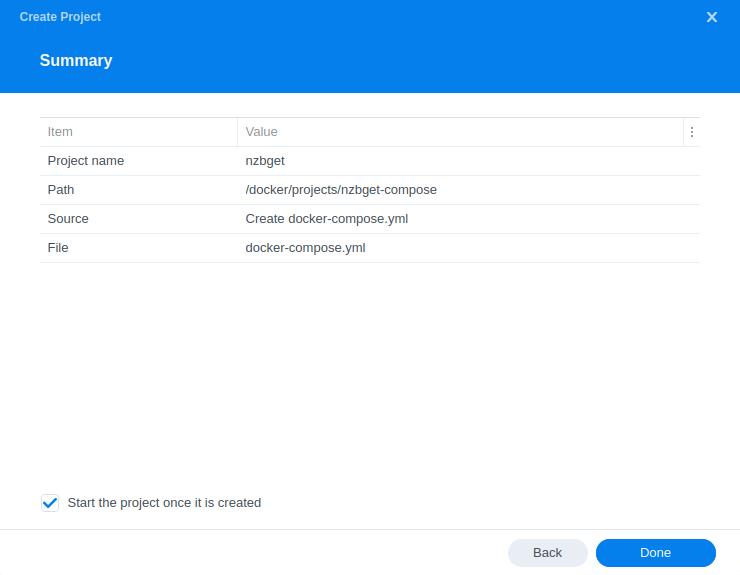
On the final screen click ‘Done’ which will begin the download of the container images and once downloaded they will be launched!
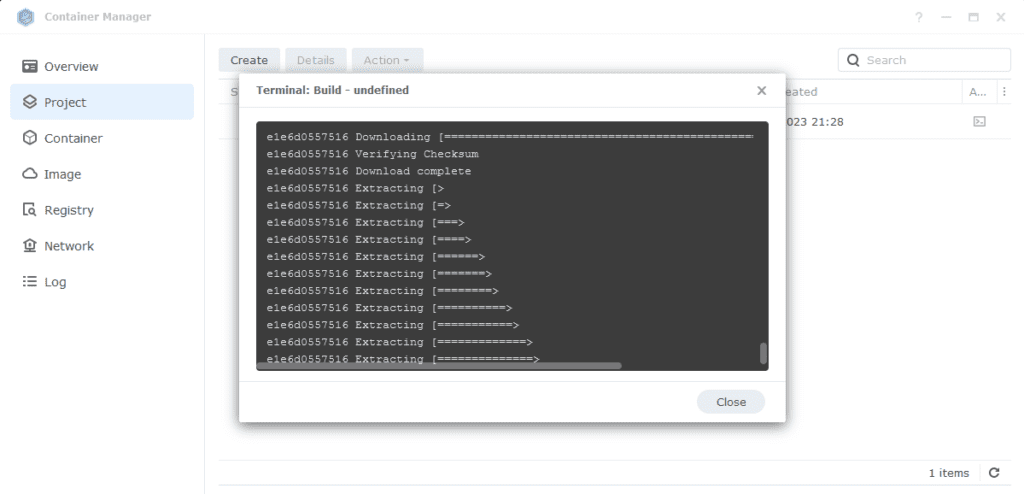
The image will now be downloaded and extracted. You should see ‘Code 0’ when it has finished.
Firewall Exceptions
(Skip if you don’t have the Firewall configured)
If you have the Synology Firewall enabled please see this additional guide for further info on exceptions and correct set up.
Some final steps
NZBGet will now be running on port 6789 you can connect to it by going to the IP address of your NAS with that port
e.g. 192.168.0.40:6789

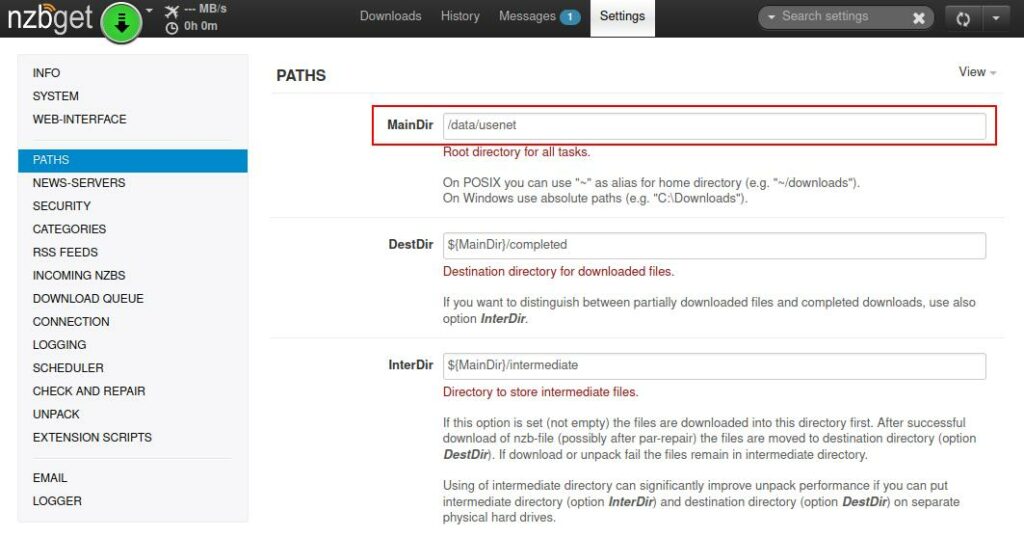
Once you have logged in with the username and password you specified you need to change the default download path. Go into Settings > PATHS as amend as per the table / screenshot.
| Path | Path to enter |
|---|---|
| MainDir | /data/usenet |
You are now configured to get downloads working, there are quite a few options in the configuration sections of the app you can find explanations of the settings in the official documentation
https://nzbget.com/documentation/
Looking for some help, join our Discord community
If you are struggling with any steps in the guides or looking to branch out into other containers join our Discord community!
Buy me a beverage!
If you have found my site useful please consider pinging me a tip as it helps cover the cost of running things or just lets me stay hydrated. Plus 10% goes to the devs of the apps I do guides for every year.


Hey Dr_Frankenstein!
Stumbled across your page very recently and have been re-configuring my NAS setup based on your layouts. Loving everything so far, and learning a ton from the extra info and notes you put into each step. Thanks so much!
One possible suggestion for you on the Environment Variables table; update the wording for the NZB user/password to use the dockerlimited user associated to the same UID and GID defined above.
My suggestion comes from my own misstep where I initially thought I had to create a whole new NZBGet user/pass. After my brain fart, I realized the issue was between the chair and keyboard and fixed my mistake haha. That said, I thought a minor adjustment to the text may help others that might’ve had the same chair/keyboard issue and save them some headache.
Thanks again for sharing your knowledge, I truly appreciate it!
ORIGINAL
Variable Value
PUID (required) The UID you obtained in the user setup guide
PGID (required) The GID you obtained in the user setup guide
TZ (required) Your timezone wikipedia.org/wiki/List_of_tz_database_time_zones
NZBGET_USER Change your username (don’t leave as default!)
NZBGET_PASS Change your password (don’t leave as default!)
SUGGESTED
Variable Value
PUID (required) The UID you obtained in the user setup guide
PGID (required) The GID you obtained in the user setup guide
TZ (required) Your timezone wikipedia.org/wiki/List_of_tz_database_time_zones
NZBGET_USER Change your username (to your username created in the user setup guide)
NZBGET_PASS Change your password (to your password created in the user setup guide)
Hey, so you don’t have to use the same ‘dockerlimited’ user for the login for the app (or any other docker app) they are unrelated but to do with file permissions. However, I will amend the yaml to make it clear to change the login details as per the table below it.
I’m getting an error when hitting “build”.
Container 45967b565229_45967b565229_45967b565229_45967b565229
Error response from daemon: invalid volume specifications: ‘/volume1/data:
I have created a shared “data” folder and allowed read/write access to what looks like the correct users.
Hey, check the compose do you have that line complete?
– /volume1/data:/data
Hi Doctor, great tutorials so far – I am working my way through. Also happily creating my media project. After running into some issues with deluge (performance) and stalled downloads with qbittorrent I wanted to explore more into usenet.
I tried to use SABnzbd and also now nzbget to run in my vpn-project dockers. Won’t work with neither next to qbittorrent, nor only nzbget/SABnzbd… Always getting the same error: Error response from daemon: conflicting options: port publishing and the container type network mode
When running nzbget in a standalone docker, it works. I’d love to run nzb’s on my vpn, do you have any advise?
I will get something added to the FAQ on the GlueTUN guides.
Essentially Three key steps to add to GlueTUN
1) Add the required container yaml(s) into the GlueTUN container yaml/compose, removing the ‘services’ part as this should only appear once at the top.
2) Put the ports required for the container into the GlueTUN ports section – this ensures the WebUI remains accessible.
3) Remove the existing ‘network_mode=synobridge’ and replace it with the same network information from the qbit or deluge containers. This puts the container on GlueTUNs network.
If you were getting stalled torrents check that the VPN is working in the GlueTUN logs, also test with a know well seeded torrent.
would these steps work for NZB Vortex ?
thanks,
chris
I did a quick search, and it looks like a MAC app? Or is there a Docker version?
it is a mac app, was just curious if you ever used it via docker or know if the setup would be similar. Ive never used docker, not too familiar with NZBget either ha… decisions decisions .
thanks
Just roll with NZBGet or Sab on the NAS they both work well
Thanks for the great guides for setting everything up like this with NzbGet, the Arr’s etc! I did however stumble upon a problem with NzbGet not being able to post process downloads with categories like movies and series into their respective folders. It could download things, unpack and do all the things fine in it’s own folders. But then would give errors saying “Could not create directory […blabla…] Acces denied” when trying to do unpacks in other folders. After double checking everything (checking all the rights, putting them in manually with SSH etc.) it should just work. Then I decided to have a look at the compose configuration and wondered if that might be te problem, for it points to /data/usenet and perhaps this prevented NzbGet from going up a directory and then down again. And yes, that did it! So the below config:
volumes:
– /volume1/docker/nzbget:/config
– /volume1/data/usenet:/data/usenet
should be
volumes:
– /volume1/docker/nzbget:/config
– /volume1/data:/data
Everything is now working nicely!
Hey it sounds like you are getting NZBGet to do your sorting for you without Sonarr etc, so your amendment makes sense. We usually restrict its ability to see across the file system just due to it not normally needing it within an overall media stack. Glad its working for you though