Last updated on 5 September 2025
Important or Recent Updates
| Historic Updates | Date |
|---|---|
| Updated guide for Container Manager and using Macvlan | 14/05/2023 |
| Added a new section to ensure DSM continues having network access. | 02/06/2023 |
| Guide updated so you can choose between Macvlan or Bridge mode | 12/08/2023 |
| Added additional security option to the compose to restrict the container from gaining new privileges | 25/10/2023 |
| Fixed issues I introduced with the recent changes in my mission to make things more secure. It was so secure I broke it! Added the appropriate permissions/capabilities at start up for the container. | 29/10/2023 |
| Removed the requirement for the synobridge as this container can just use its own bridge, and added the Host network mode, so all three are a choice. | 28/01/2024 |
| Removed the WEB_UID and WEB_GID from the config to avoid issues with ID’s conflicting inside the container. I will update again once I have some time to work around this. | 03/04/2024 |
| Some minor amends to sync up the information across this guide and the AdGuard one | 01/08/2024 |
| Removed two unneeded capabilities from the bridge version of the docker compose as they are not required. | 16/11/2024 |
| Guide updated for the all new v6 of Pi-hole (Note if you upgrade from v5 you effectively have to change all the compose settings in line with the new guide so might be worth just scrapping and starting fresh unless you really need stats etc Please note as recommended by the Pi-hole dev team I have added a Watchtower exclusion label to the compose so you can do manual updates. Automated ones could result in you losing internet access if a bad update takes place. Edited again today as I left in a variable that is not required in Host and Macvlan mode “DNSMASQ_LISTENING” sorry. | 20/02/2025 |
| Had a rethink of the Guide, and it has been rewritten to include an overdue request of including Unbound! | 24/02/2025 |
| Fixed my idiocracy adjusted the MACVLAN section to actually put Unbound on the same network.. Facepalm! | 16/03/2025 |
| I need to do some more testing of Unbound as part of the guide and I don’t currently have a lot of time so to avoid issues I have removed it from the guide for now. | 18/03/2025 |
| Added the NTP server port and environment variable so you can choose if you need it or not | 05/09/2025 |
What is Pi-hole?
If you are looking to get advertising and tracking blocked across all the devices on your network a Pi-hole will have you covered. It’s a locally hosted Domain Name Server and uses block lists to stop adverts.
This guide will get you set up with Pi-hole and cover some basic initial settings, I recommend checking out the documentation for all the various features available.
Host vs Bridge vs Macvlan Network Modes
You need to decide which mode of Networking you want to use, I have outlined the key points below in general order of preference.
Host:
Host mode uses your NAS underlying network to run the containers network services, so it will be reliant on the NAS not using any of the required ports for the container. However, this makes it easy to set up, but you need to make sure no other service is using the required ports. All your clients will appear correctly as independent devices and stats.
Bridge Mode:
The main benefit of Bridge Mode will be the ease of setup however you will find that all clients on your network will appear under the same IP as the Bridge 172.20.0.1. This won’t impact ad blocking, but it will mean you can’t apply device specific rules etc.
Macvlan:
This gives you the benefit of Pi-hole having its own IP address on your network, all clients appear with their real IP addresses allowing you to assign specific rules and give you some nicer stats. However, one downside is that your NAS will not be able to use Pi-hole for DNS, due to the additional security features of Macvlan and its communication with its host. This is generally not an issue unless you wanted to use your Ad blocking with Tailscale.
Please note if you have a bonded network connection (two LAN ports bonded into one) then try using ‘bond0’ in the network set up element of this guide.
Let’s Begin
In order for you to successfully use this guide you will need to check that your Router allows you to change your network DNS servers, this is usually found in the DHCP settings.
Please follow the initial guide below to get a restricted Docker user set up, then come back here.
Folder Setup
Let’s start by getting some folders set up for the container to use. Open up File Station create the following.
/docker/projects/pihole-compose
/docker/pihole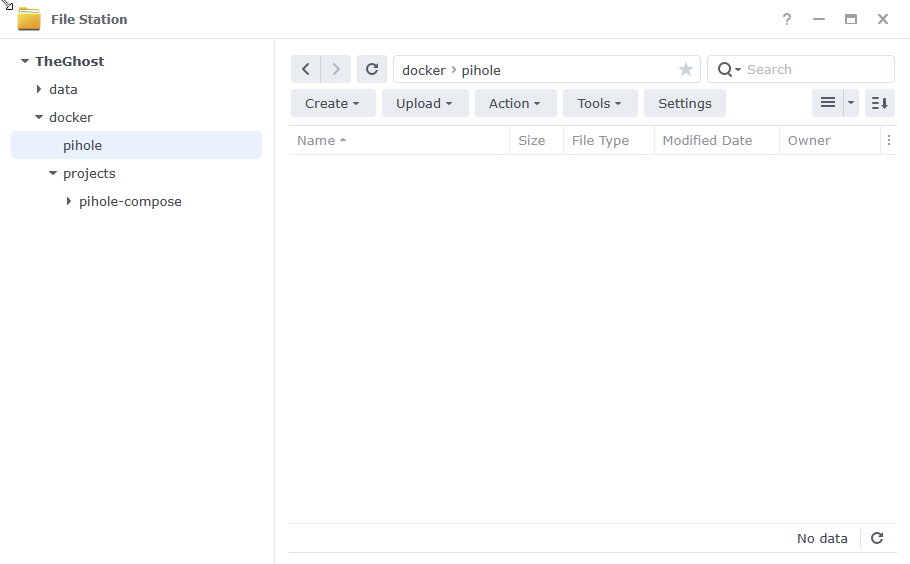
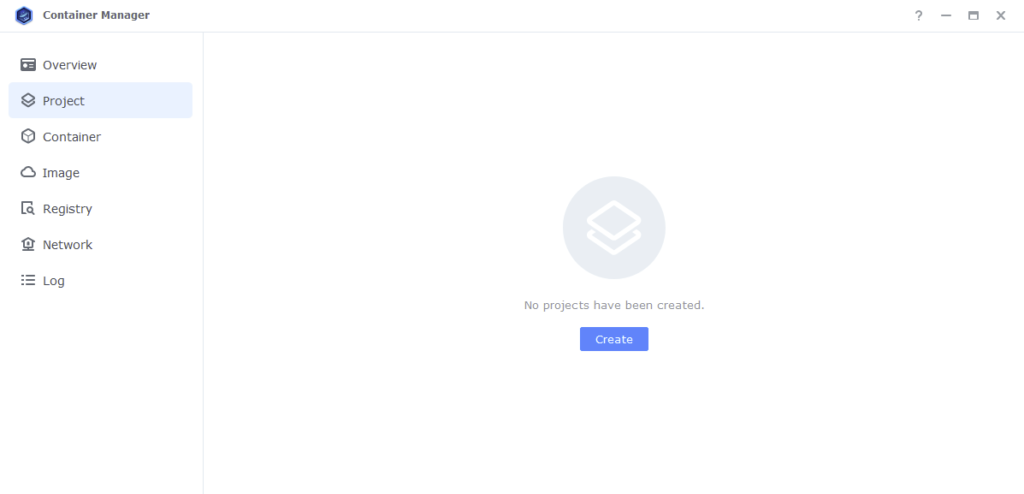
Container Manager
Next we are going to set up a ‘Project’ in Container Manager. Open up Container Manager and click on Project then on the right-hand side click ‘Create’.
In the next screen we will set up our General Settings, enter the following:
| Section | Setting |
|---|---|
| Project Name: | pihole |
| Path: | /docker/projects/pihole-compose |
| Source: | Create docker-compose.yml |
The code section of the below will be blank until we move to the next step.
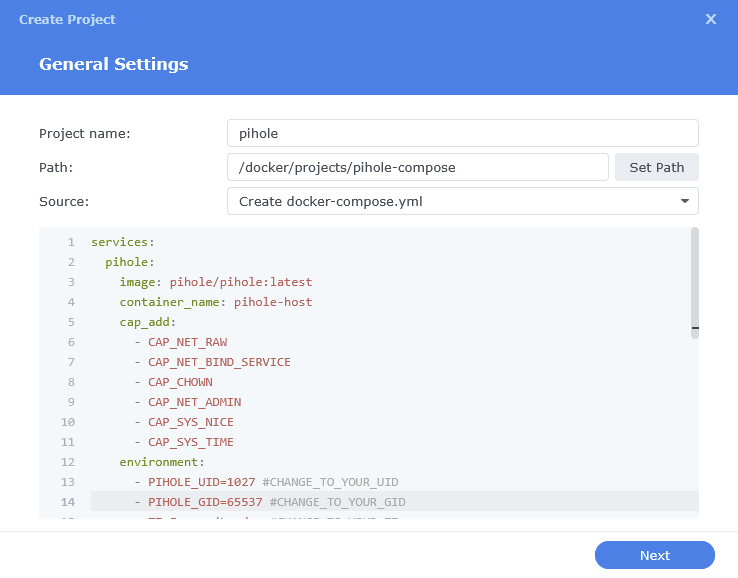
Next we are going to drop in our docker compose configuration. You now need to decide if you are going to go with Host, Bridge Mode or Macvlan. Jump to the appropriate page to follow the setup.
Host – Page 2
Bridge – Page 3
Macvlan – Page 4
Thank you so much for the guide. I have it up and running on my DS923+ for a couple of months and it runs smoothly!
However, for the v6-release of pihole I decided to revisit the project, as I am fairly new to docker and want to use my DS to host different containerized
projects as well.
And I stumbled upon something I can’t quite get my head around:
– even if I followed your instructions and set up a restricted user and group and listed their UID/GID in the docker compose for macvlan
– when i check with ‘docker exec pihole-macvlan whoami’, it says the container runs with root
– when i additionally include the “user” directive to the compose file and rebuild, it won’t work at all. Log says, a ton of operations fail due to missing permissions
So, the container runs with root privileges, event though i defined PIHOLE_UID and PIHOLE_GID to the restricted user.
Do you have any idea why that is? Thanks so much for your effort!
compose yaml looks like this:
services:
pihole:
image: pihole/pihole:latest
container_name: pihole-macvlan
cap_add:
– CAP_NET_RAW
– CAP_NET_BIND_SERVICE
– CAP_CHOWN
environment:
– PIHOLE_UID=1031 #CHANGE_TO_YOUR_UID
– PIHOLE_GID=65536 #CHANGE_TO_YOUR_GID
– TZ=Europe/Berlin #CHANGE_TO_YOUR_TZ
– WEBPASSWORD=################
– DNSMASQ_LISTENING=local
– WEB_PORT=8000
– DNSMASQ_USER=pihole
– FTLCONF_LOCAL_IPV4=192.168.178.3
volumes:
– /volume1/docker/pihole/dnsmasq.d:/etc/dnsmasq.d
– /volume1/docker/pihole/pihole:/etc/pihole
networks:
macvlan:
ipv4_address: 192.168.178.3
restart: always
networks:
macvlan:
name: macvlan
driver: macvlan
driver_opts:
parent: eth0
ipam:
config:
– subnet: “192.168.178.0/8”
ip_range: “192.168.178.254/8”
gateway: “192.168.178.1”
Hey mave2k
So the user ID elements fall into a few different things..
You have some containers such as the linuxserver builds that have an internal non root user and via the PUID and PGID variables will assign those to that internal user.
Others will run as root internally and then assign your permissions to that root user (quite common)
Then there are the containers that support/use the ‘user’ element of a compose and run as that user.
And then also don’t also confuse Docker itself as that generally runs under root (it does on Syno) however there are methods on other setups to run docker itself as non-root
Pihole falls into the camp where its a mix of a root user and also some non root elements for the webUI..keep in mind this is inside the container so its not actual root on host…
Followed the guide and it worked perfectly! Now it’s a few weeks later and I went to log into pihole and the password I set and was using does not work. I restarted the project, no luck.
I tried to reset the password using the instructions the page gives “sudo pihole setpassword” but pihole is not found. I think it’s because I’m logged in as my admin account in a terminal window and I should be the dockerlimited account (which is what I used in the yaml) but am not sure. Any guidance on how to reset the password? Feel really dumb lol.
Hey – We have had this a few times in Discord it feels like its a bug that has carried forward from the initial release..
Step should be..
1) Stop the Project and remove the password line from the compose
2) Build the Project (Save and say Yes to pop up)
3) Then in Container Manager > Pihole Container > Action > Open Terminal > Create..
4) Click on the bash window that is created enter the command “pihole setpassword” and it will let you set a password
Thanks for this guide!
i was struggling a bit, but in the end the bridge mode worked for me.
But I could not figure out why unbound was not complying.
turned out that unbound and pi hole is running in separate containers. Unbound for me refused to expose port 5335 to anybody, and pi hole was not able to reach the unbound container on either my nas ip (like my own subnet ip: 192.168.0.122 for example), neither on 127.0.0.1.
what i ended up doing is: since unbound was exposing port 53, and unbound and pi hole was on the same docker network, setting
unbound#53
as the only upstream DNS server in the pi hole did the trick.
i am not sure if i was doing something wrong, or if it is a good idea to do it this way, (i have no idea what i am doing) but at least it is working now.
Thanks for the update – Until I can do some more thorough testing here, I am removing the Unbound element of the guide. I have been really lacking time recently and that has shown in the quality of the guide Unbound element. I usually spend a month or more using in real life before doing guide updates.. You are likely doing this correctly and it’s my error.
Thanks for these… I’ve been running Synology pihole (macvlan) for a while and just setup tailscale…
However once my PC is added to Tailscale, I cannot access webpage or ping pihole
I can ping everything else on same subnet, just the pihole is not responding
Synology is set as Exit node
pihole ip is in the Tailscale DNS
I’ve also set pihole Settings > DNS > Interface Settings >
was local
now permit all origins
Also tried “allow local network access” on the tailscale menu…
Once I disconnect the PC from Tailscale, ping/web to pihole works.
Is there something I missed?
Keep in mind when Pi-hole is in macvlan the Host (your NAS) cannot access it along with anything running on the NAS. To combine with Tailscale you will need to run in Host or Bridge mode.
Hi,
I have a little issue i can’t resolve.
I followed the mcvlan guide and it’s up and running.
But the issue is the following.
I’ am able to browse my local network but can’t go outside so no websites are available.
When i go into the PiHole settings and set google as my dns everything is working.
I think there is an issue with the unbound in my docker but don’t know where to look.
Any thoughts?
Hey – let me come back to you shortly, I may have made an error in the combination of both network wise.
Thx.
I case it may help to rule out a user error.
Here’s my yaml.
[SNIP]
Hey snipped your compose – see White Swan’s comment for the fix – I will be adjust the guide very shortly!!
Thx to you two guys for the fix, it’s up and running.
My DS932+ has something to kill the time and i can rest my Raspberry.
Only thing i noticed after installation and still monitoring.
I had to change the port in the custom dns setting from #5335 to #53.
Don’t know why but did so after still seeing ads and wondered why.
After changing the port it worked.
See my replies above to similar comments such as ZarqEon.
Hi
Your unbound.conf file contains the following
server:
interface: 0.0.0.0
port: 53
When I set up unbound following the macvlan method for pihole, the dns service does not resolve addresses, and I’ve had to reinstate 1.1.1.1 as my dns provider in pihole.
I don’t think it’s related, but I had previously set up pihole through macvlan using your tutorial, and I now want to install unbound too.
Hi
The issue is that Unbound is installed on a bridge network, while Pi-hole is running on a Macvlan network. Containers on Macvlan networks cannot communicate directly with the host (your Synology DSM, in this case).
I’ve found a workable solution: place Unbound on the same Macvlan network as Pi-hole. This ensures that both Pi-hole and Unbound can communicate with each other directly, as they would both be on the same network segment. This can be done as follows:
unbound:
image: klutchell/unbound
container_name: unbound
ports:
– “5335:53/tcp”
– “5335:53/udp”
volumes:
– /volume1/docker/unbound:/etc/unbound/custom.conf.d
networks:
macvlan:
ipv4_address: 192.168.0.130
of course substituting the desired ip address for your unbound instead of 192.168.0.130
Then, the instructions for Point Pi-hole at your Unbound instance (Optional) change to:
Click on Settings, then DNS. You will need to turn off any existing public DNS providers if any are ticked (Usually Google). Then click the Custom DNS drop down and enter your chosen Unbound IP address:
For example 192.168.0.130
Thank you beat me to the punch, been AFK all day 🙁
I will get the mistake fixed ASAP.
Happy to contribute; here are some points:
– In “If you used Macvlan enter the ip you used for the Unbound container followed by #5335” on page 5 – for me #53 works, not #5335
– In terms of updating the router DNS, I’m using pihole so the router DNS points to the pihole which is on a macvlan, not (for) “Macvlan = The address you chose for the container on the line ‘ipv4_address:’ ” , and the pihole specifies the ip address for Unbound; is there a different way it should be done?
– The Unbound logs consistently report problems with DNSSEC
I’d appreciate your input
Hey, see my reply to ZarqEon. – I am pulling the Unbound element of the guide until I can do further tests here.
Based on our Discord group, the above should have worked with #5353, but something is not right.