Important or Recent Updates
| Historic Updates | Date |
|---|---|
| New DSM7.2 Container Manager Update | 01/05/2023 |
| Added additional security option to the compose to restrict the container from gaining new privileges as well as umask variable | 25/10/2023 |
| Somehow at some point a paragraph about forwarding port 32400 went missing, I had never added it! But it’s in now!! | 13/06/2024 |
| Changed ‘version’ variable to ‘docker’ this will stop in container server updates! | 01/07/2024 |
In this guide I am going to take you through the setup of Plex in Docker using Container Manager.
Plex Pass
You will only benefit from hardware transcoding if you have an active Plex Pass either monthly or lifetime. If you don’t have one you can either follow this guide or jump over to the non hardware transcoding version.
Does my Synology support Hardware Transcoding?
Before we do anything else, you need to make sure your model of Synology has hardware transcoding capabilities. You need to do a quick lookup via the linked Google Sheet below, this is updated by Plex and makes it super easy to look up your model of NAS.
If you find that hardware transcoding is not available on your model you can jump back over to the standard guide on the menu.
Let’s Begin
As usual, it’s important you complete the two proceeding guides which will get your folder structure and docker, user setup.
Folder Setup
Let’s start by getting some folders set up for the container to use. Open up File Station create the following.
/docker/projects/plex-compose
/docker/plex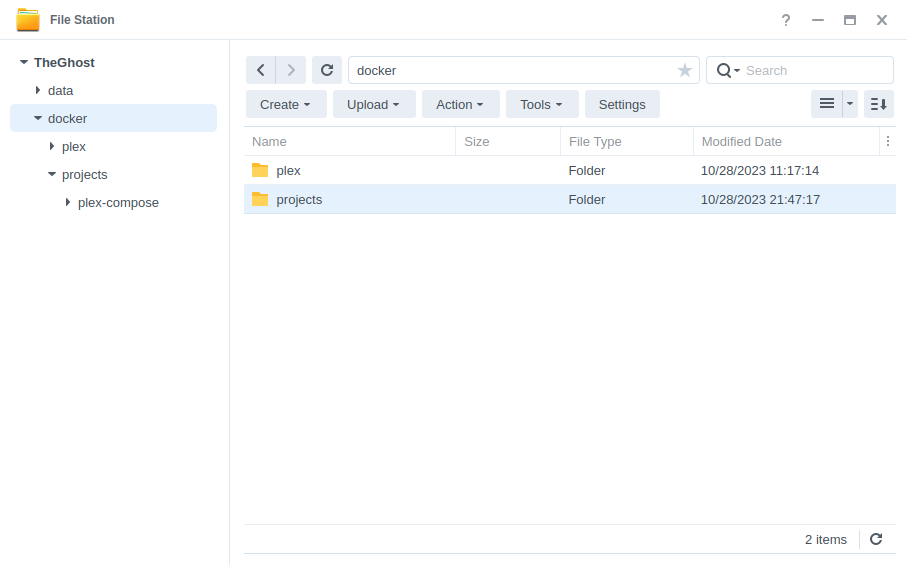
Container Manager
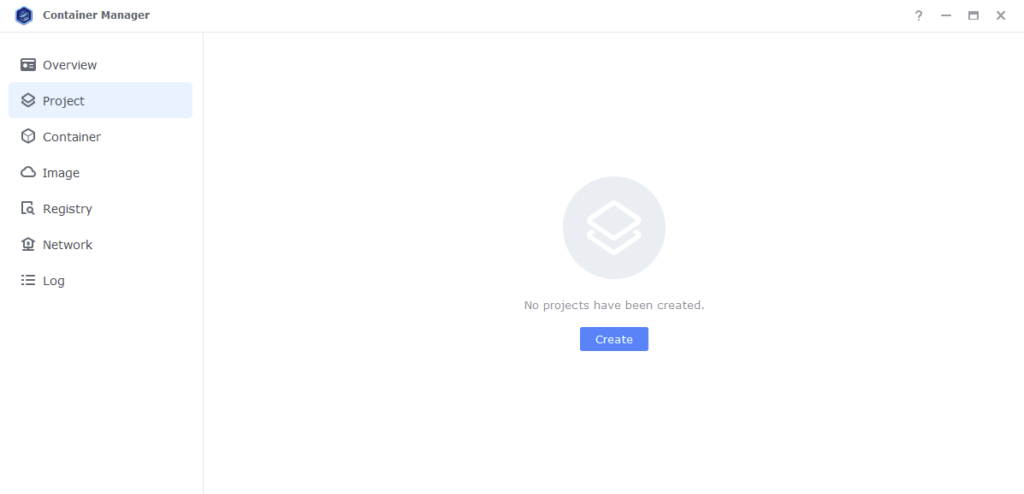
Next we are going to set up a ‘Project’ in Container Manager. Open up Container Manager and click on Project then on the right-hand side click ‘Create’.
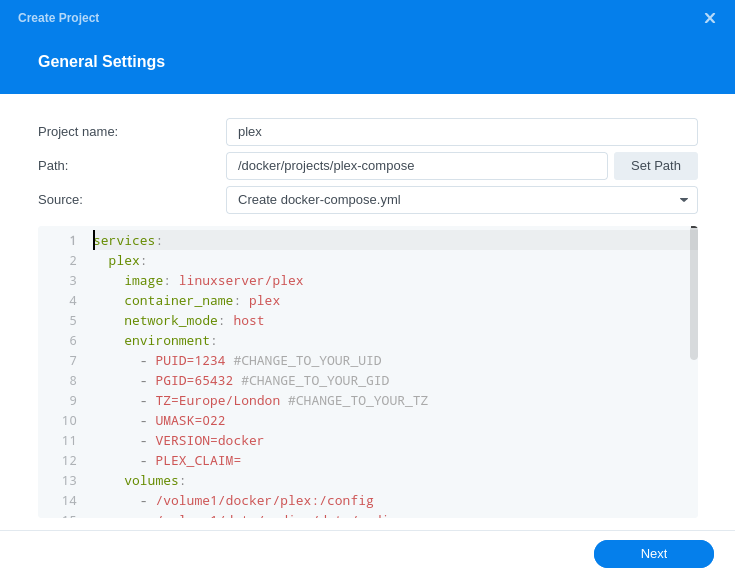
In the next screen we will set up our General Settings, enter the following:
| Section | Setting |
|---|---|
| Project Name: | plex |
| Path: | /docker/projects/plex-compose |
| Source: | Create docker-compose.yml |
Next we are going to drop in our docker compose configuration copy all the code in the box below and paste it into line ‘1’ just like the screenshot.
services:
  plex:
    image: linuxserver/plex:latest
    container_name: plex
    network_mode: host
    environment:
      - PUID=1234 #CHANGE_TO_YOUR_UID
      - PGID=65432 #CHANGE_TO_YOUR_GID
      - TZ=Europe/London #CHANGE_TO_YOUR_TZ
      - UMASK=022
      - VERSION=docker
      - PLEX_CLAIM= #Your Plex Claim Code
    volumes:
      - /volume1/docker/plex:/config
      - /volume1/data/media:/data/media
    devices:
      - /dev/dri:/dev/dri
    security_opt:
      - no-new-privileges:true
    restart: always
A note on Network Mode
You will notice that for Plex we don’t put it on the normal bridge network, this is because DSM reserves the DLNA ports Plex requires in order to use DLNA. So we run in Host mode, so it can share the ports.
Environment Variables
We need to make some changes in order for the container to have the correct permissions to save its configuration files and to have access to your media.
| Variable | Value |
|---|---|
| PUID | (required) The UID you obtained in the user setup guide |
| PGID | (required) The GID you obtained in the user setup guide |
| TZ | (required) Your timezone wikipedia.org/wiki/List_of_tz_database_time_zones |
| PLEX_CLAIM | Please note the PLEX_CLAIM variable is optional and not always required. You can remove this line if you don’t need it or come back and add it if you are unable to sign in to your server on start up. To get the code go to https://plex.tv/claim and sign in, then put the code you receive after the ‘PLEX_CLAIM=’. You have 4 mins to finish the guide after doing this, so best to grab it just before running the project. |
Volumes
I have pre-filled this section to pass the correct paths, the only thing that you may need to change is the /volume1/ if your file paths are on a different volume.
Click ‘Next’
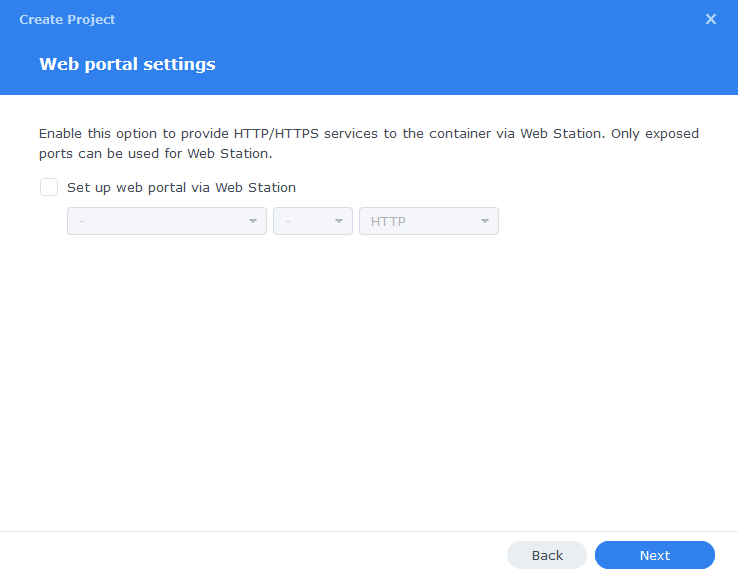
You do not need to enable anything on the ‘Web portal settings’ screen click ‘Next’ again.
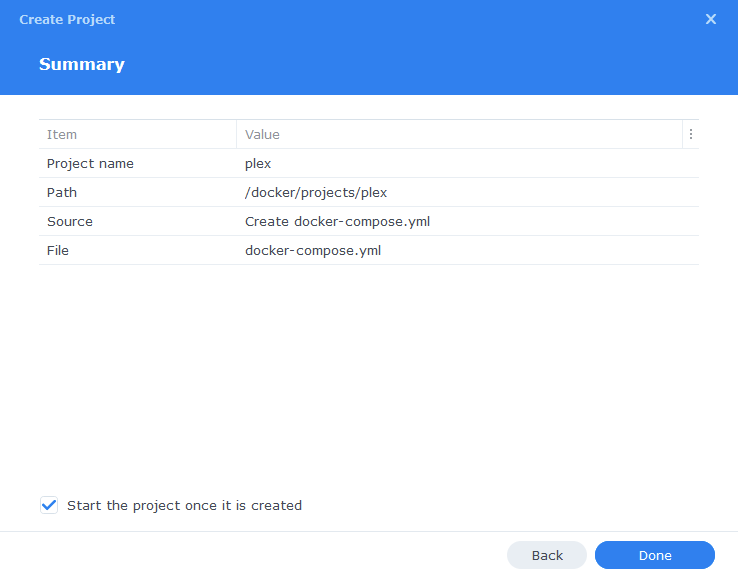
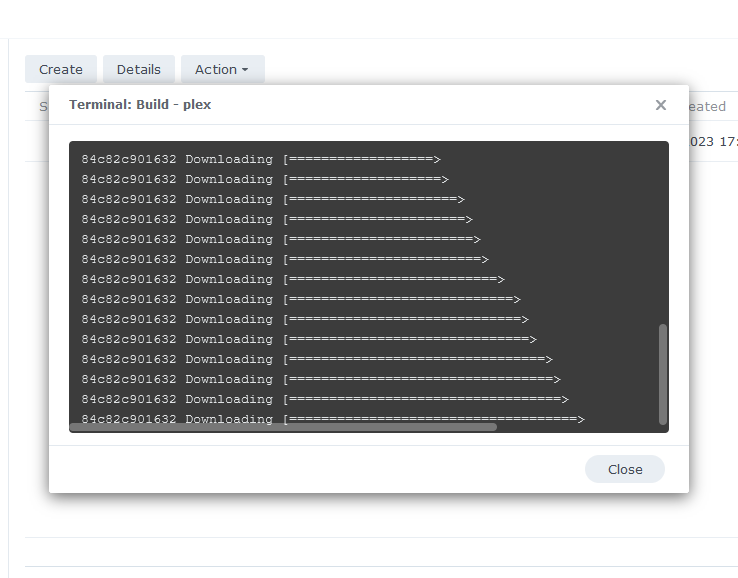
On the final screen click ‘Done’ which will begin the download of the container images and once downloaded they will be launched!
The image will now be downloaded and extracted. You should see ‘Code 0’ when it has finished.
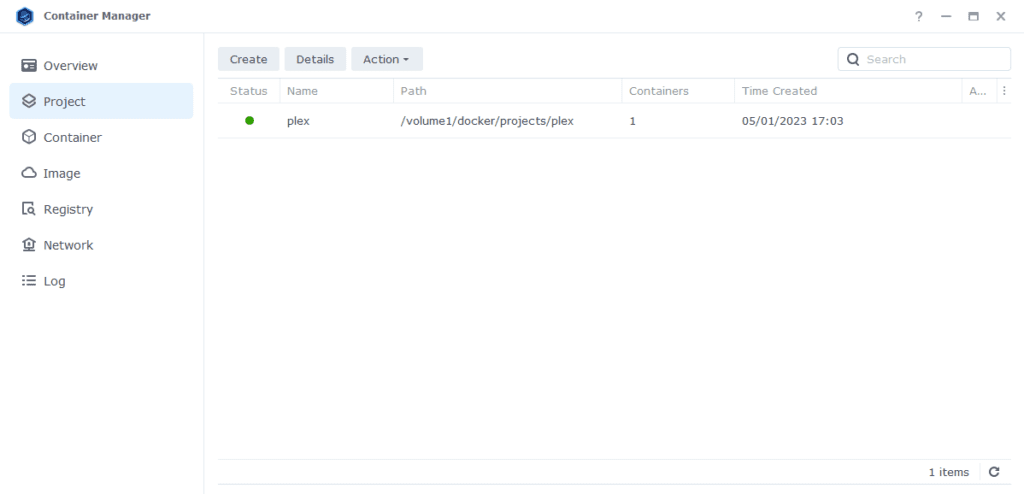
You will now see your Plex running and should have a green status on the left-hand side.
Firewall Exceptions
(Skip if you don’t have the Firewall configured)
If you have enabled and configured the Synology Firewall you will need to create exceptions for any containers that have a Web UI or have any incoming or outgoing connections. This section covers the basics of how to add these. (Please note this is a generic section and will not show the specific ports used in this guide however it applies in the same way)
Also, I would like to refer people to the great guide on getting the Firewall correctly configured over on WunderTechs site.
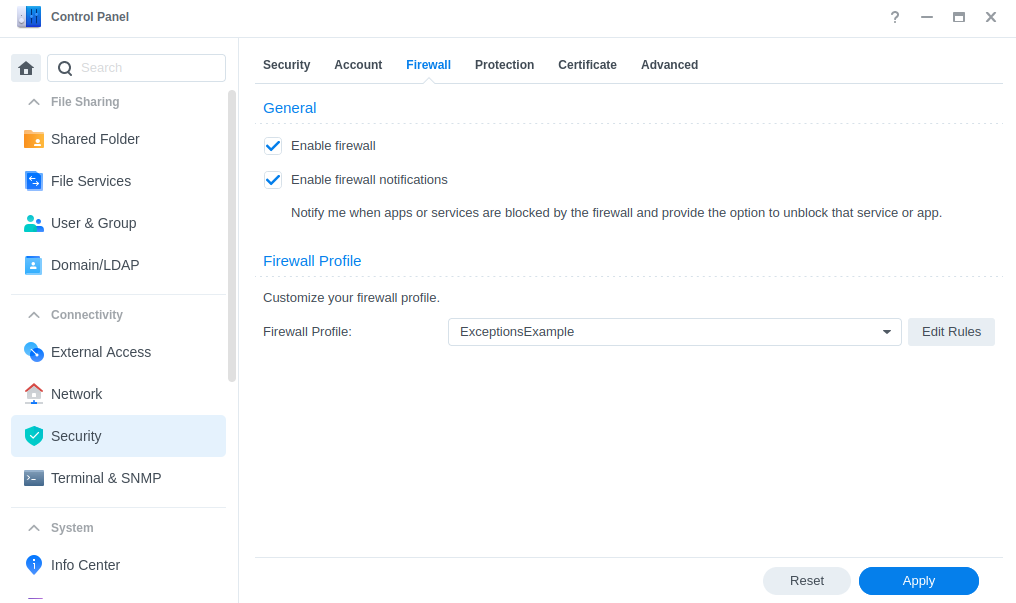
Head into the Control Panel> Security > Firewall, from here click Edit Rules for the profile you set up when you enabled the Firewall.
Next click on Create and you will see the screen below. Source IP and Action will be automatically selected to All and Allow, I will leave it up to you as to your own preference on whether you want to lock down specific Source IPs from having access. In this example we will leave as All.
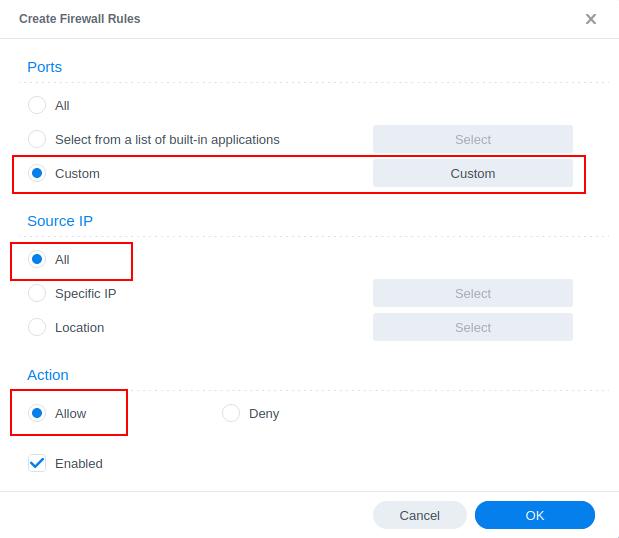
You will now choose ‘Custom‘ and then the Custom button
Now select Destination from the drop-down menu, most web based containers require TCP access but check the guide as it will show the port and protocol. Then add comma separated ports. Then press OK.

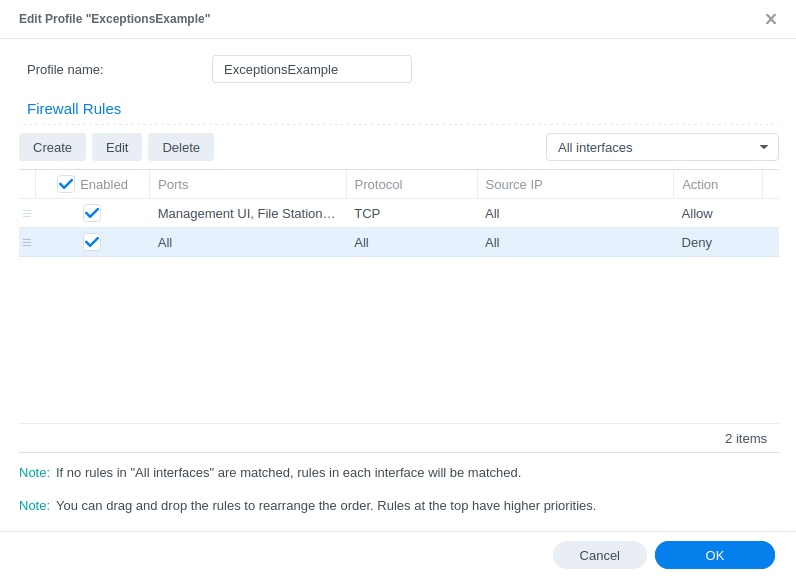
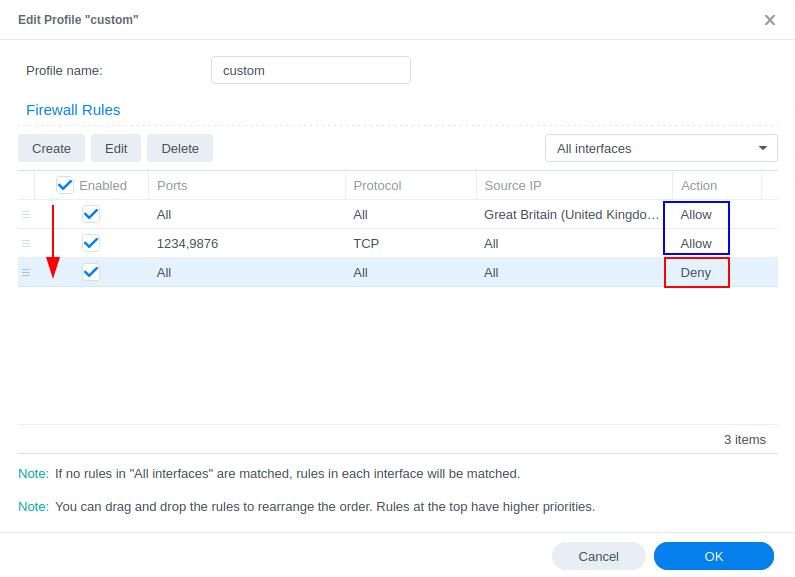
Click OK a couple of times to get back to the main screen. You will see by default the new rule is added to the bottom of the list. You must always have your Block All rule last in the list as the rules are applied top down so move your container up.
You have now completed the Firewall changes and can continue with the guide.
Port Forwarding
In order to use Plex remotely and stream your local media you need to forward port 32400 from your Router to the NAS IP on the same port. This varies for everyone’s router so check the manual on how to do this.
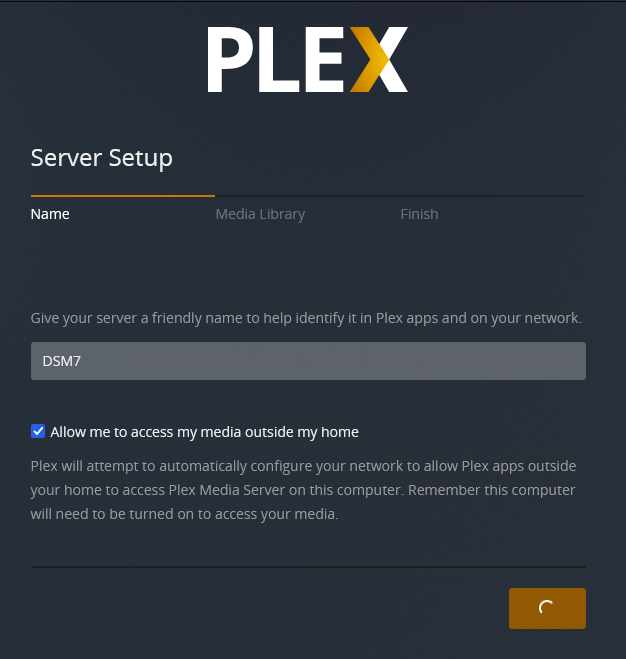
Plex Initial Setup
After a few minutes you should be able to access the server and go through the Plex setup by going to the IP of your NAS in your browser followed by port 32400/web/
e.g. 192.168.0.45:32400/web/
You will be asked to sign in or sign up for an account if you don’t have one already.
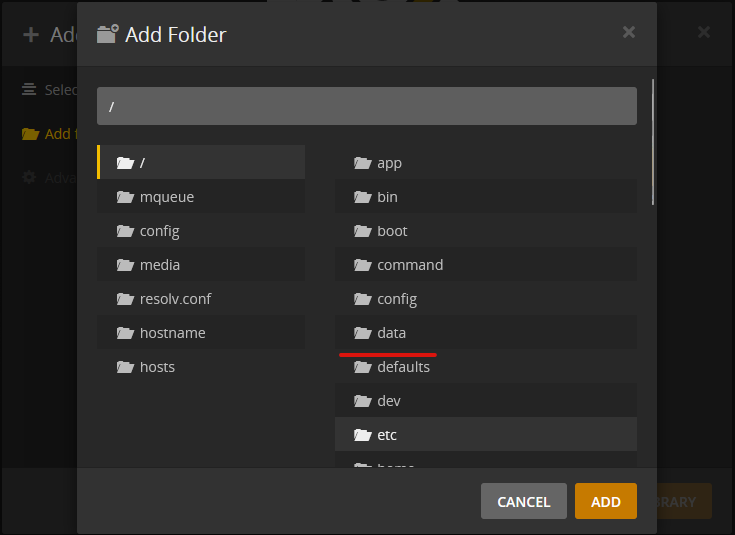
You should now be able to add your media which will be in the /data/media folder within Plex
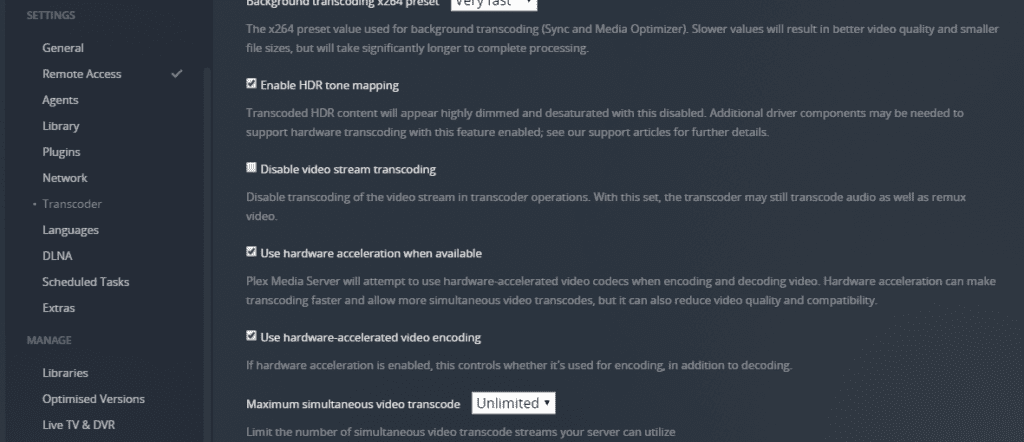
Once you have got to the main Plex interface make sure you go into the settings and turn on
- Enable HDR tone mapping
- Use hardware acceleration when available
- Use hardware-accelerated video encoding
That’s it you are all setup. When a new server update is available you will just need to restart the container, and it will automatically download the latest update.
Looking for some help, join our Discord community
If you are struggling with any steps in the guides or looking to branch out into other containers join our Discord community!

Buy me a beverage!
If you have found my site useful please consider pinging me a tip as it helps cover the cost of running things or just lets me stay hydrated. Plus 10% goes to the devs of the apps I do guides for every year.


I had Plex working great in Docker. When upgraded to Docker Container / DSM 7.2, Plex crashes. Looking at the log, it says: libc++abi: terminating with uncaught exception of type boost::filesystem::filesys
tem_error: boost::filesystem::create_directories: Permission denied [system:13]:
“/config/Library/Application Support/Plex Media Server/Cache”, “/config/Library/Application Support/Plex Media Server/Cache
I have tried changing the permissions to that path, but no luck. Any thoughts?
Can you try temporarily renaming the two cache folders (stop plex first) then start it up and see if it recreates them.
Interesting that you say 2 folders, because I thought it should be just one. When I searched the Synology, there is an install under Docker folder and one under PlexMediaServer. I renamed both of the folders to Cache_old and restarted Plex. Same error being thrown.
Here is the entire process as shown in Terminal. It is stuck in a loop:
Starting Plex Media Server.
libc++abi: terminating with uncaught exception of type boost::filesystem::filesys
tem_error: boost::filesystem::create_directories: Permission denied [system:13]:
“/config/Library/Application Support/Plex Media Server/Cache”, “/config/Library/Application Support/Plex Media Server/Cache”
Stopping Plex Media Server.
kill: usage: kill [-s sigspec | -n signum | -sigspec] pid | jobspec … or kill –
l [sigspec]
Before the upgrade to DSM 7.2 / Container Manager, this instance was rock solid for a very long time (over 2 years). I don’t understand what is happening, but it seems to be permissions based by the error. While I can change the permission on the docker folder to allow System users to read and write, Synology won’t let me change the permissions on the PlexMediaServer folder in the same way. Not sure if that helps…
My mistake on the two folders – however interesting you have the old Package version as well.
Did you set the container up from fresh using container manager or is this the version from prior to the upgrade but keeping the original files in the /docker/plex/ folder…
Yes, it is the original “Docker” package. I made the mistake of seeing a message that a new DSM was available and installing it without reviewing the release notes. When it rebooked “Docker” was gone and “Container Manager” was in its place. My Plex container no longer worked (not Tautulli, but those are the only two Dockers I had).
The error seems to be permissions based, but I can’t seem to fix it. My biggest concern is that my watched history remains. If I need to set something up from scratch, I can – but I’d love to maintain my watch history.
I would try deleting the container. Not the configs as they are safe in /docker (make sure you have backups) and then set the container up using the new method in Container Manager.
Failing that we can try a permission fix with the following which assumes your setup has a dockerlimited USER and that your Docker share is on volume1. You do via SSH.
sudo chown -R dockerlimited:users /volume1/docker
sudo chmod -R a=,a+rX,u+w,g+w /volume1/docker
I did a quick new build and noticed a few things that are definitely pain points for Container Manager that were not for Docker. My file paths in Docker contained uppercase letters, spaces, and dashes. Container Manager is fine with that on the real path side, but not on the container side., so I had to create all lowercase and use underscores for that.
I fixed that in the original build, but I am still running into the permission issue with the Cache.
As far as function – it is a hybrid of what I want. My settings (users, etc.) seem to be preserved. My original library structure exists in the menu, but not in the settings. When I recreate it and scan, some of the movies come up as watched, but not all of them, so the watch history is 60-80% there. No seeming rhyme or reason for what is marked watched or unwatched. Of course, it will take a long time to detect intros, credits, and rebuild all of the chapter markers. If you have any ideas on how to repoint the library structure, watch history, and intro/credit/thumbnails, I’m all ears. Of course, I lose all of my custom sorting and collections, too. So that all sucks a lot.
At least I can watch some things over the weekend…
Hey
I don’t understand how / why you needed to change paths as container manager should have no issues with the spaces in the yml/compose. Did you set it up as per the guide via the Projects page or edit the container in the UI? I would restore a backup from the day before you made the changes and set up as per the guide. This should be a completely seamless change over.
>>Q1. I don’t understand how / why you needed to change paths as container manager should have no issues with the spaces in the yml/compose. Did you set it up as per the guide via the Projects page or edit the container in the UI?
I did, I even followed your suggested path of – /volume1/data/media:/data/media
The problem is I have multiple folders for my own organizational purposes, so I only added one initially as proof of concept. Once your method worked, I edited in the GUI and the GUI will not allow spaces/uppercase/dashes.
>>Q2. I would restore a backup from the day before you made the changes and set up as per the guide. This should be a completely seamless change over.
I just tried and here is what I found:
1. Since I pointed to the original path and Plex has made changes there, I wasn’t able to fully back out/restore. (This is fine with me)
2. When I used the original file paths (with spaces/uppercase/dashes) in the compose, the kind of work. When I browse for folders withing the library editor of Plex, I see the uppercase and dashes, but all spaces are replaced with \040. This is functional, but looks dumb. (Under Docker it appeared as expected. For example TV – Ended. Now it shows as TV/040-/040Ended
I appreciate all of your help! By using your guide I was able to go from Docker completely screwed up to functional, but with about 25% of view history incorrect. While not perfect (It is still scanning for credits/intros, I had to unpin/re-pin the “new” library, etc.), these are minor inconveniences compare to a legit new install. My users, friends, other settings, etc. are in place (though with “new” libraries, I had to reset the shared library function).
Anyhow, seems my problems are unique, so I appreciate your time. Hopefully this chain may help others.
First off my apologies as I should not answer comments when multitasking as I am completely wrong about the internal paths. You can have spaces but it requires formatting differently.
You would do the below with a double // or quote the whole section “”
volumes:
– /volume1/data/media folder:/data/media folder//
or
– “/volume1/media folder2:/media folder2”
Excuse the brief reply want to get this in to help out first…
Why is Plex built as a Project and not as a Container?
We use the Project feature (aka Docker Compose) in order to pass the graphics hardware of your NAS into the Container when it is built which is not possible via the UI
That’s the /dev/dri section of the yml
Thanks for the explanation. Makes sense.
if i follow this guide , i can get plex hardware transcoding even i haven’t pay Plex Pass ?
Hey, you need a Plex Pass in order to use Hardware Encoding.
Oh, never mind. I somehow skipped the step creating the /docker/plex directory above. Feel free to delete these comments
Looks like a minor error in the volumes:
– /volume1/docker/plex:/config
should be:
volumes:
– /volume1/docker/projects/plex:/config
Is this confirmed?
The paths in the guide are correct 🙂
I ran into this question as well. Why not just one path for both the project yaml config file AND the library? Why is the config path with the library folder one level up, directly under the /Docker path? Is there a reason not to have the Plex config path nested in the projects folder?
Hey
We avoid putting the compose in a folder the container has access to. This is for security, if the container is compromised someone could then make malicious edits to the file without you knowing, such as adding paths to your other files. I just used a projects folder to keep things consistent as Container Manager calls every single project compose the same name they also need to live in a separate folder for each.
It’s ultimately up to you how you would like to lay out the config structure.