Last updated on 21 April 2025
Important or Recent Updates
| Historic Updates | Date |
|---|---|
| Fresh new guide by popular demand | 28/09/2023 |
| Updated with new steps to obtain and change WebUI password | 21/11/2023 |
| Issue with passwords has been fixed in 4.6.2 so removed tty line from yaml | 29/11/2023 |
| Added TORRENTING_PORT= variable to save a step updating it in the UI | 09/04/2025 |
What is qBittorrent?
qBittorrent is a torrent downloader used to both manage torrent downloading and seeding.
If you are looking to combine a VPN with this set up see the GlueTUN guide on the left Menu
Useful external links for this guide
Linuxserver qBittorrent Container GitHub
qBittorrent Forums
Let’s Begin
In this guide I will take you through the steps to get qBittorrent up and running in Docker
In order for you to successfully use this guide, please complete the three preceding guides
- Docker Package, SSD and Memory Recommendations
- Step 1: Directory Setup Guide
- Step 2: Setting up a restricted Docker user
- Step 3: Setting up a Docker Bridge Network (synobridge)
Folder Setup
Let’s start by getting some folders set up for the containers to use. Open up File Station create the following.
/docker/projects/qbit-compose
/docker/qbittorrent
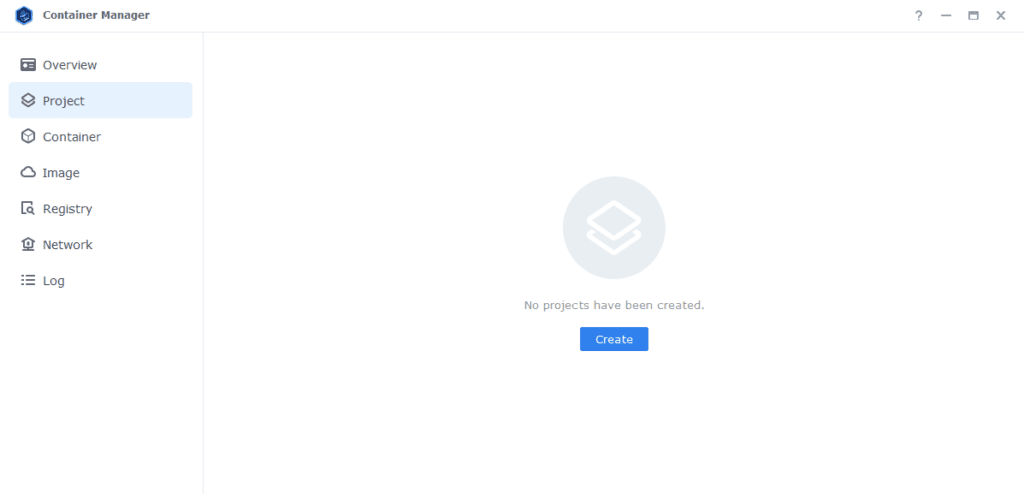
Container Manager
Next we are going to set up a ‘Project’ in Container Manager, a project is used when you want one or more to all be loaded together and uses Docker Compose to do this.
Open up Container Manager and click on Project then on the right-hand side click ‘Create’
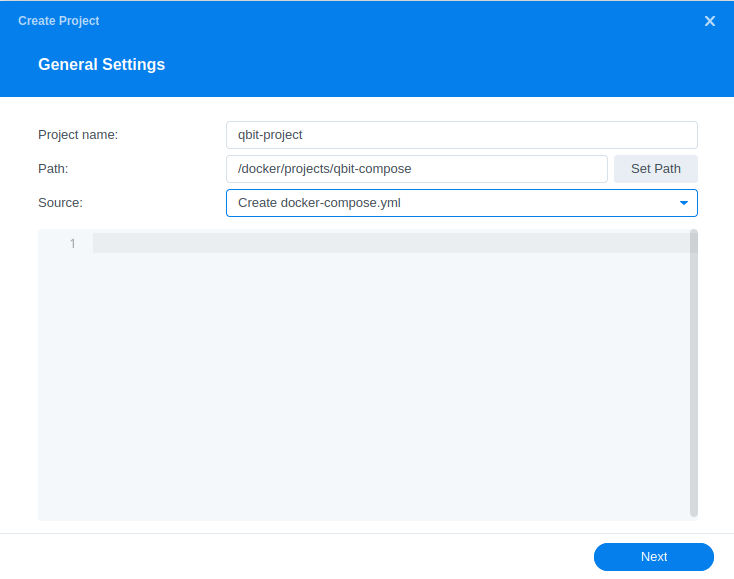
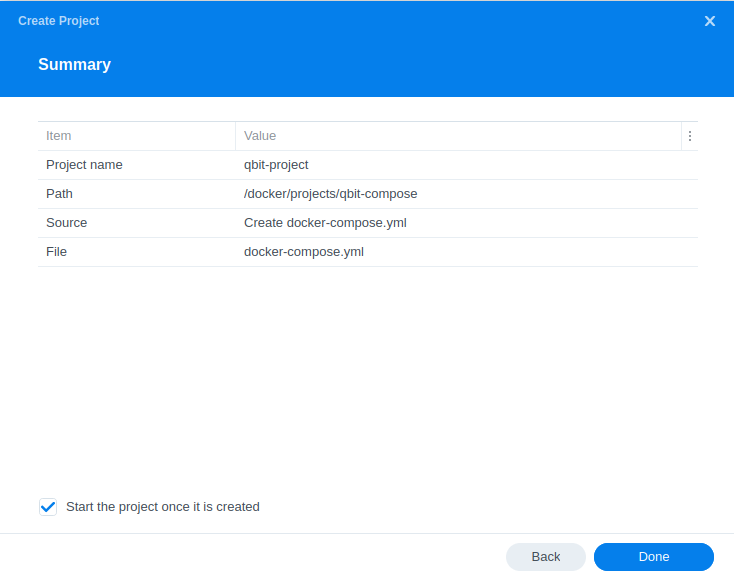
In the next screen we will set up our General Settings, enter the following:
| Section | Setting |
|---|---|
| Project Name: | qbit-project |
| Path: | /docker/projects/qbit-compose |
| Source: | Create docker-compose.yml |
Next we are going to drop in our docker compose configuration copy all the code in the box below and paste it into line ‘1’ just like the screenshot
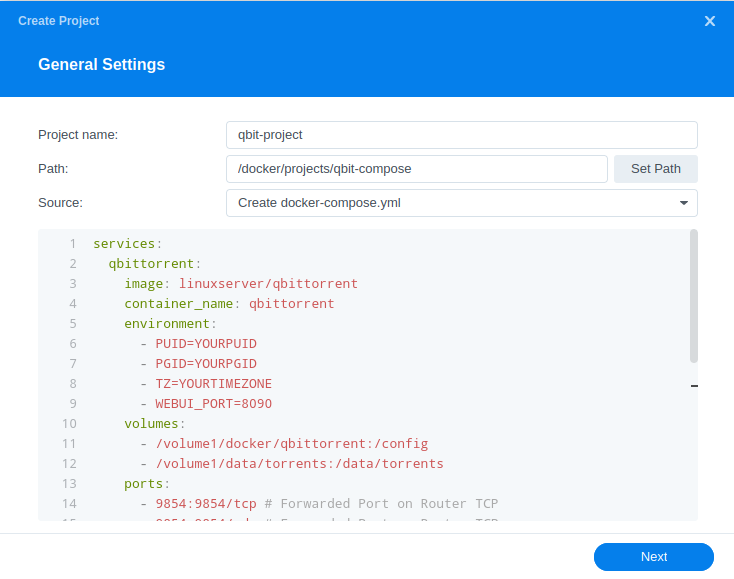
services:
  qbittorrent:
    image: linuxserver/qbittorrent:latest
    container_name: qbittorrent
    environment:
      - PUID=1234 #CHANGE_TO_YOUR_UID
      - PGID=65432 #CHANGE_TO_YOUR_GID
      - TZ=Europe/London #CHANGE_TO_YOUR_TZ
      - WEBUI_PORT=8090
      - TORRENTING_PORT=9854
    volumes:
      - /volume1/docker/qbittorrent:/config
      - /volume1/data/torrents:/data/torrents
    ports:
      - 9854:9854/tcp # Forwarded Port on Router TCP
      - 9854:9854/udp # Forwarded Port on Router TCP
      - 8090:8090/tcp # port for qbittorrent webui
    network_mode: synobridge
    restart: always
Environment Variables
We are now going to amend some key variables to make sure the container has access to our folders and also knows where we are in the world. Don’t change any other settings other than those I mention.
| Variable | Value |
|---|---|
| PUID | (required) The UID you obtained in the user setup guide |
| PGID | (required) The GID you obtained in the user setup guide |
| TZ | (required) Your timezone wikipedia.org/wiki/List_of_tz_database_time_zones |
Ports
Nothing to change here, the web UI will run on port 8090 and the ports we will be using for the torrent protocol will be 9854 for TCP and UDP.
Volumes
By default, I have assumed you have your config files stored on /volume1 if these are located on another volume amend this line accordingly.
Click ‘Next’
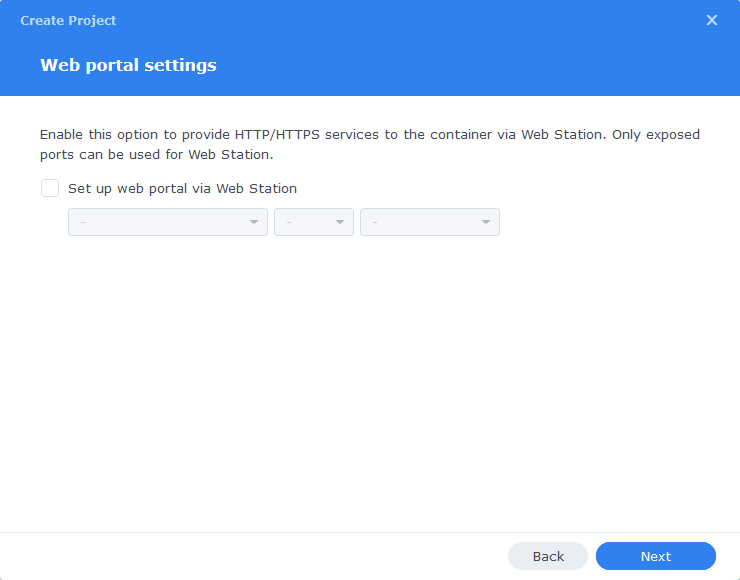
You do not need to enable anything on the ‘Web portal settings’ screen click ‘Next’ again
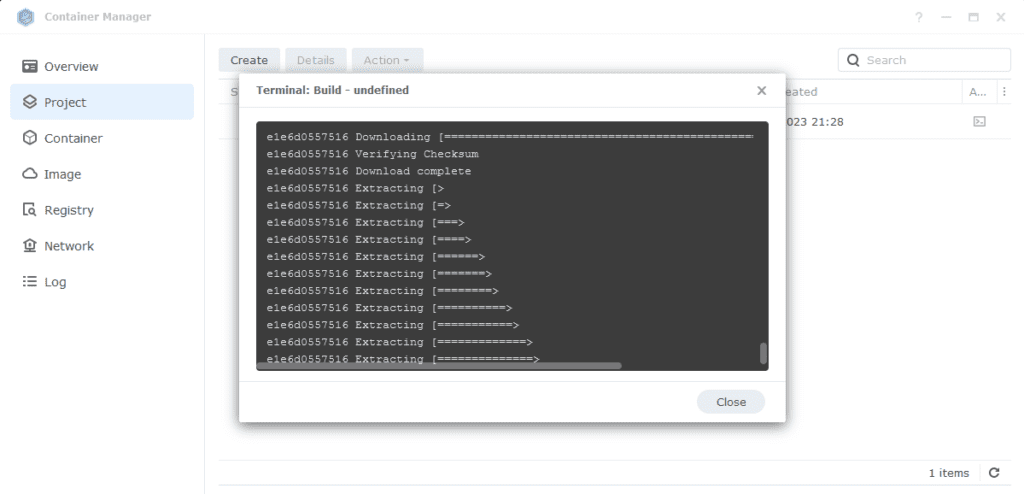
On the final screen click Done which will begin the download of the container images and once downloaded they will be launched!
The images will now be downloaded and extracted. You should see ‘Code 0’ when it has finished.
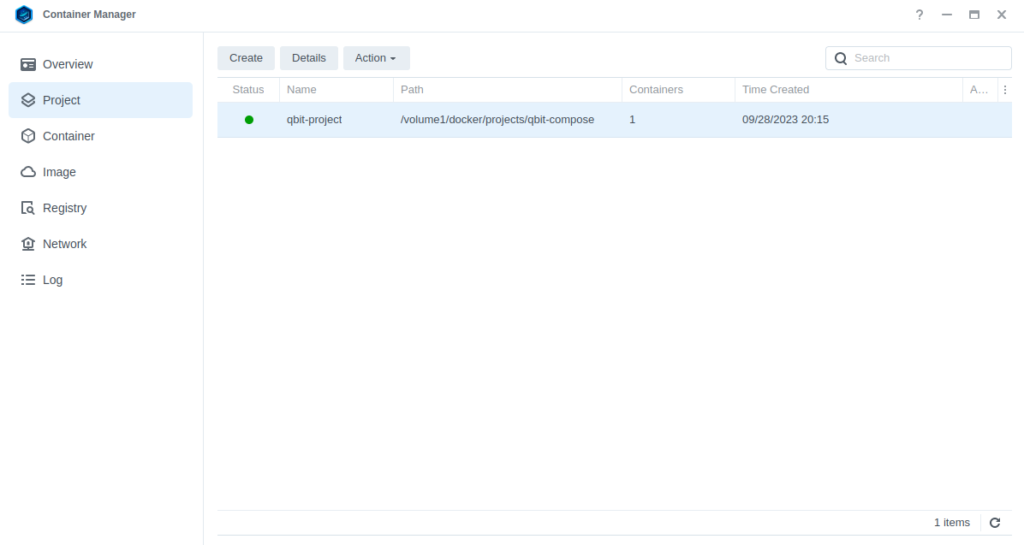
You will now see your qbit-project running with a green status on the left-hand side.
Firewall Exceptions
(Skip if you don’t have the Firewall configured)
If you have the Synology Firewall enabled please see this additional guide for further info on exceptions and correct set up.
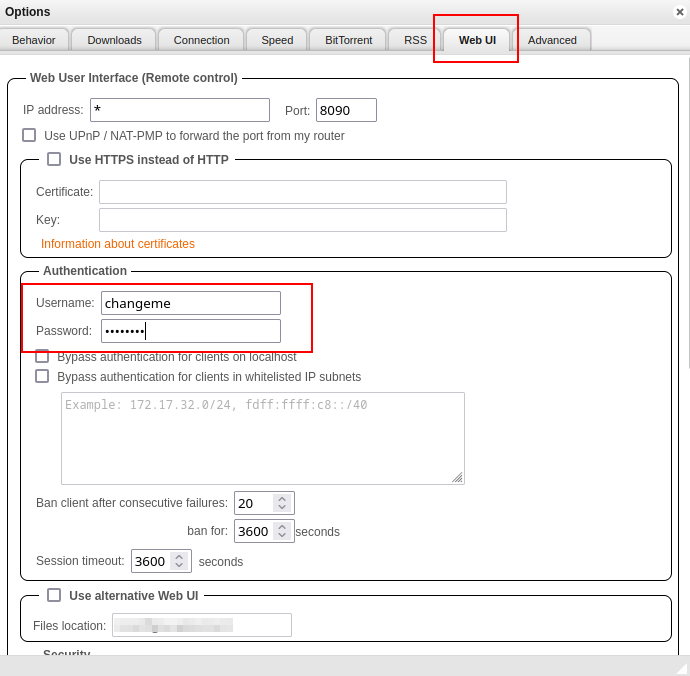
Changing the default WebUI login and password
If you skip this step you won’t be able to log in.
Now the container has started open it in the Docker UI by clicking the qbittorrent container select ‘details’ and then view the ‘log’ tab. Within the logs you will see the login details.
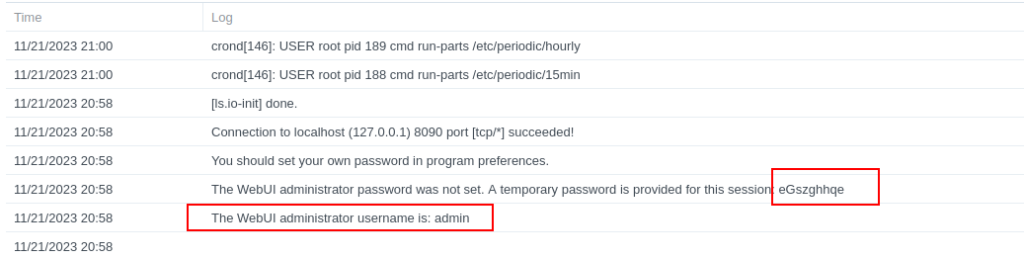
Now before doing any more of the guide go to the Web UI by going to the IP of your NAS followed by port 8090 and log in. Then on the WebUI tab change the defaults to your own and save them.
Now continue on..
Router Port Forwarding
As you can imagine there are thousands of possible router configs out there, so you will need to check the manual for your own.
Essentially you need to Port Forward port 9854 TCP and UDP to your NAS IP address. This will make you connectable for all peers. Most routers support UPnP or NAT-PNP which will automatically set up ports however it’s usually more secure to turn these off and do it manually.
Final qBittorrent Setup
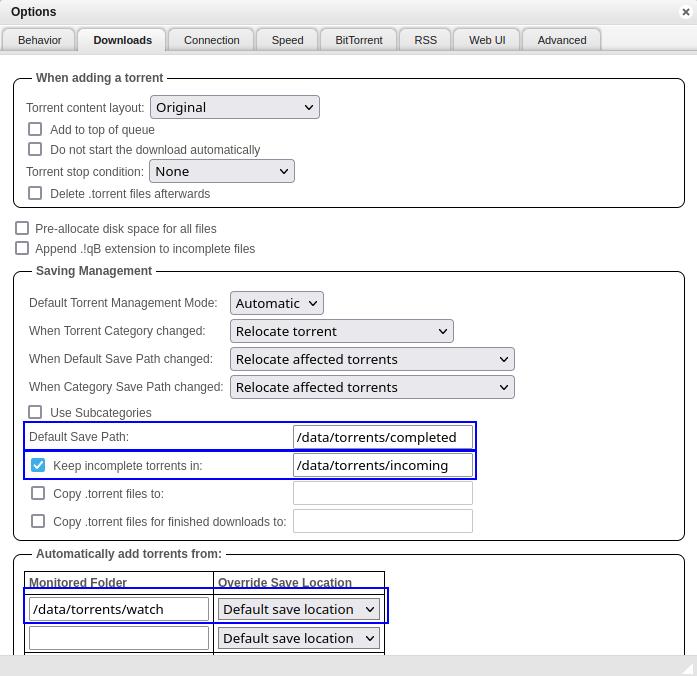
As we have used /data/torrents as the mount point for our downloads we need to make sure qBittorrent uses this same file path. Open the settings and edit the following paths and save.
| Option | Original Value | New Value |
|---|---|---|
| Default Save Path | /downloads | /data/torrents/completed |
| Keep incomplete torrents in | /downloads/incomplete | /data/torrents/incoming |
| Monitored Folder (optional) | blank | /data/torrents/watch |
In prior versions of this guide I had a command to unzip RAR and ZIP files, I have removed this as it is not reliable, check out Unpackerr from the menu.
I am not going to walk through all the other settings as you can customise these as you wish.
That’s it.
WARNING!

Do not port forward or set up a reverse proxy for qBittorrents WebUI so it directly faces the internet - we have seen 5 or 6 people with compromised instances running Crypto mining. Always use something like Tailscale or a direct WireGuard or OpenVPN connection into your network.
FAQs
Q: I am getting the ‘errored’ status for all my torrents
This is very likely a permissions issue, go to the User and Group guide and see the permission fixes towards the bottom.
Q: Everything seems to be connected but nothing is downloading.
Try grabbing the Ubuntu torrent as that is a sure fire way of testing as generally it has over 3k seeds.
Looking for some help, join our Discord community
If you are struggling with any steps in the guides or looking to branch out into other containers join our Discord community!

Buy me a beverage!
If you have found my site useful please consider pinging me a tip as it helps cover the cost of running things or just lets me stay hydrated. Plus 10% goes to the devs of the apps I do guides for every year.


Hi Doc,
been following your great guides to the comma, but all torrents get stalled or are terribly slow download rates (<10 kB/s).
– there are no errors in the qbit container log
– I am not using any VPN
– I disabled the Syno firewall for testing
Do you have any idea what might be wrong? Thank you for your work!
If you are getting slow rates, initially test the Ubuntu torrent and see what happens. Also make sure you have enabled the port forwarding from your router to port 9854, so you are connectable.
https://releases.ubuntu.com/23.10.1/ubuntu-23.10.1-desktop-amd64.iso.torrent
Thanks for your reply!
Funnily enough, I already used the Ubuntu torrent for testing earlier.
qBit is configured to use port 9854.
Port forwarding is active for 9854 on the router (and the NAS for that matter, if the firewall is enabled). However, I cannot activate any of the firewalls without the torrent stalling.
If its the Firewall you need to create an exception for port 9854 in line with the guide that should allow traffic to flow.
Thank you so much for this guide! I followed it exactly and got it up and running without issues. I have a question regarding seeding and the file structure. I didn’t want to keep all the different categories of files (movies, tv shows, books etc.) lumped together in the completed folder to seed since I want to seed as long as possible on some files rather than moving them to the “media” folders after awhile. When I save the file to another location outside of the “completed” folder, the file remains in the “incoming” folder once it’s completed. However, I created folders for “tv” “movies” etc. inside the “completed “folder and saved to those and that seemed to allow me to separate the categories and still be seeding. For example, if it’s a movie, when I add the torrent it obviously wants to save in “data/torrents/completed” by default, but since I have a “movies” section in the “completed” folder I add “/movies” to the end of “data/torrents/completed” and the movie successfully saves to there. My question is am I screwing something up doing it this way?
You should be setting up if not already in place categories for the types, this should already be happening, for example Sonarr > Settings > Download Clients you can set a category, this will mean once the file has completed downloading it will move to /completed/tv-sonarr, it will remain seeding and Sonarr will Atomic Move / Hardlink the file so it appears in /data/media. So don’t manually do it make the apps do it.
Hi, I can’t see WebUI login and password details in the log ?
They should be there are you checking the qbit log..
hi… i dont have a folder name Project in Container Manager > Open up Container Manager and click on Project then on the right-hand side click ‘Create’
Jump back to the first section ‘Folder Setup’
Just a quick question, why are the firewall ports open for 1234 and 9876 when the port used is 9854?
The firewall section is generic across all guides as noted at the start of that section, it saves me having the same information to update across every guide you just change out the ports used in the Guide.