Skip to content

qBittorrent in Container Manager on a Synology NAS

Last updated on 8 January 2025

Important or Recent Updates
Historic UpdatesDate
Fresh new guide by popular demand28/09/2023
Updated with new steps to obtain and change WebUI password21/11/2023
Issue with passwords has been fixed in 4.6.2 so removed tty line from yaml29/11/2023
Historic Updates

What is qBittorrent?

qBittorrent is a torrent downloader used to both manage torrent downloading and seeding.

If you are looking to combine a VPN with this set up see the GlueTUN guide on the left Menu

Let’s Begin

In this guide I will take you through the steps to get qBittorrent up and running in Docker

In order for you to successfully use this guide, please complete the three preceding guides

Folder Setup

Let’s start by getting some folders set up for the containers to use. Open up File Station create the following.

Folders
/docker/projects/qbit-compose
/docker/qbittorrent

Container Manager

Next we are going to set up a ‘Project’ in Container Manager, a project is used when you want one or more to all be loaded together and uses Docker Compose to do this.

Open up Container Manager and click on Project then on the right-hand side click ‘Create’
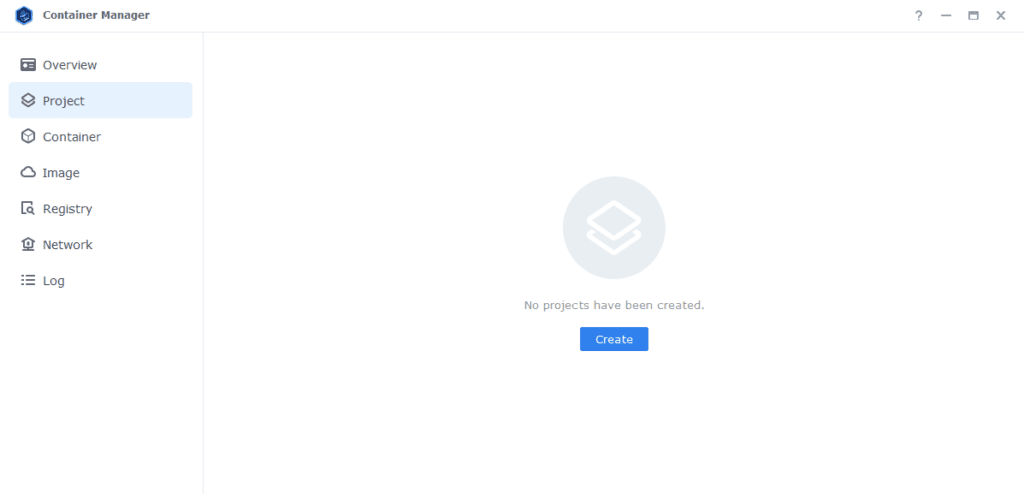
In the next screen we will set up our General Settings, enter the following:

SectionSetting
Project Name:qbit-project
Path:/docker/projects/qbit-compose
Source:Create docker-compose.yml

Next we are going to drop in our docker compose configuration copy all the code in the box below and paste it into line ‘1’ just like the screenshot


YAML
services:
  qbittorrent:
    image: linuxserver/qbittorrent:latest
    container_name: qbittorrent
    environment:
      - PUID=1234 #CHANGE_TO_YOUR_UID
      - PGID=65432 #CHANGE_TO_YOUR_GID
      - TZ=Europe/London #CHANGE_TO_YOUR_TZ
      - WEBUI_PORT=8090
    volumes:
      - /volume1/docker/qbittorrent:/config
      - /volume1/data/torrents:/data/torrents
    ports:
      - 9854:9854/tcp # Forwarded Port on Router TCP
      - 9854:9854/udp # Forwarded Port on Router TCP
      - 8090:8090/tcp # port for qbittorrent webui
    network_mode: synobridge
    restart: always

Environment Variables

We are now going to amend some key variables to make sure the container has access to our folders and also knows where we are in the world. Don’t change any other settings other than those I mention.

VariableValue
PUID(required) The UID you obtained in the user setup guide
PGID(required) The GID you obtained in the user setup guide
TZ(required) Your timezone wikipedia.org/wiki/List_of_tz_database_time_zones

Ports

Nothing to change here, the webui will run on port 8090 and the ports we will be using for the torrent protocol will be 9854 for TCP and UDP.

Volumes

By default, I have assumed you have your config files stored on /volume1 if these are located on another volume amend this line accordingly.

Click ‘Next’

You do not need to enable anything on the ‘Web portal settings’ screen click ‘Next’ again

On the final screen click Done which will begin the download of the container images and once downloaded they will be launched!

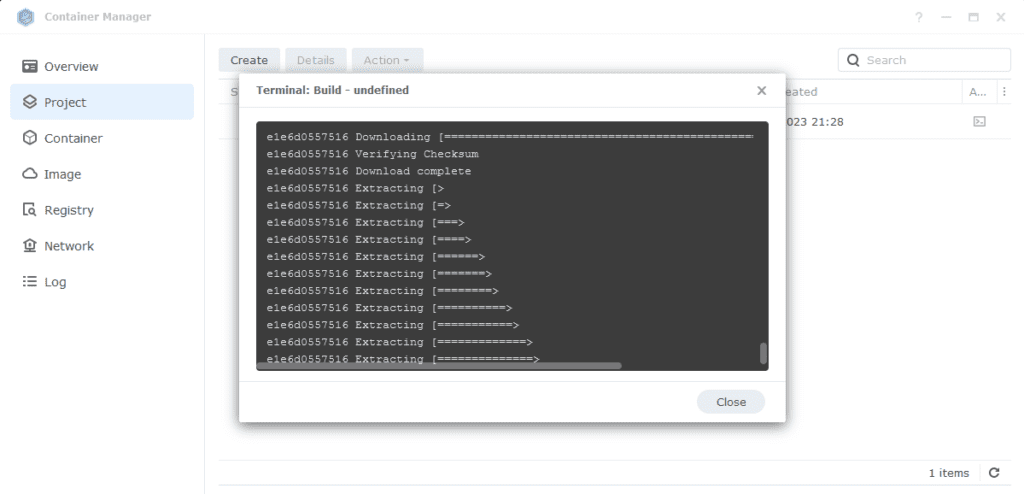
The images will now be downloaded and extracted. You should see ‘Code 0’ when it has finished.
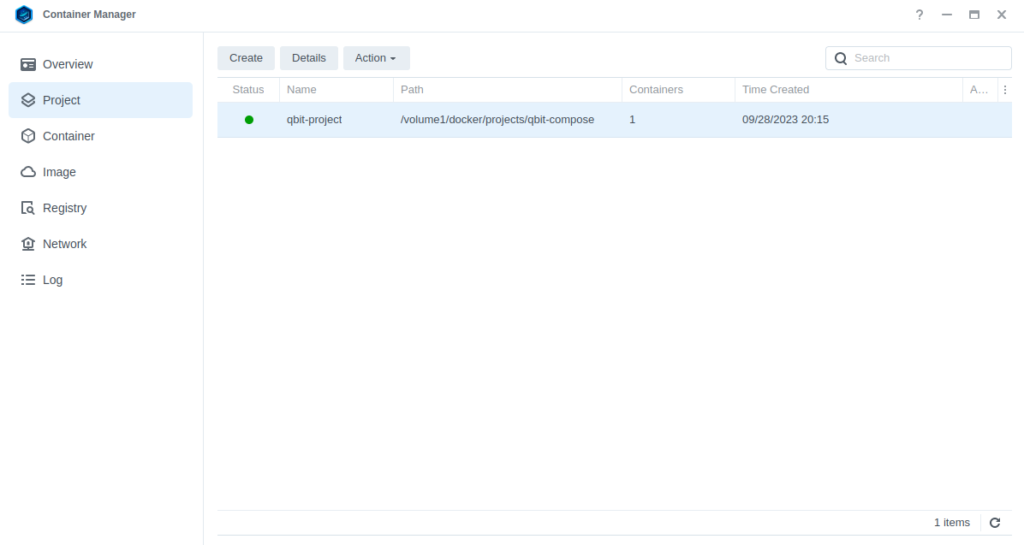
You will now see your qbit-project running with a green status on the left-hand side.
Firewall Exceptions

(Skip if you don’t have the Firewall configured)

If you have the Synology Firewall enabled please see this additional guide for further info on exceptions and correct set up.

Changing the default WebUI login and password

If you skip this step you won’t be able to log in.

Now the container has started open it in the Docker UI by clicking the qbittorrent container select ‘details’ and then view the ‘log’ tab. Within the logs you will see the login details.

Now before doing any more of the guide go to the Web UI by going to the IP of your NAS followed by port 8090 and log in. Then on the WebUI tab change the defaults to your own and save them.

Now continue on..

Router Port Forwarding

As you can imagine there are thousands of possible router configs out there, so you will need to check the manual for your own.

Essentially you need to Port Forward port 9854 TCP and UDP to your NAS IP address. This will make you connectable for all peers. Most routers support UPnP or NAT-PNP which will automatically set up ports however it’s usually more secure to turn these off and do it manually.

Final qBittorrent Setup

Changing the default WebUI login and password

If you skip this step you won’t be able to log in.

Now the container has started open it in the Docker UI and go to the Log tab. Within the logs you will see the login details

Now before doing any more of the guide go to the Web UI by going to the IP of your NAS followed by port 8090 and log in. Then on the WebUI tab change the defaults to your own and save them.

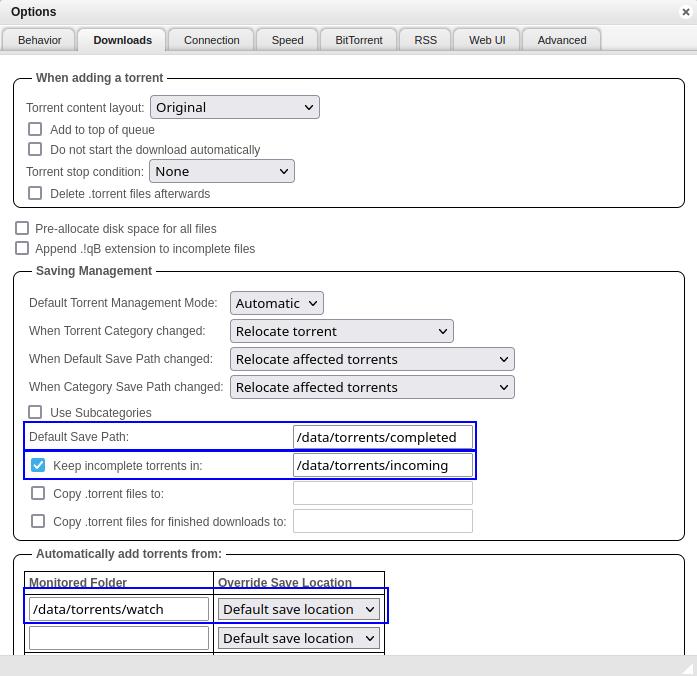
As we have used /data/torrents as the mount point for our downloads we need to make sure qBittorrent uses this same file path. Open the settings and edit the following paths and save.

OptionOriginal ValueNew Value
Default Save Path/downloads/data/torrents/completed
Keep incomplete torrents in/downloads/incomplete/data/torrents/incoming
Monitored Folder (optional)blank/data/torrents/watch

In prior versions of this guide I had a command to unzip RAR and ZIP files, I have removed this as it is not reliable, check out Unpackerr from the menu.

Connection Settings

The last step is to tell qBittorrent to use the correct port for communication enter 9854 in the Listening Port.

I am not going to walk through all the other settings as you can customise these as you wish.

That’s it.


FAQs

Q: I am getting the ‘errored’ status for all my torrents

This is very likely a permissions issue, go to the User and Group guide and see the permission fixes towards the bottom.

Q: Everything seems to be connected but nothing is downloading.

Try grabbing the Ubuntu torrent as that is a sure fire way of testing as generally it has over 3k seeds.


Looking for some help, join our Discord community

If you are struggling with any steps in the guides or looking to branch out into other containers join our Discord community!

Buy me a beverage!

If you have found my site useful please consider pinging me a tip as it helps cover the cost of running things or just lets me stay hydrated. Plus 10% goes to the devs of the apps I do guides for every year.
Published inDockerDownload Tools 7.2Synology

85 Comments

  1. DeliveryMan DeliveryMan

    Today I set up my new DS923+ and followed this guide to install qBittorrent. What a fantastic guide to follow , I’ve got everything set up and working perfectly. Thank you very much , amazing!!

  2. Dag Dag

    Hi, I love your guides, I wouldn’t have been able to get my arr:s up and running without them. So thank you!

    Now however I’m looking to add qBitManage and was just wondering whether it’s something you’re planning to make a guide for.
    I’m trying to use it with this folder structure and can’t get it to work,

    # radarr paths(but this is irrelevant to qbitManage, right)
    /volume1/data/media/01_movies
    /volume1/data/media/01_movies_documentary

    # torrent paths
    /volume1/data/torrents/completed/01_movies
    /volume1/data/torrents/completed/01_movies_documentary
    /volume1/data/torrents/incoming # incomplete torrents before they are finished and moved to appropriate directory

      • Dag Dag

        I can always rely on your helping hand! Thank you.
        If I may ask, how do you manage your deletion?

        I have a few question concering the whole eco-system with the arrs, qbittorrent and jellyfin.

        Ideally I would like to do everything from the frontend, in my case Jellyfin, both requests and deletions.
        However I understand this is not how it’s intended and you are better off managing Radarr to delete your content and do your requests in Jellyseerr and Jellyfin will just get whatever is in the folders, which is fine.
        Likewise qBittorrent is totally disconnected from whatever happens anywhere else and it should be set up to delete torrents if the movie is deleted from Radarr. Likewise Jellyseerr should clear its data of that movie so it can be requested again imo. Maybe another user would like to see it too at some other point.

        And last thing. I have my folders organized which works well, but I have to manually select the correct genre when adding a “documentary movie” or “animation movie” in Jellyseerr. Is there a way to automate this somehow to autoselect the right tag based on genrer should I better ditch having separate folders since jellyfin and radarr could organize it by the tags in the movie itself perhaps? It’s a habit from the past when I would tag things when all I had was qBittorrent and a Windows directory and wanted to have my downloads organized. “Movies”, “Series”, “Games”, “Software”, “Tutorials” etc

        • Dr_Frankenstein Dr_Frankenstein

          So I generally just do deletions via the Arrs, although I only really delete stuff that is terrible most other stuff just remains so other users can watch.
          Keep in mind you can have multiple root folders in the arrs, so you can segregate your movies or shows using separate folders. I have Kids Movies/Movies/Foreign… TV/Documentary/Foreign etc. Then my Plex libraries are also segregated…
          From a torrents perspective I only really grab stuff I can’t get on Usenet so it’s just a manual operation mostly seed for X amount of time then the arrs remove once that time is reached.

          If you ask someone else you will likely find they also do it a different way – it’s the part of this setup where you kind of get into your own method of doing things. It’s automated up to a point but I kind of get a weird kick out of doing some manual stuff.

          • Dag Dag

            Ok. but if you delete them through the arrs which I suppose it how everything is intended. But if you do delete through Radarr, how is the torrent deleted if we assume it hasn’r been deleted by a ratio criteria or reached its seed time yet?
            The thing is I want to keep my torrents alive. No one downloads from me anyway =D
            So I don’t really want to automate removing them, but instead once I remove a movie, it should clean up the torrent too.

            Then in my Arrs I have it like this.
            https://imgur.com/NB5jjea

            This is also exactly what it looks like in my qbittorrent
            https://imgur.com/pkJrbgR

            And here is how it looks like in my synology directory
            https://imgur.com/v98mvvw

            But here I’m not sure I’m doing correct with the paths
            https://imgur.com/AlFRLlC
            Or am I stupid and this work recursively so I should just add the root?
            which is “torrents/completed”

            And lastly my config file with all my save paths:
            https://imgur.com/PuVyOhG

            I do appreciate it a lot and don’t take you for granted and after all this i sure owe you a coffe.

            Oh, one last thing. Because I have created the same tags in Radarr I can select them in Jellyseerr and it will download to the correct folder, but I have to select the tag myself. Is there a way to make this automated that you can think of? sometimes I forget and an “animation movie” ends up in “movies” folder.

            • Dr_Frankenstein Dr_Frankenstein

              From a deletion outside the normal rules perspective I could only find mention of some script that can do it via reddit

              https://www.reddit.com/r/radarr/comments/zczlbl/comment/izjhp36/?utm_source=share&utm_medium=web3x&utm_name=web3xcss&utm_term=1&utm_content=share_button

              I asked copilot.microsoft.com `With the container qbit_manage how can I run a script that removes a torrent when a movie is deleted from Radarr` and it produced a very convincing script and explanation of how it worked, so this must have been scraped from somewhere give it a try..

              From a tags and categories perspective, I would just make sure to select the right root folder when requesting the movie in Overseerr. The rest downstream will just work automatically with the movie going to the right root folder upon completion without having to segregate the entire downstream through qbit tags/categories.

              Nothing wrong with asking questions 🙂 – Just feels like you may be over complicating things for the same outcome.

              • Dag Dag

                Yes, I got that tag system all working nicely.
                Each category is mapped to its own library in Jellyfin. Is there another way to do it?

                And I think that qBitManage should be able to delete and clean up things based on the tags it sets?
                I have qBitManage working so now I just need to see how to delete all torrents that are tagged noHL. It’s shaping up! =)

                • Dag Dag

                  And well. I can’t figure out how to delete the torrent with qBitManage.
                  Ideally I don’t care about tagging it, I just want to delete it if it’s not a hard link.
                  But I understand this is how qBitManage works. So the question is how I configre the config file to delete the noHL tagged torrents.

          • Dag Dag

            Just wanted to say I think I got it.
            I didn’t get exactly what each path meant, how to use them. But at long last I go it right. I also was thrown off because I thought I could type this:

            root_dir: /volume1/data/torrents/
            torrents_dir: /volume1/data/torrents/00_temp/00_torrent_files/

            but it wanted:

            root_dir: /data/torrents/
            torrents_dir: /data/torrents/00_temp/00_torrent_files/

            This is of course what it says in the qBittorrent.conf file and in the qBittorrent WEB-UI too when I looked there.

            Just not entirely sure why we put: “/volume1/data/torrents:/data/torrents”
            in: /docker/projects/qbit-compose/compose.yaml
            instead of “/data/torrents:/data/torrents”

            what I mean is that if I look in the command prompt my path is indeed “/volume1/….”
            but in other interfaces like File Station and qBittorrent it only shows “/data/…”

            Not sure I make much sense so I’ll stop.

            But it works now.

  3. Justin Cutler Justin Cutler

    I set this up months ago and have just been copying and pasting the torrent link in qbittorrent because I could never figure out how to use Radarr and Sonarr. The file downloads fine but it just stays in the incoming folder and then I move it to the movies folder. Is that only possible when using Radarr or Sonarr?

    • Dr_Frankenstein Dr_Frankenstein

      Do you want the file to move to the movie folder without using Sonarr/Radarr, if so amend the volume mount points up one level so qbit has access across into the other folders. So you could then tell it to move the file for you upon completion


      volumes:
      - /volume1/docker/qbittorrent:/config
      - /volume1/data:/data

  4. MrNooobie MrNooobie

    Hello!

    From my understanding, the Router Port forwarding is used for seeding, but do I need it? I have my Synology with mullvad VPN integrated with tailscale, would that be safe enough to do with the Port Forwarding on my router for torrenting linux iso’s?

    • Dr_Frankenstein Dr_Frankenstein

      Hey MrNoobie – Mullvad doesn’t do any port forwarding on their side any more so you would have limited connectivity from other peers finding you. I would only suggest going direct to your router forwarding if you are sharing literal Linux ISOs as anything copyrighted will land you in hot water (unless you don’t have the issue in your country)

  5. md_laudo md_laudo

    Hi there! I followed your instruction carefully (including the initial setup). As long as I try to add any download job via the web interface, torrent status immediately becomes ”errored”.
    Do you have any suggestion on how to solve this?
    Thanks in advance 😉

Leave a Reply

Your email address will not be published. Required fields are marked *

This site uses Akismet to reduce spam. Learn how your comment data is processed.

drfrankenstein.co.uk – writing Synology Docker Guides since 2016 – Join My Discord!