Important or Recent Updates
| Historic Updates | Date |
|---|---|
| First version of the setup | 01/08/2021 |
| Updated the general formatting Gave the guide a once over with LanguageTool | 14/03/2022 |
| Added ‘books’ | 15/07/2022 |
| DSM7.2 Update for Container Manager | 22/04/2023 |
| Adjusted screenshot for DSM7.2.1 | 30/04/2024 |
| Amended the first section of this guide to accommodate those using NVMe volumes. | 31/10/2024 |
Container Manager Install
When installing Container Manager for the first time it will automatically create your docker shared folder, so there is no need to create this manually. If you have an NVMe or SATA SSD volume make sure you install the package to it for optimal performance.
Docker path adjustments for NVMe or SATA SSD volumes
If you are using a NVMe or SSD volume you will need to adjust the storage volume shown in each guide for any /docker share to the correct volume number for your fast storage. The /data share remains on your larger hard drive volume.
For example for Plex it would look like this assuming your volume numbers are volume 1 (hard drives) volume 2 (NVMe/SSD)
    volumes:
      - /volume2/docker/plex:/config
      - /volume1/data/media:/data/media
Media Folder Set up
When passing folders into a Docker container each mount point is treated as its own filesystem.
This means when moving files between two mount points Docker will do a Copy, then Delete operation. Meaning you are creating a full duplicate of a file while its being ‘moved’ creating unwanted disk IO and temporarily taking up double the space. (especially when seeding torrents after copying to the final folders)
In order to avoid this we need to set up a clean directory structure that allows us to just have one folder or share mounted to our containers.
If you are starting with these guides and have existing media you may need to move around your data in line with this setup, I recommend creating all the folders below using File station to avoid potential permission issues later.
Directory Structure
With this setup all of your media will sit within a single share, you can call this whatever you want but in all the guides it will be called ‘data’. If you change its name you will need to adjust any steps or compose files from my guides accordingly.
Please note: it is important that you make a decision around whether to use lowercase or Uppercase folder names, I recommend just stick with lowercase everywhere as it simplifies setup. If you decide to go against this ensure you change all the volume maps in the guides to match the case! Otherwise, containers and you will be very confused.
Open up the control panel then in ‘Shared Folder’ hit ‘Create’

Screen 1 – fill out the name as ‘data’ and use Volume 1 for its storage location (Your main hard drive volume)

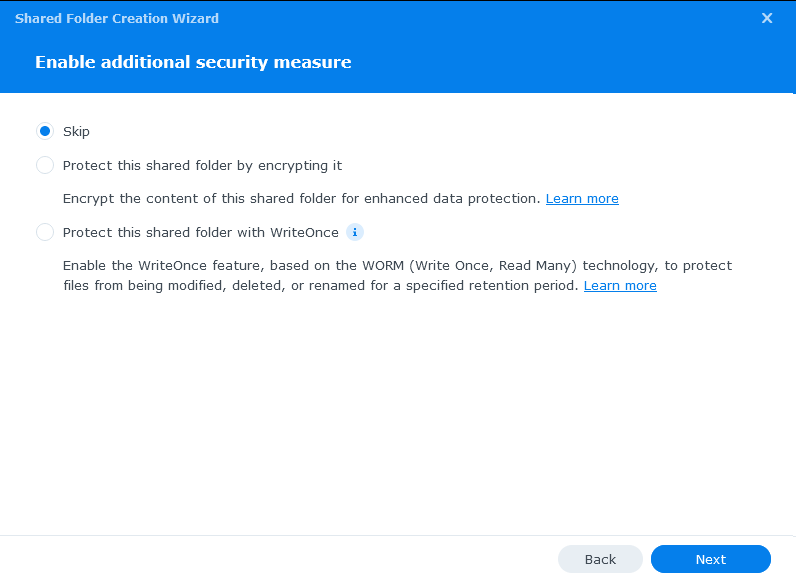
Screen 2 – we leave the folder unencrypted and don’t enable write once features
Screen 3 – Enable data checksums as this will help catch any issues with files during data scrubbing. (These options will not appear if you have ext4 file system – If you are starting this with a clean NAS go back change to BTRFS if possible)

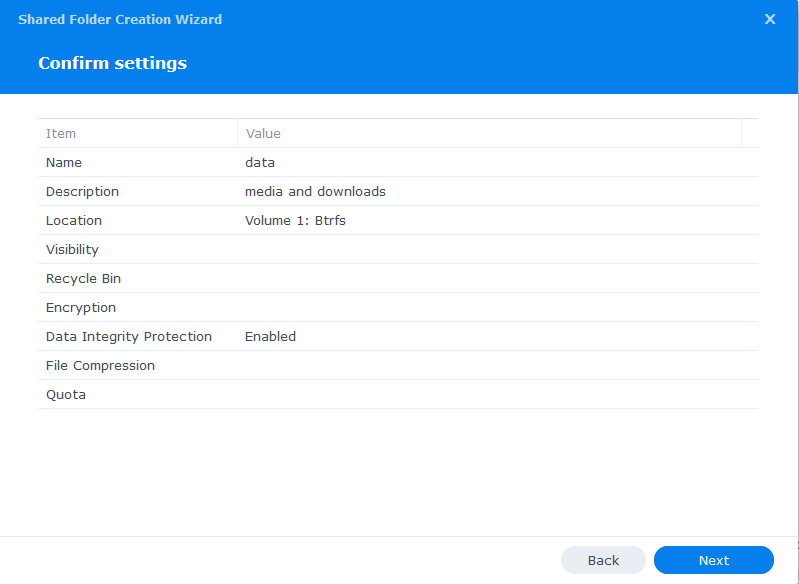
Screen 4 – just click next past the summary
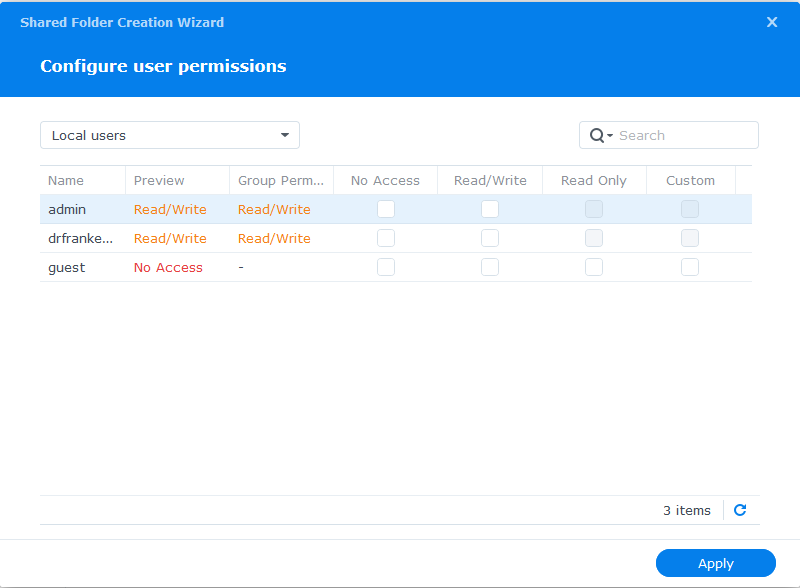
On the final screen we don’t need to change any user permissions yet, we will do that in the second guide.
The Sub-folders
Now we have our main ‘data’ directory we need to create a number of sub-folders to hold our media and downloaded files. You can amend this depending on whether you are using Torrents or Usenet (Newsgroups) or both.
You will initially create 3 folders within /data
- media
- torrents
- usenet
Then under /data/media create
- movies
- music
- tv
- books
Then under /data/torrents create
- completed
- incoming
- watch
Then under /data/usenet create
- completed
- intermediate
- nzb
- queue
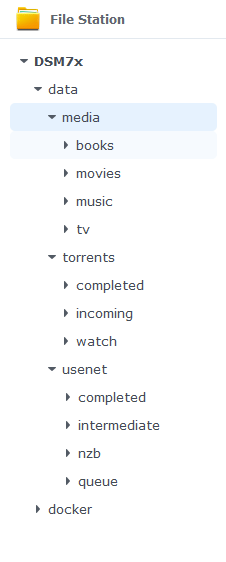
Your folder tree should now look like this.
Finally, within the /docker shared folder create a folder called ‘projects‘ which will be used for any containers using the Projects (Docker Compose) feature of Container Manager.
You can now go back to where you left off in the guides and do the next step.
Looking for some help, join our Discord community
If you are struggling with any steps in the guides or looking to branch out into other containers join our Discord community!

Buy me a beverage!
If you have found my site useful please consider pinging me a tip as it helps cover the cost of running things or just lets me stay hydrated. Plus 10% goes to the devs of the apps I do guides for every year.


Hi again sorry 🙁
I got sick of my Synology moving my Nord VPN to be the primary network interface after me moving it back to 2nd repeatedly. So I thought I’d try this guide.
The project has 2 healthy containers.
The gluetun log shows my new Nord IP however I can’t open the qbit UI using 192.168.50.10(mySynologyIP):8090
It just says ERR_CONNECTION_REFUSED
I disabled the Synology Firewall to test if that was the cause but no change.
I can open my other containers that use a different bridge using the bridge IP, 172.17.0.1, and their port number. They also don’t work if I use my Synology IP.
With that in mind I tried 172.20.0.1:8090 but no joy still.
Edit ——–
Whilst writing this I discover my phone connected via wifi CAN access the qbit UI using 192.168.50.10 but my PC can’t.
Any ideas ?
Upside is that I’ve confirmed qbit is using my Nord IP.
If it’s purely the PC not being able to access I would see if it has been banned
Look in the qBittorrent.conf file for the line IPFilter \ BannedIPs =
If your PC is listed delete the IP, you will need to stop the project before doing this otherwise the changes wont save.
any reason you don’t enable recycle bin? that’s saved me a few times, just preference I’m guessing?
I leave those bits entirely up to you 🙂
I can’t check the enable data checksums because the checkbox is greyed.. I’m on DSM 7.2.1-69057 Update 4, NAS DS124
It is likely you have not used BTRFS for the filesystem or its not supported on your system
Can we use ext4 system or better to create new btrfs volume?
I would use btrfs as you gain the various features it provides such as snapshots, file healing etc
Loving these guides so far, I tried all of this years back and gave up mid-way, thank you for all your work. Question, is this folder structure set up for “Atomic-Moves” as many other guides opt for? if not, why they choose not to? Or did I miss them later on in your guides and process?
Atomic moves all the way through
Great intro! To those noobs who were stuck like I was after creating the data folder, you need to move to File Station to create the folders / subdirectories after creating the shared folder ‘data.’