
Important or Recent Updates
| Historic Updates | Date |
|---|---|
| New guide | 13/09/2023 |
| Added additional security option to the compose to restrict the container from gaining new privileges as well as umask variable | 25/10/2023 |
| Adjusted the restart variable to make sure containers start on boot | 28/10/2023 |
| Made some small tweaks for readablity added some useful external links | 05/03/2025 |
| Removed Readarr as it has been retired. | 27/06/2025 |
The Arrs are a suite of apps they help you both organise and obtain media from various sources online. This guide will give you the core items your need for managing Movies, TV Shows, Subtitles, and Music as well as a central search app called Prowlarr.
- Sonarr for TV
- Radarr for Movies
- Lidarr for Music
- Bazarr for Subtitles
- Prowlarr for Search
If you only want a subset of these items you can adjust the setup according to your needs.
Useful external links for this guide
Servarr.wiki (Official Documentation)
Linuxserver.io (Documentation for the Containers)
Let’s Begin
In order for you to successfully use this guide please complete the three initial setup guides if you have not done so already
- Docker Package, SSD and Memory Recommendations
- Step 1: Directory Setup Guide
- Step 2: Setting up a restricted Docker user
- Step 3: Setting up a Docker Bridge Network (synobridge)
As Container Manager now supports using Docker Compose in the UI we will be using it as it will save you lots of time and steps!
What on earth is a Docker Compose?
Docker Compose allows us to define how Docker should set up one or more containers within a single configuration file. This file is yaml formatted and Container Manager uses the Projects feature to manage them.
Folder Setup
First we need to set up some folders for the Arr’s to save their configuration files and also where the Project will save the compose.
Using File Station create the following folders. (Skip ones you don’t need)
/docker/projects/arrs-compose - Required
/docker/radarr
/docker/sonarr
/docker/lidarr
/docker/prowlarr
/docker/bazarr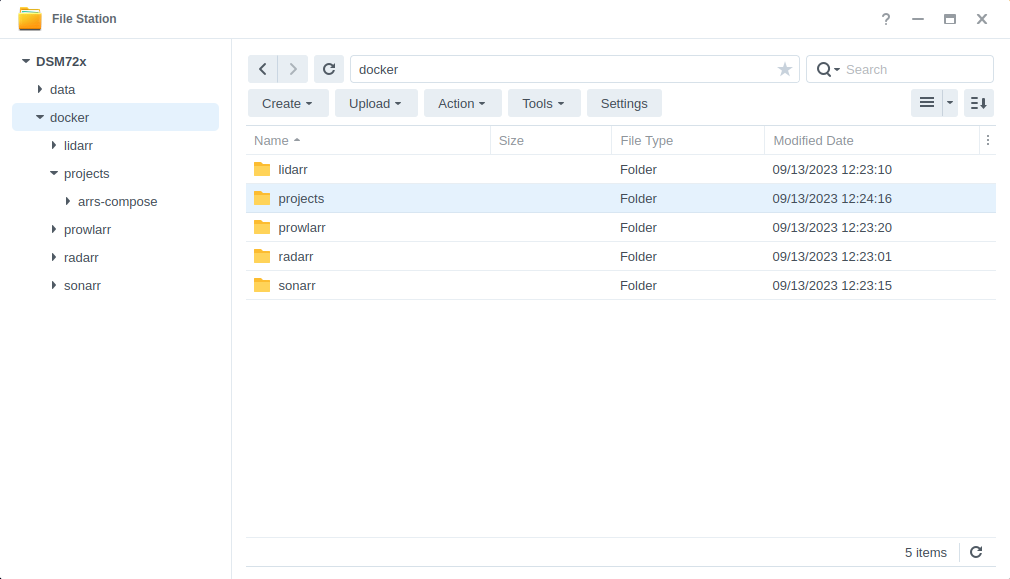
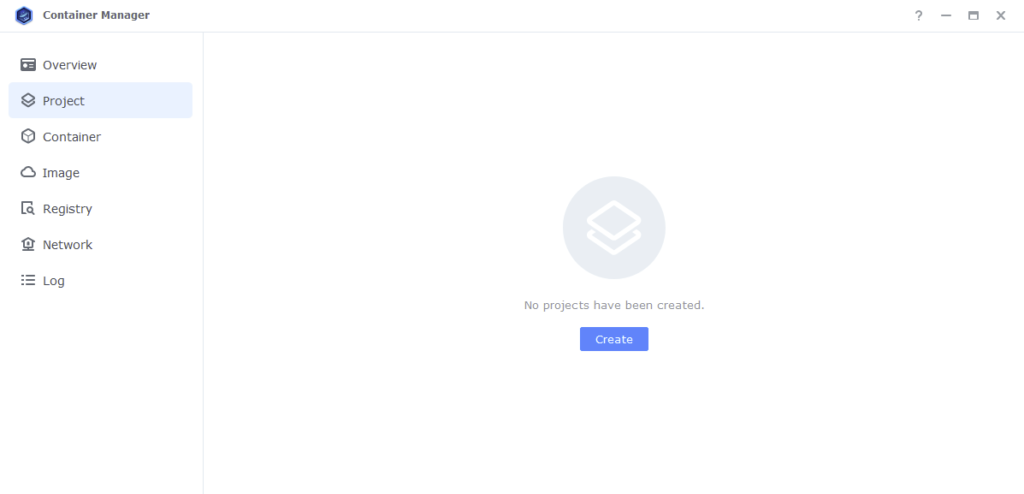
Container Set Up
Next we are going to set up a ‘Project’ in Container Manager. Open up Container Manager and click on Project, then on the right-hand side click ‘Create’.
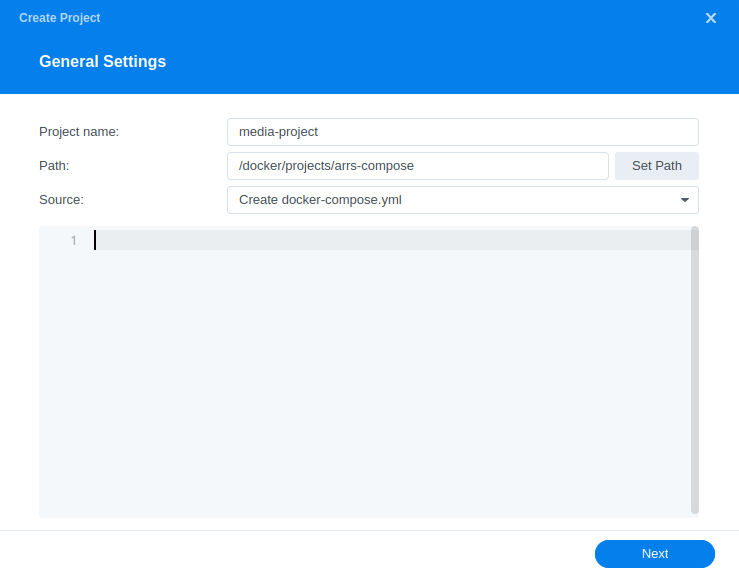
In the next screen we will set up our General Settings.
| Section | Setting |
|---|---|
| Project Name: | media-project |
| Path: | /docker/projects/arrs-compose |
| Source: | Create docker-compose.yml |
Next we are going to drop in our docker compose configuration, copy all the code in the box below and paste it into line ‘1’
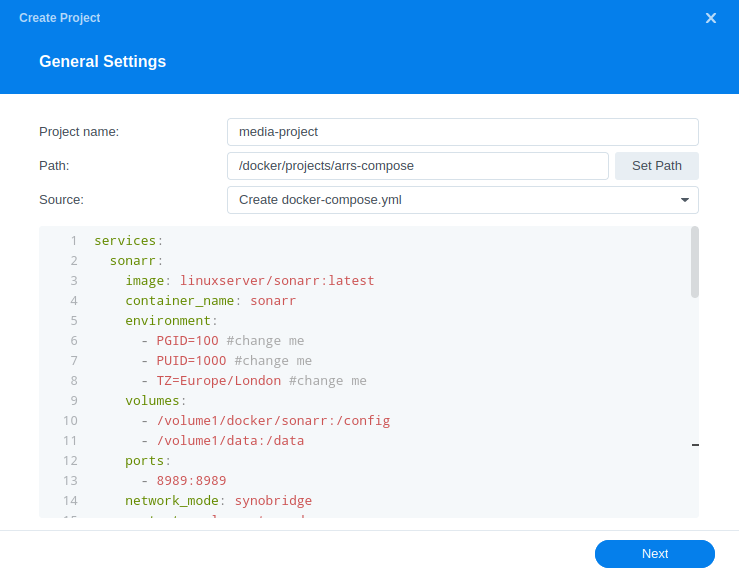
A couple of notes:
- I am pulling these images directly from Docker Hub and not lscr.io this is because container manager can’t check for updates on third party repos
- You will see notes saying #change me we will do this on the next step, and you can remove the comments if you wish
- The folder structure across my guides will result in Hard links for torrents
services:
  sonarr:
    image: linuxserver/sonarr:latest
    container_name: sonarr
    environment:
      - PUID=1234 #CHANGE_TO_YOUR_UID
      - PGID=65432 #CHANGE_TO_YOUR_GID
      - TZ=Europe/London #CHANGE_TO_YOUR_TZ
      - UMASK=022
    volumes:
      - /volume1/docker/sonarr:/config
      - /volume1/data:/data
    ports:
      - 8989:8989/tcp
    network_mode: synobridge
    security_opt:
      - no-new-privileges:true
    restart: always

  lidarr:
    image: linuxserver/lidarr:latest
    container_name: lidarr
    environment:
      - PUID=1234 #CHANGE_TO_YOUR_UID
      - PGID=65432 #CHANGE_TO_YOUR_GID
      - TZ=Europe/London #CHANGE_TO_YOUR_TZ
      - UMASK=022
    volumes:
      - /volume1/docker/lidarr:/config
      - /volume1/data:/data
    ports:
      - 8686:8686/tcp
    network_mode: synobridge
    security_opt:
      - no-new-privileges:true
    restart: always

  radarr:
    image: linuxserver/radarr:latest
    container_name: radarr
    environment:
      - PUID=1234 #CHANGE_TO_YOUR_UID
      - PGID=65432 #CHANGE_TO_YOUR_GID
      - TZ=Europe/London #CHANGE_TO_YOUR_TZ
      - UMASK=022
    volumes:
      - /volume1/docker/radarr:/config
      - /volume1/data:/data
    ports:
      - 7878:7878/tcp
    network_mode: synobridge
    security_opt:
      - no-new-privileges:true
    restart: always

  bazarr:
    image: linuxserver/bazarr:latest
    container_name: bazarr
    environment:
      - PUID=1234 #CHANGE_TO_YOUR_UID
      - PGID=65432 #CHANGE_TO_YOUR_GID
      - TZ=Europe/London #CHANGE_TO_YOUR_TZ
      - UMASK=022
    volumes:
      - /volume1/docker/bazarr:/config
      - /volume1/data/:/data
    ports:
      - 6767:6767/tcp
    network_mode: synobridge
    security_opt:
      - no-new-privileges:true
restart: alwaysI have split out Prowlarr as you may want this running on a VPN connection if your ISP blocks certain indexers. If not copy this section into your compose as well. See the side menu for adding this to GlueTUN.
  prowlarr:
    image: linuxserver/prowlarr:latest
    container_name: prowlarr
    environment:
      - PUID=1234 #CHANGE_TO_YOUR_UID
      - PGID=65432 #CHANGE_TO_YOUR_GID
      - TZ=Europe/London #CHANGE_TO_YOUR_TZ
      - UMASK=022
    volumes:
      - /volume1/docker/prowlarr:/config
    ports:
      - 9696:9696/tcp
    network_mode: synobridge
    security_opt:
      - no-new-privileges:true
restart: alwaysEditing the Compose & Environment Variables
Please keep in mind that YAML formatting is very specific, so keep things lined up as per the original.
The compose contains all the Arr’s in the overall stack, you can remove any you don’t plan on using by deleting their entire section in the code.
We need to make some minor edits to the compose file in order to make sure the containers use the ‘dockerlimited’ user we created earlier and also let them know which timezone we are located. You will need to edit these in each section noted with ‘#change me’
| Variable | Value |
|---|---|
| PUID= | Change it to the UID you obtained earlier in the first setup guides |
| PGID= | Change it to the GID you obtained earlier in the first setup guides |
| TZ= | You will need to change this line to your own timezone code – you can find the correct list of ones to use on wikipedia.org/wiki/List_of_tz_database_time_zones |
Once you have made all your required edits click ‘Next’
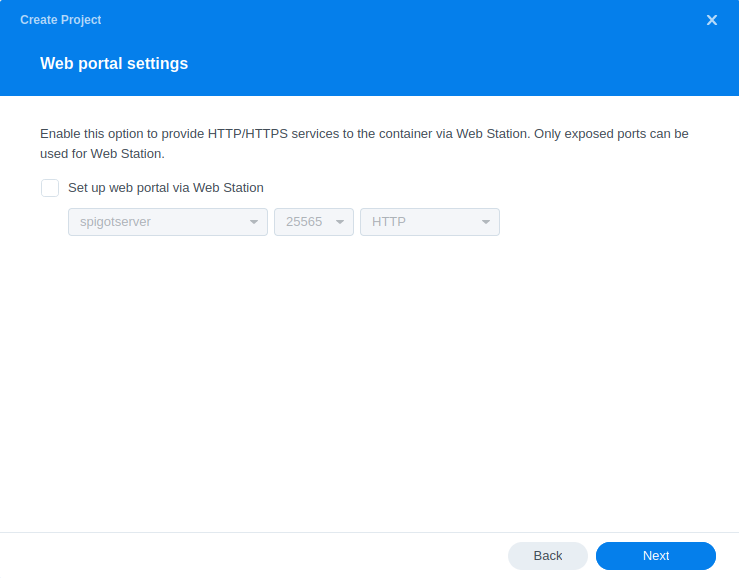
Nothing to change on the next screen click ‘Next’ again..
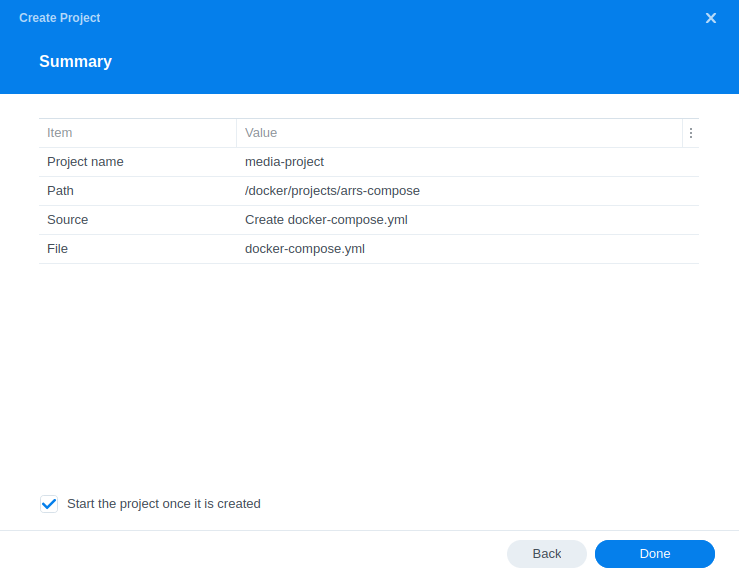
On the final screen just click ‘Done’ and you will see a new window appear which will kick of downloading of the required container image and configure the containers.
This can take a couple of minutes to finish as all the images are downloaded and extracted. You should see ‘Code 0’ when it has finished.

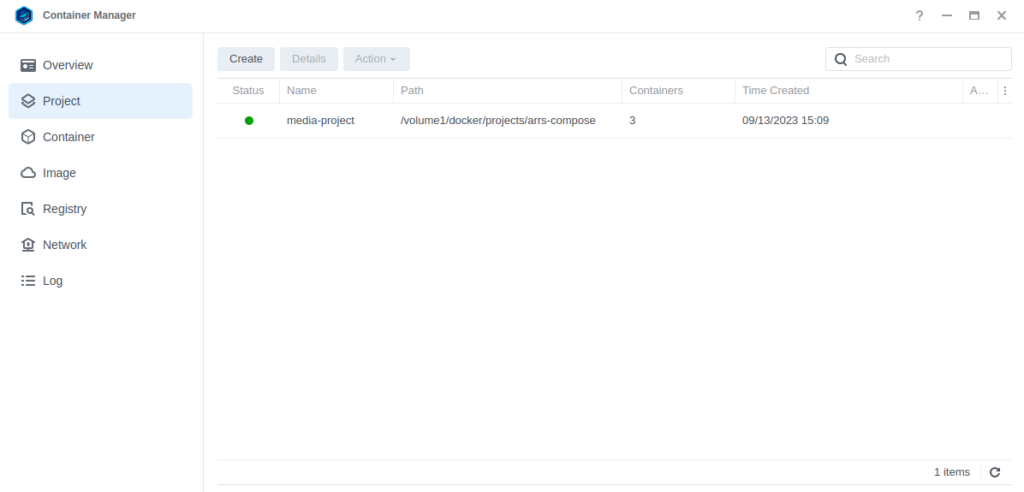
Once finished you will see the Project is running with a green status.
Firewall Exceptions
(Skip if you don’t have the Firewall configured)
If you have the Synology Firewall enabled please see this additional guide for further info on exceptions and correct set up.
Containers are ready to use
You will now be able to access each of the containers on their respective ports.
| App | Address (not https://) |
|---|---|
| Lidarr | http://NASIP:8686 |
| Radarr | http://NASIP:7878 |
| Sonarr | http://NASIP:8989 |
| Readarr | http://NASIP:8787 |
| Bazarr | http://NASIP:6767 |
| Prowlarr | http://NASIP:9696 |
Please see the next section which covers the ‘basics’ of each application setup as these usually catch people out. Full documentation can be found on https://wiki.servarr.com/
Key Settings within the Arrs
Settings > Media Management > Root Folders
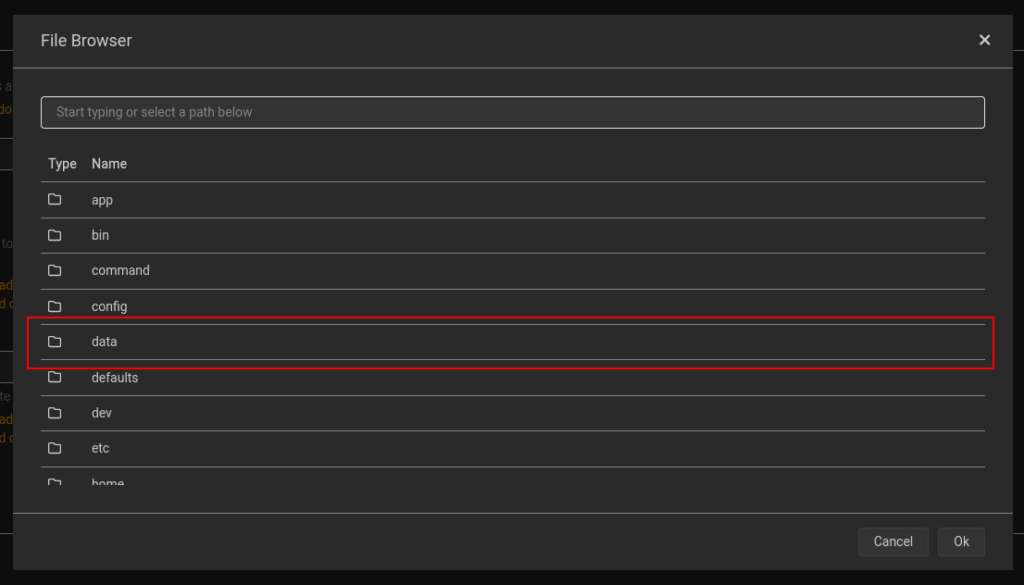
Each of the Arr’s refer to the place(s) you keep your media as ‘Root Folders’. These are where the app will ultimately move your music/movies/books/shows once they finish downloading. Use the table below to set each of your folders correctly.
You will see other folders when you first browse for the /data folder it is located in the top level folder.
| App | Root Folder |
|---|---|
| Lidarr | /data/media/music |
| Radarr | /data/media/movies |
| Sonarr | /data/media/tv |
| Bazarr | Not required |
| Prowlarr | Not required |
Settings > Media Management > Remote Path Mappings
While most of the settings on this page are self-explanatory something that has caught people out is the Remote Path Mappings setting. If you are hosting all your services on the same NAS and in Docker do not add any settings here.
Settings > Download Client(s) > Add your Client > Host and Port
As our containers are all running on the ‘synobridge’ custom bridge we can use the Gateway IP for this bridge for inter container networking. This will be 172.20.0.1 and the appropriate port for your Client assuming it is running in Docker!
You should now have the basics in place and I 100% recommend having a look at the previously mentioned https://wiki.servarr.com/ documentation as it will help you understand how the Arrs work.
Other settings for the Arrs
While I covered some very basics you really need to make use of the documentation, it goes into detail of how and why the core functions work across the apps. You can find it on the Servarr Wiki.
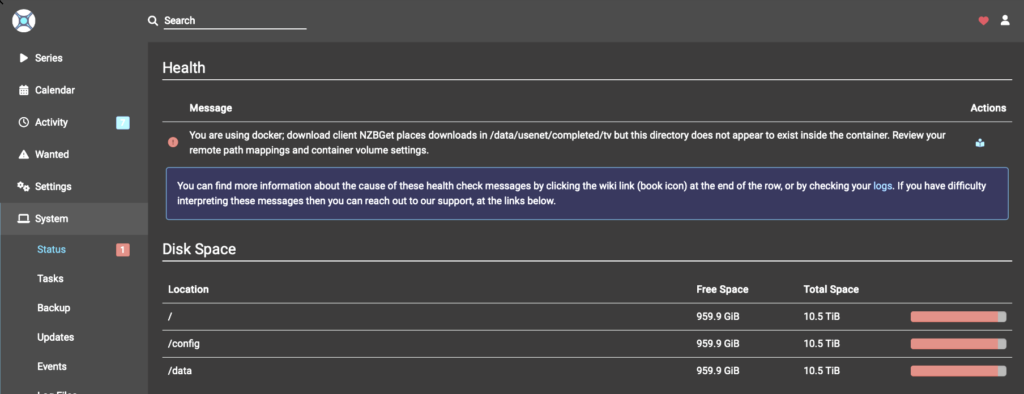
Warning about download location not being available
Recently on initial setup we have been seeing the below Health message – if your “/data” folder is reporting its free and total space you should be able to ignore this and it will vanish once a download is successfully imported
FAQ
Migration from old guides.
If you followed my older guides where you set up each of these containers in the Container Manager UI or Pre DSM7.2 Docker UI you can follow this one to migrate in a couple of steps.
- Stop and delete the existing containers but keep your directories!
- Follow the rest of this guide and all your existing configs will be kept using your old files.
Looking for some help, join our Discord community
If you are struggling with any steps in the guides or looking to branch out into other containers join our Discord community!

Buy me a beverage!
If you have found my site useful please consider pinging me a tip as it helps cover the cost of running things or just lets me stay hydrated. Plus 10% goes to the devs of the apps I do guides for every year.


Hello,
First of all, thanks for the guide…
Secondly i am getting the following error: cannot find synobridge.
How can i solve this issue?
Thanks
See the ‘Let’s Begin’ section 🙂
Great guide as always!
I believe Prowlarr and Bazarr definetely belong to vpnproject along with gluetun and a download client. At least in my country (Greece) it is impossible to access the vast majority of indexers and subtitle sites without vpn.
I added them to your vpn project (Deluge+GlueTun) and everything works absolutely fine!
Yeah, it really does vary dependent on where you live, I have requests for non VPN versions of the guides as some places seem like they have no rules! No such luck here either!
Hi!
I have everything up and running on my DS923+, only problem is that when Sonarr or Radarr adds something the system freezes and I can’t access the webui. Can you give me some pointers to what’s going on?
Thanks for some great guides!
Peter
Hey, very odd! Is there anything in the Docker logs at all.
Does the whole system freeze or just the Docker containers?
I don’t see anything in the container manager logs, but it does seem to slow down the entire system. When I check system resources there’s very high disk and network activity, but that’s it.
I have four disks in a SHR setup with two disk redundancy.
At first I thought it might be from repairing nzb downloads, so I tried handling that on another computer and just copying back to my nas., but it didn’t change anything.
Peter
How much memory do you have? It may be you are hitting or exceeding memory limits, so the drives are then having to act as swap. Then layered with 2 drive redundancy that has a write speed hit on top.
I only have the 4gb that came with the unit. I’m try installing some more. Thank you!
Yeah, 4GB by the time you start loading up a number of containers gets to become a bottleneck fast. As RAM is fairly inexpensive it’s worth picking up the max the NAS can handle or at least 8GB as a minimum really.
That did the trick – thank you 🙂
So, all the downloads are going into the /data/torrents/completed/ folder, but I don’t know how to automatically get them into their respective /data/media/ folders.
The respective Arr should be monitoring the downloads and moving them for you, keep an eye on the ‘Activity’ section on the left-hand side menu of for example Radarr it will tell you what it is doing or if there is a problem.
So, for example, I downloaded a TV episode (using Prowlarr via qbittorrent), but when I go into Sonarr, the ‘Activity’ section Queue is empty and no History is found. And the TV episode is still sitting in the torrents/completed folder. I’m looking for some step I missed following this guide, but I can’t find anything.
` TV episode (using Prowlarr via qbittorrent),` This will be the key – if you did this directly from Prowlarr Sonarr won’t know it needs to monitor and import it unless you put it in Sonarrs ‘tv’ category. In this instance when downloaded you will need to perform a Manual Import from the Wanted option on the Left menu.
Thanks! Turns out handling TV shows from Sonarr seems to be working now to move my files around.
Configure and sync the indexers from Prowlarr and configure the download client in Sonarr, then everything works absolutely fine!
Should we not run all of the *arr’s behind a VPN?
Thanks!
There is no real need, they scrape their info from perfectly legitimate sources such as themoviedb and don’t do any actual downloading. The devs even recommend not putting them on a vpn.