
Important or Recent Updates
| Historic Updates | Date |
|---|---|
| New guide | 13/09/2023 |
| Added additional security option to the compose to restrict the container from gaining new privileges as well as umask variable | 25/10/2023 |
| Adjusted the restart variable to make sure containers start on boot | 28/10/2023 |
| Made some small tweaks for readablity added some useful external links | 05/03/2025 |
| Removed Readarr as it has been retired. | 27/06/2025 |
The Arrs are a suite of apps they help you both organise and obtain media from various sources online. This guide will give you the core items your need for managing Movies, TV Shows, Subtitles, and Music as well as a central search app called Prowlarr.
- Sonarr for TV
- Radarr for Movies
- Lidarr for Music
- Bazarr for Subtitles
- Prowlarr for Search
If you only want a subset of these items you can adjust the setup according to your needs.
Useful external links for this guide
Servarr.wiki (Official Documentation)
Linuxserver.io (Documentation for the Containers)
Let’s Begin
In order for you to successfully use this guide please complete the three initial setup guides if you have not done so already
- Docker Package, SSD and Memory Recommendations
- Step 1: Directory Setup Guide
- Step 2: Setting up a restricted Docker user
- Step 3: Setting up a Docker Bridge Network (synobridge)
As Container Manager now supports using Docker Compose in the UI we will be using it as it will save you lots of time and steps!
What on earth is a Docker Compose?
Docker Compose allows us to define how Docker should set up one or more containers within a single configuration file. This file is yaml formatted and Container Manager uses the Projects feature to manage them.
Folder Setup
First we need to set up some folders for the Arr’s to save their configuration files and also where the Project will save the compose.
Using File Station create the following folders. (Skip ones you don’t need)
/docker/projects/arrs-compose - Required
/docker/radarr
/docker/sonarr
/docker/lidarr
/docker/prowlarr
/docker/bazarr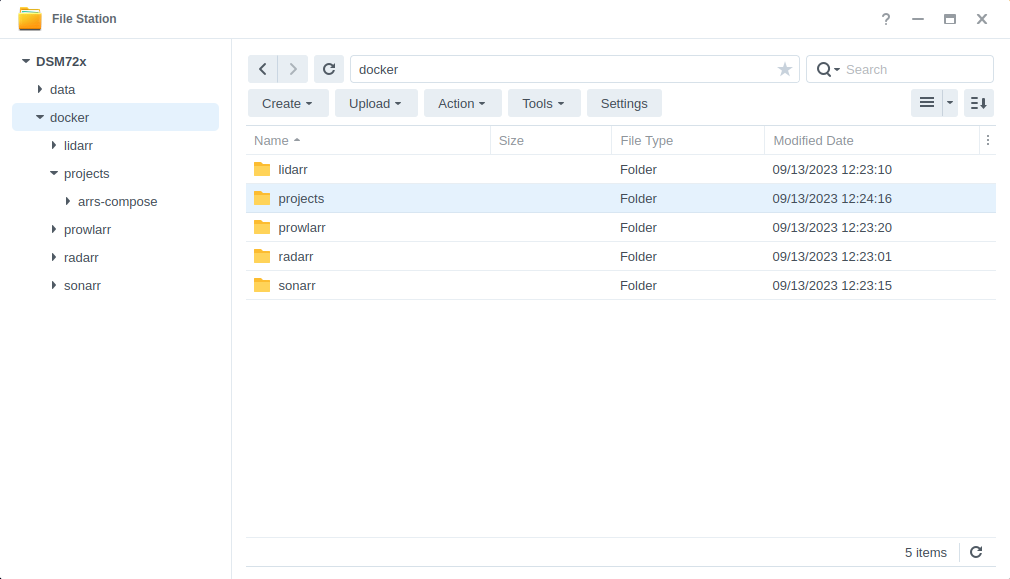
Container Set Up
Next we are going to set up a ‘Project’ in Container Manager. Open up Container Manager and click on Project, then on the right-hand side click ‘Create’.
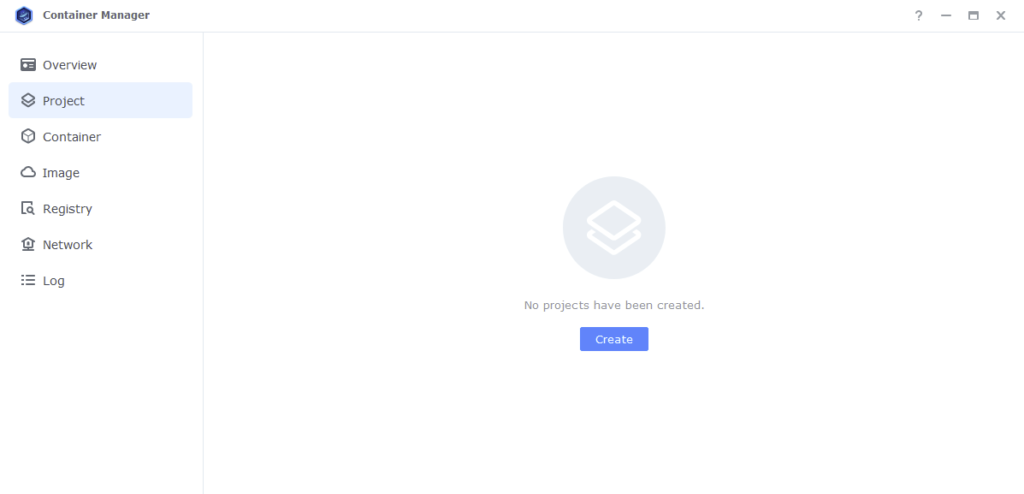
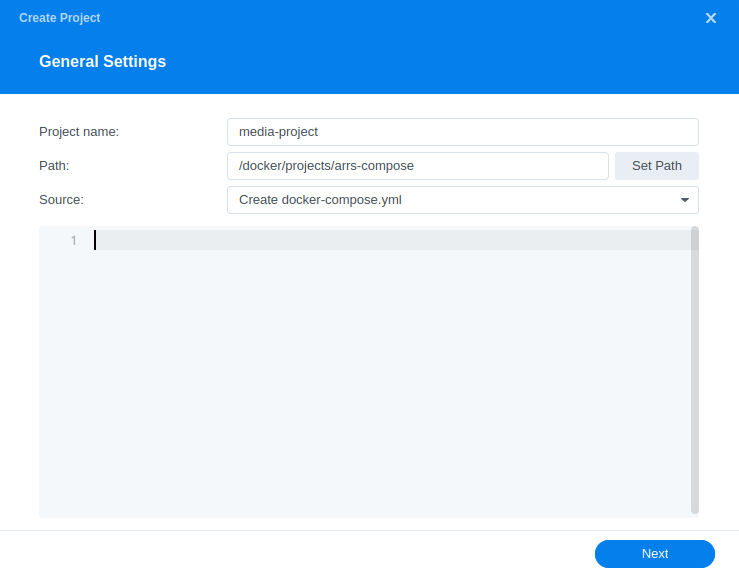
In the next screen we will set up our General Settings.
| Section | Setting |
|---|---|
| Project Name: | media-project |
| Path: | /docker/projects/arrs-compose |
| Source: | Create docker-compose.yml |
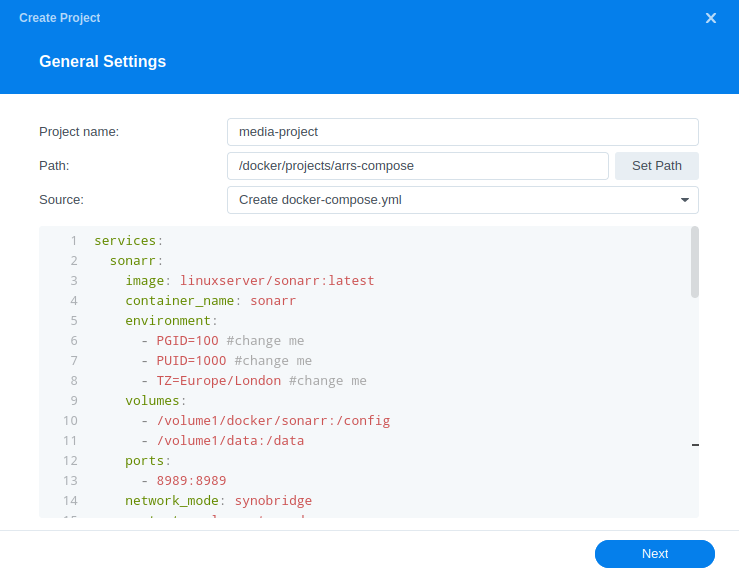
Next we are going to drop in our docker compose configuration, copy all the code in the box below and paste it into line ‘1’
A couple of notes:
- I am pulling these images directly from Docker Hub and not lscr.io this is because container manager can’t check for updates on third party repos
- You will see notes saying #change me we will do this on the next step, and you can remove the comments if you wish
- The folder structure across my guides will result in Hard links for torrents
services:
  sonarr:
    image: linuxserver/sonarr:latest
    container_name: sonarr
    environment:
      - PUID=1234 #CHANGE_TO_YOUR_UID
      - PGID=65432 #CHANGE_TO_YOUR_GID
      - TZ=Europe/London #CHANGE_TO_YOUR_TZ
      - UMASK=022
    volumes:
      - /volume1/docker/sonarr:/config
      - /volume1/data:/data
    ports:
      - 8989:8989/tcp
    network_mode: synobridge
    security_opt:
      - no-new-privileges:true
    restart: always

  lidarr:
    image: linuxserver/lidarr:latest
    container_name: lidarr
    environment:
      - PUID=1234 #CHANGE_TO_YOUR_UID
      - PGID=65432 #CHANGE_TO_YOUR_GID
      - TZ=Europe/London #CHANGE_TO_YOUR_TZ
      - UMASK=022
    volumes:
      - /volume1/docker/lidarr:/config
      - /volume1/data:/data
    ports:
      - 8686:8686/tcp
    network_mode: synobridge
    security_opt:
      - no-new-privileges:true
    restart: always

  radarr:
    image: linuxserver/radarr:latest
    container_name: radarr
    environment:
      - PUID=1234 #CHANGE_TO_YOUR_UID
      - PGID=65432 #CHANGE_TO_YOUR_GID
      - TZ=Europe/London #CHANGE_TO_YOUR_TZ
      - UMASK=022
    volumes:
      - /volume1/docker/radarr:/config
      - /volume1/data:/data
    ports:
      - 7878:7878/tcp
    network_mode: synobridge
    security_opt:
      - no-new-privileges:true
    restart: always

  bazarr:
    image: linuxserver/bazarr:latest
    container_name: bazarr
    environment:
      - PUID=1234 #CHANGE_TO_YOUR_UID
      - PGID=65432 #CHANGE_TO_YOUR_GID
      - TZ=Europe/London #CHANGE_TO_YOUR_TZ
      - UMASK=022
    volumes:
      - /volume1/docker/bazarr:/config
      - /volume1/data/:/data
    ports:
      - 6767:6767/tcp
    network_mode: synobridge
    security_opt:
      - no-new-privileges:true
restart: alwaysI have split out Prowlarr as you may want this running on a VPN connection if your ISP blocks certain indexers. If not copy this section into your compose as well. See the side menu for adding this to GlueTUN.
  prowlarr:
    image: linuxserver/prowlarr:latest
    container_name: prowlarr
    environment:
      - PUID=1234 #CHANGE_TO_YOUR_UID
      - PGID=65432 #CHANGE_TO_YOUR_GID
      - TZ=Europe/London #CHANGE_TO_YOUR_TZ
      - UMASK=022
    volumes:
      - /volume1/docker/prowlarr:/config
    ports:
      - 9696:9696/tcp
    network_mode: synobridge
    security_opt:
      - no-new-privileges:true
restart: alwaysEditing the Compose & Environment Variables
Please keep in mind that YAML formatting is very specific, so keep things lined up as per the original.
The compose contains all the Arr’s in the overall stack, you can remove any you don’t plan on using by deleting their entire section in the code.
We need to make some minor edits to the compose file in order to make sure the containers use the ‘dockerlimited’ user we created earlier and also let them know which timezone we are located. You will need to edit these in each section noted with ‘#change me’
| Variable | Value |
|---|---|
| PUID= | Change it to the UID you obtained earlier in the first setup guides |
| PGID= | Change it to the GID you obtained earlier in the first setup guides |
| TZ= | You will need to change this line to your own timezone code – you can find the correct list of ones to use on wikipedia.org/wiki/List_of_tz_database_time_zones |
Once you have made all your required edits click ‘Next’
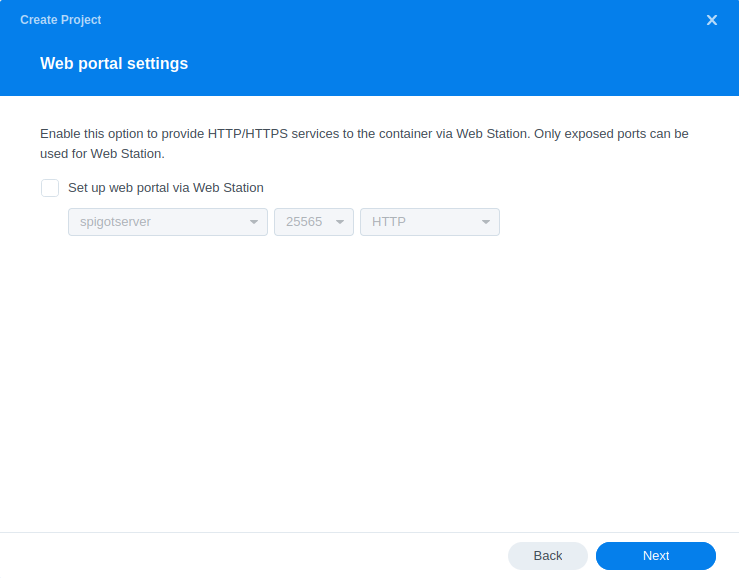
Nothing to change on the next screen click ‘Next’ again..
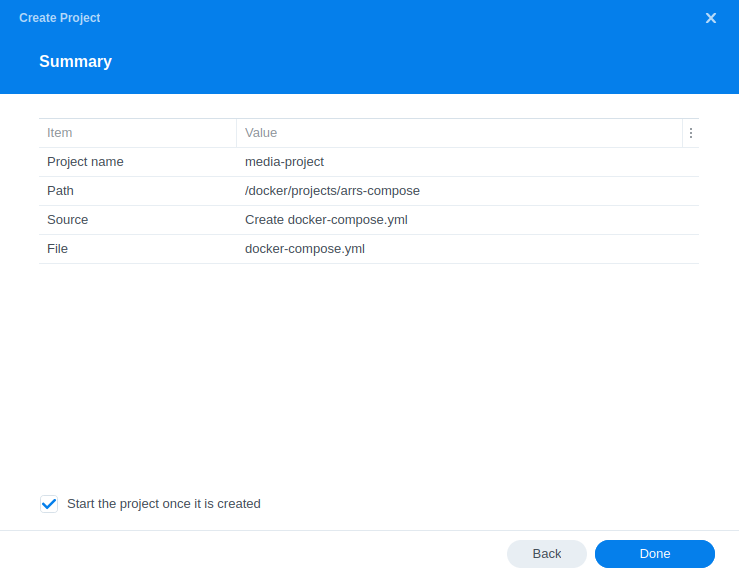
On the final screen just click ‘Done’ and you will see a new window appear which will kick of downloading of the required container image and configure the containers.
This can take a couple of minutes to finish as all the images are downloaded and extracted. You should see ‘Code 0’ when it has finished.

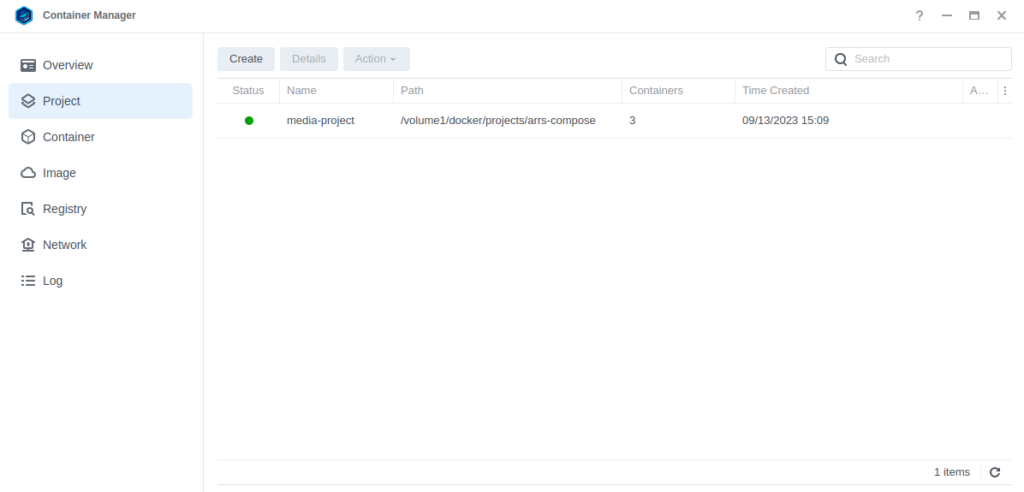
Once finished you will see the Project is running with a green status.
Firewall Exceptions
(Skip if you don’t have the Firewall configured)
If you have the Synology Firewall enabled please see this additional guide for further info on exceptions and correct set up.
Containers are ready to use
You will now be able to access each of the containers on their respective ports.
| App | Address (not https://) |
|---|---|
| Lidarr | http://NASIP:8686 |
| Radarr | http://NASIP:7878 |
| Sonarr | http://NASIP:8989 |
| Readarr | http://NASIP:8787 |
| Bazarr | http://NASIP:6767 |
| Prowlarr | http://NASIP:9696 |
Please see the next section which covers the ‘basics’ of each application setup as these usually catch people out. Full documentation can be found on https://wiki.servarr.com/
Key Settings within the Arrs
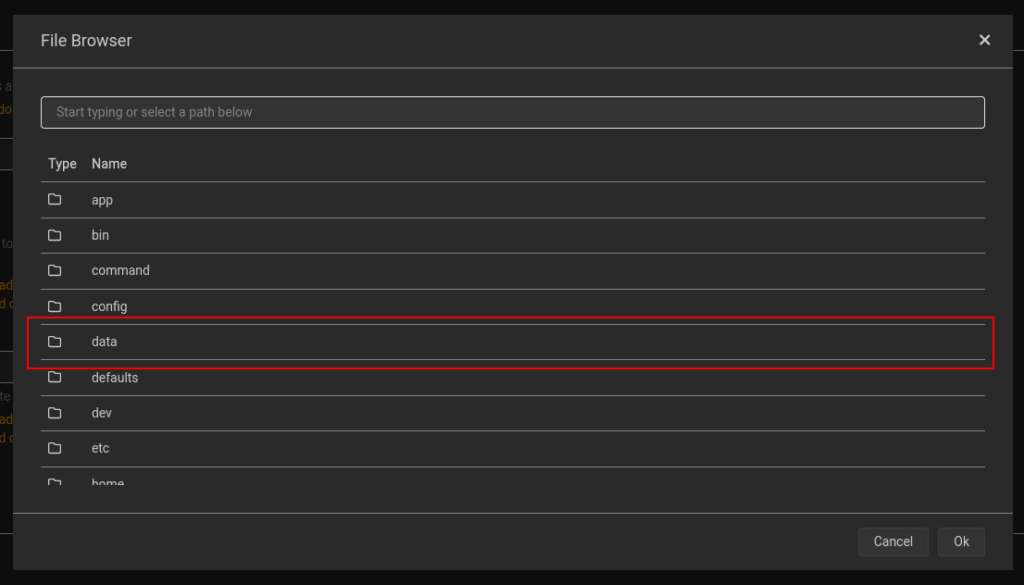
Settings > Media Management > Root Folders
Each of the Arr’s refer to the place(s) you keep your media as ‘Root Folders’. These are where the app will ultimately move your music/movies/books/shows once they finish downloading. Use the table below to set each of your folders correctly.
You will see other folders when you first browse for the /data folder it is located in the top level folder.
| App | Root Folder |
|---|---|
| Lidarr | /data/media/music |
| Radarr | /data/media/movies |
| Sonarr | /data/media/tv |
| Bazarr | Not required |
| Prowlarr | Not required |
Settings > Media Management > Remote Path Mappings
While most of the settings on this page are self-explanatory something that has caught people out is the Remote Path Mappings setting. If you are hosting all your services on the same NAS and in Docker do not add any settings here.
Settings > Download Client(s) > Add your Client > Host and Port
As our containers are all running on the ‘synobridge’ custom bridge we can use the Gateway IP for this bridge for inter container networking. This will be 172.20.0.1 and the appropriate port for your Client assuming it is running in Docker!
You should now have the basics in place and I 100% recommend having a look at the previously mentioned https://wiki.servarr.com/ documentation as it will help you understand how the Arrs work.
Other settings for the Arrs
While I covered some very basics you really need to make use of the documentation, it goes into detail of how and why the core functions work across the apps. You can find it on the Servarr Wiki.
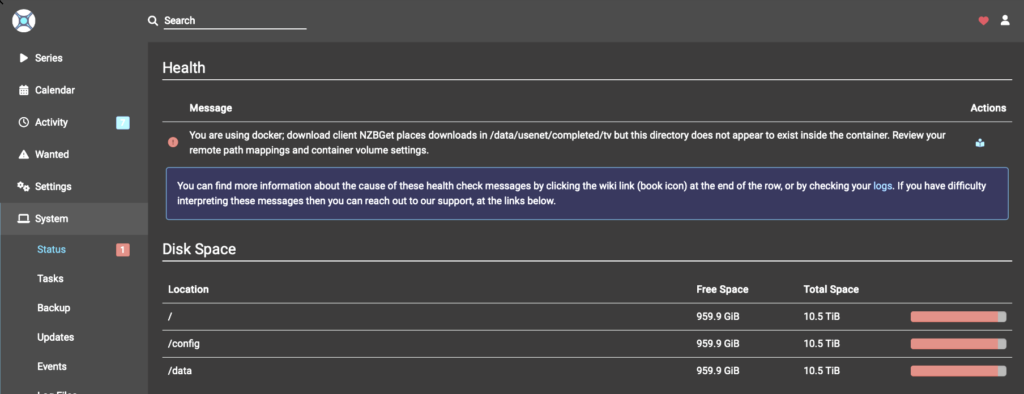
Warning about download location not being available
Recently on initial setup we have been seeing the below Health message – if your “/data” folder is reporting its free and total space you should be able to ignore this and it will vanish once a download is successfully imported
FAQ
Migration from old guides.
If you followed my older guides where you set up each of these containers in the Container Manager UI or Pre DSM7.2 Docker UI you can follow this one to migrate in a couple of steps.
- Stop and delete the existing containers but keep your directories!
- Follow the rest of this guide and all your existing configs will be kept using your old files.
Looking for some help, join our Discord community
If you are struggling with any steps in the guides or looking to branch out into other containers join our Discord community!

Buy me a beverage!
If you have found my site useful please consider pinging me a tip as it helps cover the cost of running things or just lets me stay hydrated. Plus 10% goes to the devs of the apps I do guides for every year.


Hi Thank you for the guide, I can’t find the following paths
> Download Client > Client IP and Port
and
> Settings > Indexers
These should be settings within the Arrs themselves, they can vary a little between versions but essentially the settings themselves are the same.
Hi Thank you for your reply.
I have gone through all the arrs and there is no such option that I can see called “client IP and Port” under Download client. Also can’t find where to enter Gateway IP under indexers.
Thanks
Hey, I will reword this section of the guide and add some screenshots. Essentially the options are when you add a download client it will ask you to enter an ip address or hostname.
Will get on it tonight after work.
Hi thank you.
I have managed to set up the download client. However, I still don’t understand the indexer part. I have prowlarr installed following your guide. I have connected both radarr and sonarr in prowlarr. But where do I add “Gateway IP of 172.20.0.1 for your connection to Prowlarr if you are using it.”
Edited after my initial reply..
I think I need to lay off the coffee!
“As per the Download client settings use the Gateway IP of 172.20.0.1 for your connection
toProwlarr to each of the arrs if you are using it.”“As per the Download client settings use the Gateway IP of 172.20.0.1 for your connection from Prowlarr to each of the arrs if you are using it.”
Within Prowlarr once you have added each of the Arrs it will sync the indexers you configure to each app on a schedule nothing more to do with Radarr etc.
Hi thank you so much. I think that one word changed it all haha.
Maybe unrelated question, but i dont know where to ask it.
Assuming i set up the Arr project and a torrent downloader (most likely qbittorrent) with vpn.
How would i use the qbittorrent for videos/stuff which i dont want to have within the arrs? I do however want to download it with qbittorrent because of the VPN.
I also dont want to make a separate container for qbittorrent as i would only use it occassionally and would then be ok with manually moving the files where i want them.
Is that possible? Maybe i just overread it or missed a crucial part
Hey
So as long as those additional downloads are not tagged/categorised for Radarr/Sonarr then it will not import them.
Ah, thank you. I guess i will set it up next week and fiddle around a bit with it..
Hey Doc
Hope you’re well, and thanks for all the assistance with your guides.
I’m running a DS1821+ and Radarr seems to be having issues with SQLite ‘database is locked’ errors during ‘refresh movie’ (either manually or the daily automated task. In researching this, it seems that it’s due to problems with SQLite via SMB or NFS (if you use it). This grinds my NAS to a crawl until it’s worked it’s way right through the entire movie list, failing at random movies.
Is there a way to set Radarr to directly access the docker /config directory directly to improve SQLite performance ?
See: https://www.reddit.com/r/radarr/comments/b150np/docker_radarr_and_sonarr_database_locked/
I’m not running NFS, but instead standard SMB.
Many thanks
Hey, they are two unrelated issues you are running in Docker which is directly accessing the filesystem so no relation to SMB. I have had 3 others with the same issue and we think this must be an upstream change as went from no issues to lots in the course of a few days. Some people have reported moving to the nightly version fixes it. Someone else disabled there SSD read cache and it went away.
I will reply again a little later but I think it might be worth rolling back to a known working version from maybe a month ago. I am mobile at the moment so shorter reply.
I have even seen random locks on my 1821 with read/write cache so feels like something is not right.
Everything apart from Sonarr is working, it wont connect to any indexers or the download client. any ideas on how to fix this please
Got to love it when everything works apart from one thing! – Are you using the IP 172.20.0.1 as suggested at the end of the guide.
Hey Doc!
Have you had much experience with separate pools (ie. an additional pool added to a previous setup) and how to redirect downloads/media to the new(bigger) pool?
Hey
You can mount additional shares on other volumes just like the main /volume1/data we use in the guides..
e.g. /volume2/data2:/data2 (or whatever you called the secondary share.)
Then within Radarr/Sonarr etc you add the additional ‘root folder’of /data2/media/tv and any existing or new series you want to go there just add them to the new root folder accordingly
Just make sure you give the appropriate permissions to the share beforehand