Last updated on 6 April 2025
Please note if you are using DSM7.2 or higher you should use the Container Manager version of this guide from the menu.
This guide has reached the end of its updates as most people are now on the latest DSM update - This guide is correct as of 08/12/2023 however no further updates will be added.
| Update | Date |
|---|---|
| Aligned the Plex Claim environment variable with the other guides. | 01/05/2023 |
In this guide I am going to take you through the setup of Plex in Docker.
Do I need Hardware Transcoding?
The version of this guide you follow will depend on whether you want hardware transcoding, this is available to Plex Pass holders and requires your Synology CPU to have Intel Quick Sync capabilities.
Generally, if you are only using Plex at home with devices that can direct play your media you likely won’t need this. However, if you have users that share your server outside your household, or plan on streaming to mobile devices you will want hardware transcoding as this will speed up the process of changing media between codecs and resolutions quickly.
You can find the hardware transcoding guide here, if you want the standard setup continue on below…
Let’s Begin
In order to use this guide successfully you will need to complete the two proceeding guides which will get your folder structure and Docker, user setup. In addition, if you already have the original Synology Plex Package installed you will need to uninstall it first.
Downloading the Plex Image
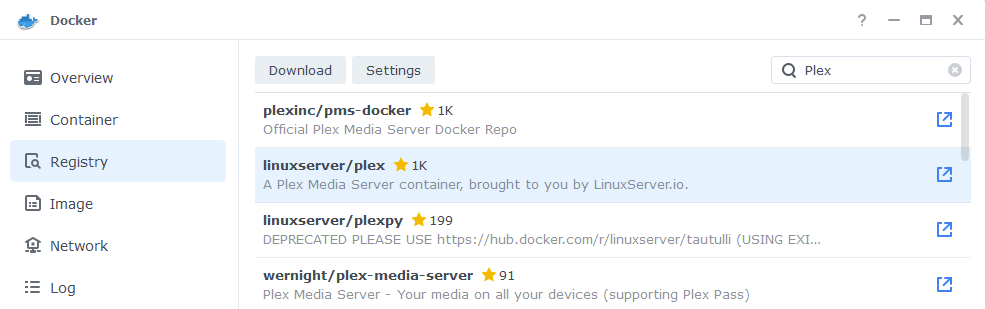
Open up Docker within DSM and navigate to the ‘Registry’ tab, then search for ‘Plex’.
In the list of available containers select the one made by Linuxserver as shown below, right click on it and select ‘Download’ or click the button at the top of the window.
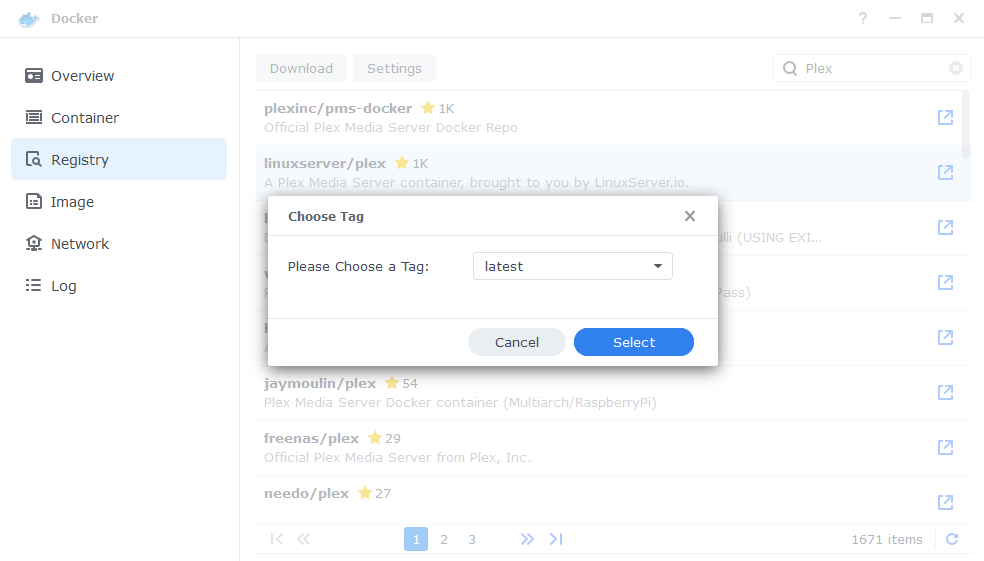
When the dialogue pops up asking you to choose a version, make sure you choose ‘Latest’ from the list.
You can check the status of the download over on the ‘Image’ tab, it will take a few minutes depending on the speed of your internet connection.
Setting up the container
In Docker click on the ‘Image’ tab, in the list of your containers select the ‘Linuxserver Plex’ image and click on ‘Launch’
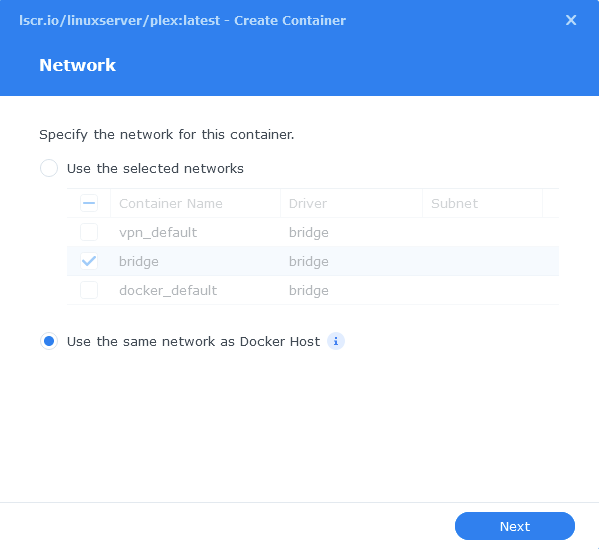
A note on Network Mode
You will notice that for Plex we don’t put it on the normal bridge network, this is because DSM reserves the DLNA ports Plex requires in order to use DLNA. So we run in Host mode, so it can share the ports.
General Settings
Next you will be greeted with the General Settings screen, this is where you can start specifying some of your preferences.
You can change the name of the container to anything you like, and you may want to enable Auto Restart as this will ensure the server starts automatically if you reboot your NAS.
You will also notice a Configure capabilities button — don’t change anything in here!
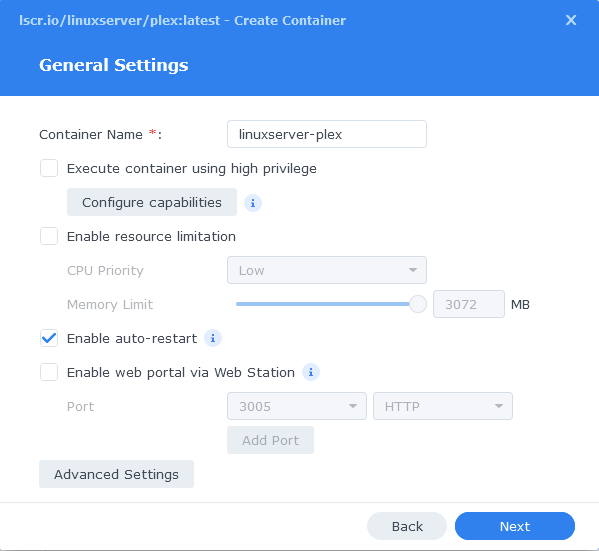
Next up we are going to click on the ‘Advanced Settings’ button, this will take you to a new window with a number of tabs which we are going to work through.
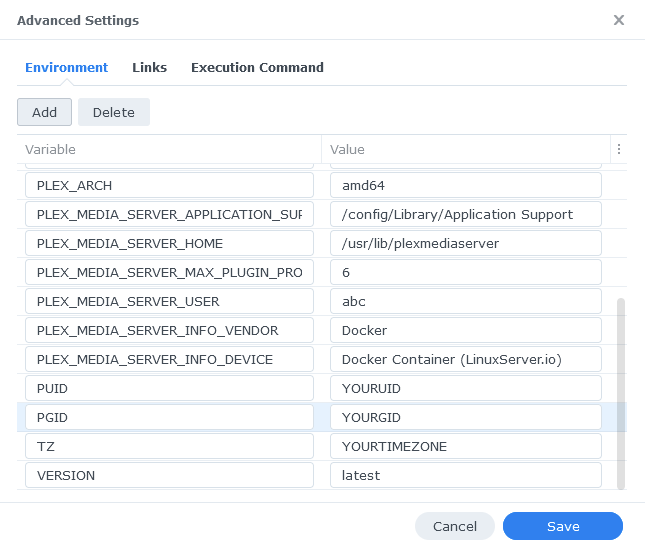
Environment
Next we are going to set up a couple of environment variables that docker will use to allow the container access to our files and folders and also to tell it where we live in the world.
Click the Add button, and fill in the following details as per the table/screenshot, you will need to do one at a time.
| Variable | Value |
|---|---|
| PUID | The UID you obtained in the user setup guide |
| PGID | The GID you obtained in the user setup guide |
| TZ | Your timezone wikipedia.org/wiki/List_of_tz_database_time_zones |
| VERSION | latest |
| PLEX_CLAIM | See Note Below |
Please note the PLEX_CLAIM variable is optional and not always required. You can remove if you don’t need it or come back and add it if you are unable to sign in to your server on start up.
To get the code go to https://plex.tv/claim and sign in, then put the code you receive in the PLEX_CLAIM variable. You have 4 mins to finish the guide after doing this, so best to grab it just before running the container.
Links / Execution Command
You do not need to set up anything on these tabs.
Press ‘Save’ to go back to the initial setup screen, then press ‘Next’
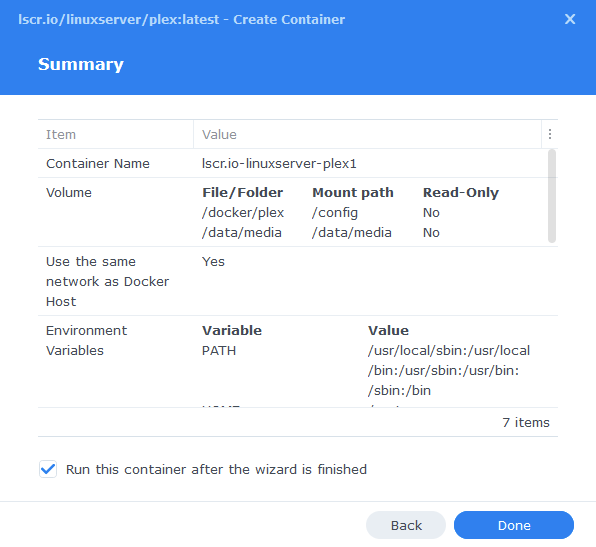
Volume Settings
We will now be specifying the directories where Plex will store its configuration files and where to find our media.
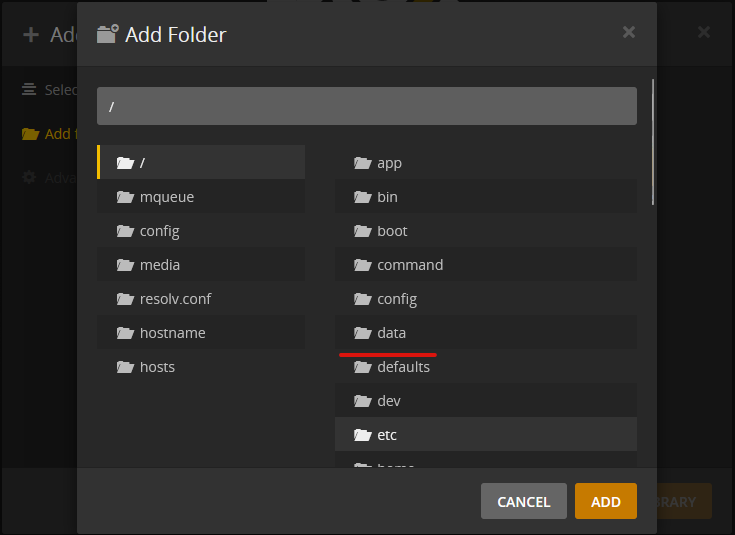
Click on ‘Add Folder’ select the ‘docker’ folder and create a new sub-folder called ‘plex’ select this folder and click ‘select’
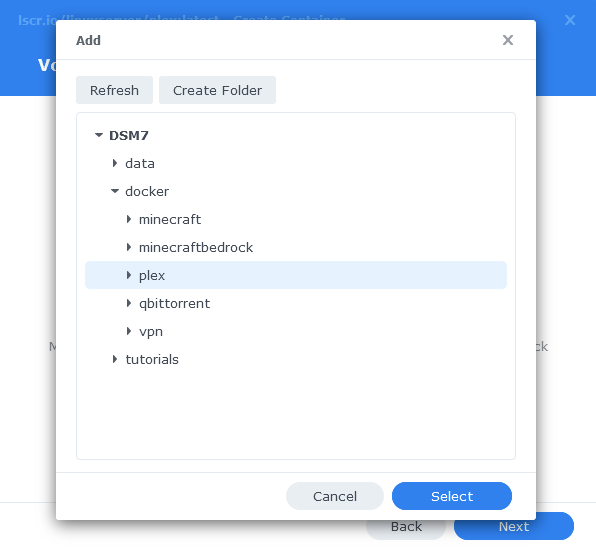
Now add ‘/config’ to the Mount path box

Click Add Folder again and this time select the top level ‘data’ folder and click Select, then enter ‘/data/media’ into the ‘Mount path’ box
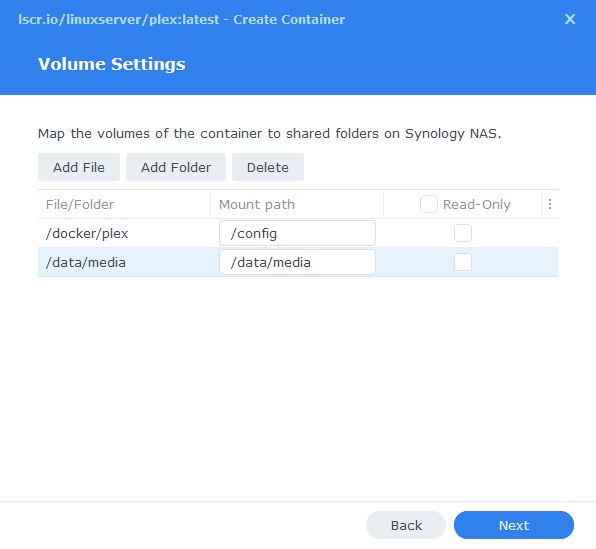
Click Next to move to the final screen.
Summary
You have now completed the setup of the container.
You will be shown an overall summary of the settings we have specified, this is a good time to double-check everything is correct. Finally, click on Done and the container should start to boot.
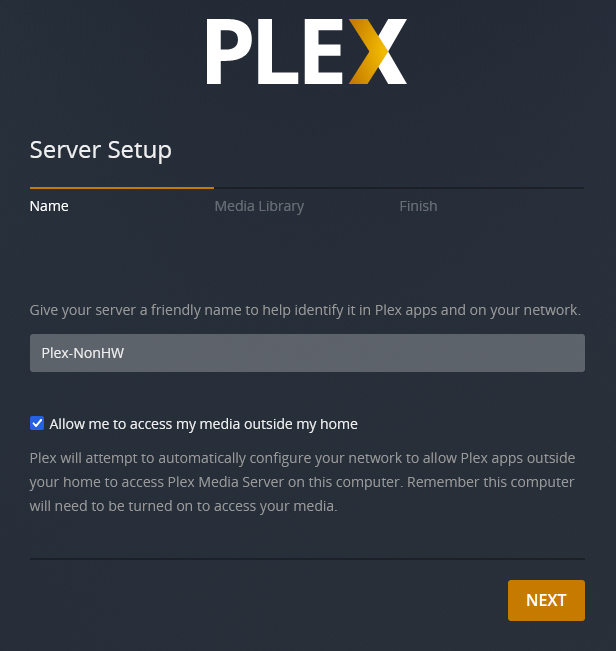
Initial Plex Setup
After a few minutes you should be able to access the server and go through the Plex setup by going to the IP of your NAS in your browser followed by port 32400/web/
e.g. 192.168.0.45:32400/web/
You will be asked to sign in or sign up for an account if you don’t have one already.
You should now be able to add your media which will be in the /data folder within Plex
You have now completed the setup.
| Historic Updates | Date |
|---|---|
| New guide released | 06/12/2021 |
| Updated Environment Variables to ensure server is updating to the latest version | 02/02/2022 |
| Updated with DSM7.1 Steps and Screenshots | 28/05/2022 |
| Amended the mount path for media | 12/08/2022 |
Looking for some help, join our Discord community
If you are struggling with any steps in the guides or looking to branch out into other containers join our Discord community!

Buy me a beverage!
If you have found my site useful please consider pinging me a tip as it helps cover the cost of running things or just lets me stay hydrated. Plus 10% goes to the devs of the apps I do guides for every year.


Hi, when trying to follow this I get as far as the apply stage, right at the end. I get the error “some of your settings are invalid. please enter them again” – this seems to be highlighting the first row on the ports tab, suggesting there’s an issue with the greyed out ‘auto’ value for port 1900. I cannot proceed, I just have to cancel and exit. Any ideas? I already have sonarr and sab setup and working ok.
Hey—which port number is it complaining about? It may be you have it in use – Do you also have the Plex package installed?
Hi, yes I was wondering last night if that might be it. I have an old synocommunity Plex version installed but it’s been dead for months now.
Yeah that will be hanging onto the port, you will need to uninstall it to free it up
Hi – I see the data folder in Plex once I install it, but am not seeing the movies or music or tv folders I created in step 1. any thoughts?
Hey double check you have entered your PUID and PGID correctly and the right way around
That was it, thanks. Didn’t realize dockerlimited would have a different PUID/PGID.
Hi Dr. Frankenstein! I followed your guide for DSM 7 but when I go into Plex it doesn’t find any media. I have permissions set up for full access. Any way you can help me?
Hey, first check to make sure you have your PUID, PGID the right way around. As that is the usual culprit.
Just to be clear: I have a Synology 1621+ with an AMD Ryzen V1500B CPU, therefore I should use the non-hardware transcoding installation.
Hey, To be honest it would be great if you could test it please, I don’t have an AMD based machine to try it. Based on some google searches it should work. If so I can update the guide based on your feedback.
If you have Discord it would be great to let us know on there as well.
Not sure if you read my previous reply already, but I just looked up the specifications and the v1500b doesn’t have the capabilities. So use the non transcoding setup.
https://cpu-benchmark.org/cpu/amd-ryzen-embedded-v1500b/
Thank you!
Been waiting for this one! Donated.
Thanks much appreciated