| Update | Date |
|---|---|
| Amended the path to save the compose file – this is for security, so the container has no access to the file contents. | 14/04/2023 |
Please note that the original version of NZBGet is no longer receiving updates from its developer – It continues to function perfectly, however you may wish to use the actively developed SABnzbd.
What is NZBGet?
NZBGet is an Usenet downloader, it will download releases from Newsgroups and where required will also repair and extract releases. It works on its own or in conjunction with other tools such as Sonarr and Radarr.
Let’s Begin
In the guide I will be taking you through the steps to download and setup NZBGet in Docker.
In order for you to successfully use this guide please complete the three preceding guides
- Step 1: Directory Setup Guide
- Step 2: Setting up a restricted Docker user
- Step 3: Setting up a Docker Bridge Network
Downloading the NZBGet Image
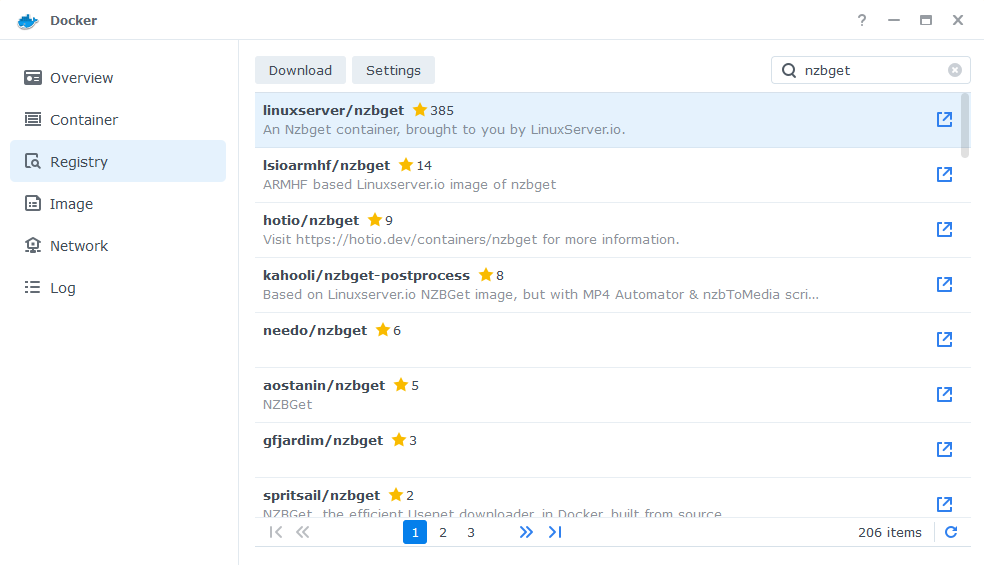
Open up Docker within DSM and navigate to the ‘Registry’ tab, then search for ‘nzbget’. In the list of available containers select the one made by Linuxserver as shown below and click on ‘Download’.
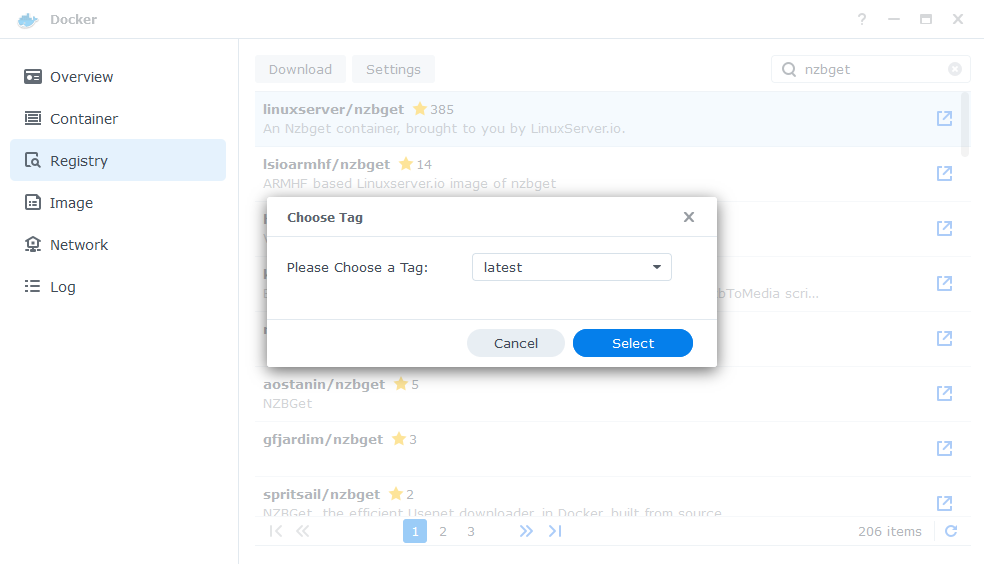
The pop-up box will ask which version you want to download, make sure you choose ‘Latest’ from the list of available versions.
You can check the status of the download over on the ‘Image’ tab.
Setting up the container
In Docker click on the ‘Image’ tab, in the list of your containers select the ‘Linuxserver/ NZBget’ image and click on ‘Launch’
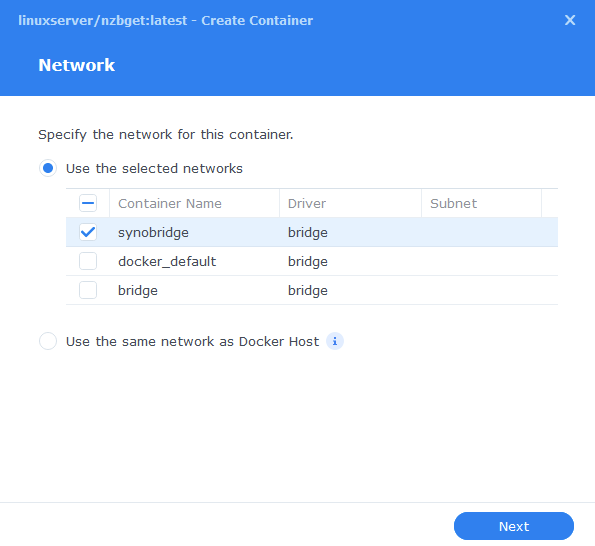
You will be greeted with the Network screen, we will be using the ‘synobridge’ network we created earlier select it from the list and click Next.
General Settings
Next you will be greeted with the General Settings screen, this is where you can start specifying some of your preferences.
You can change the name of the container to anything you like, and you may want to enable Auto Restart as this will ensure NZBGet starts automatically if you reboot your NAS.
You will also notice a Configure capabilities button — don’t change anything in here!

Next up we are going to click on the ‘Advanced Settings’ button, this will take you to a new window with a number of tabs which we are going to work through.
Environment Variables (PGID, PUID and Timezone)
Next we are going to set up a couple of environment variables that docker will use to allow the container access to our files and folders and also to tell it where we live in the world.
Click the Add button, and fill in the following details as per the table/screenshot, you will need to do one at a time.
| Variable | Value |
|---|---|
| PUID | The UID you obtained in the user setup guide |
| PGID | The GID you obtained in the user setup guide |
| TZ | Your timezone wikipedia.org/wiki/List_of_tz_database_time_zones |

Links/Execution Command
You do not need to set up anything on these tabs.
Press ‘Save’ to go back to the initial setup screen, then press ‘Next’
Port Settings
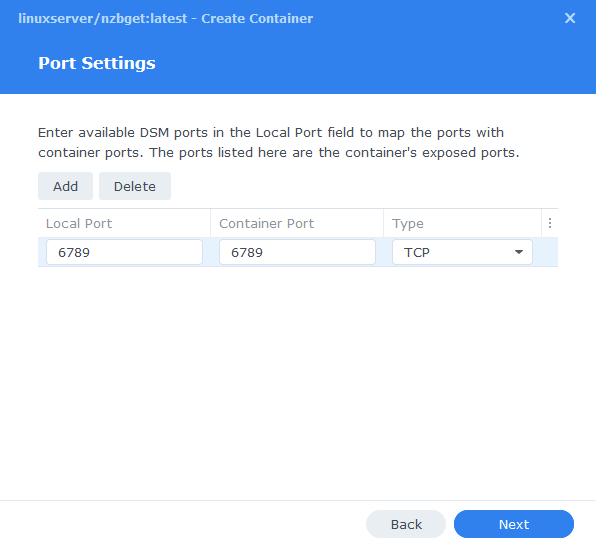
We won’t be changing any of the ports the container uses. You can repeat the ones shown on the right side of the settings page ‘Container Port’ onto the left side ‘Local Port’ once you have done this press ‘Next’.
Volume Settings
We will now be specifying the directories where NZBGet will store its configuration files and where to download files to.
First let’s create a folder for the configs, click on ‘Add Folder’ select the ‘docker’ share and create a new sub-folder called ‘nzbget’ click on this folder and click ‘select’

Next repeat this process and select the /data/usenet folder as this is where downloads will be heading.
You will then enter the ‘Mount paths’ as per the table and screenshot below.
| File/Folder | Mount path |
|---|---|
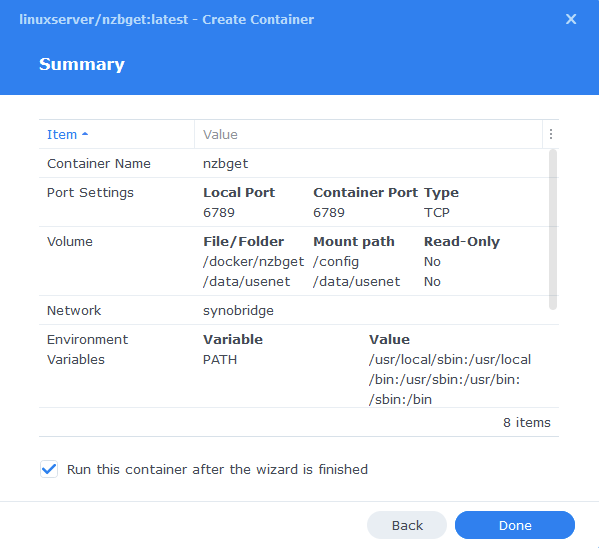
| docker/nzbget | /config |
| data/usenet | /data/usenet |

Click Next to move to the final screen.
Summary
You have now completed the setup of the container.
You will be shown an overall summary of the settings we have specified, this is a good time to double-check everything is correct. Finally, click on Done and the container should start to boot.
Some final steps
NZBGet will now be running, you can connect to it by going to the IP address of your NAS and port 6789
e.g. 192.168.0.40:6789
The default login details are:
Username = nzbget
Password = tegbzn6789

File Paths
To make sure you file ‘path’ settings are correct, go into settings and change the following value, this will ensure downloads go to the correct place.
| Path | Path to enter |
|---|---|
| MainDir | /data/usenet |

You have now completed the setup and can begin using NZBGet.
| Historic Updates | Date |
|---|---|
| Added Docker Compose details Added new folder mappings to ensure atomic moves and Hard-linking | 03/05/2021 |
| Guide re-written and updated with DSM7 screenshots | 01/08/2021 |
| Updated screenshots and steps for DSM7.1 | 11/06/2022 |
| Added new port settings and Docker Bridge Network | 24/07/2022 |
| Added note regarding ongoing updates of NZBGet | 30/12/2022 |
| Compose version number removed and small wording amendments | 08/04/2023 |
Looking for some help, join our Discord community
If you are struggling with any steps in the guides or looking to branch out into other containers join our Discord community!
Buy me a beverage!
If you have found my site useful please consider pinging me a tip as it helps cover the cost of running things or just lets me stay hydrated. Plus 10% goes to the devs of the apps I do guides for every year.


Thank you so much for your setup guides – they are by far the easiest to follow that I have come across – I will definitely be making a donation asap.
I followed your guide above but when I try to access my NAS using port 6789 I am unable to access the NZBGET portal. When I looked at the log file for the container I get “[ERROR] Binding socket failed for 0.0.0.0: ErrNo 98, Address already in use”
I checked ‘netstat -tnlp’ and it looks like port 6789 is in use – by what I have no idea!
I did not want to touch your setup guide but I am assuming I need to allocate another ‘unused’ port for this to work. Would I need to add an environment setting? I can’t change the port settings on the container as it is using the same network as the Docker host.
What would you suggest the best way to do correct this.
Cheers in advance.
Before you change anything do a reboot to see if that clears up the port. If not you will have to delete the container and during the setup skip the network tab and specify the port on the ports panel.
Thanks will give it a go and let you know the outcome.
Did you get it to work? I get the exact same thing, but I don’t know what would use this port.
On this NAS I have Unifi, Home Assistant, Sonarr and now trying to get NZBGet up and running. Any ideas?
It’s worth a quick reboot to try it
I setup using Bridge network in the container instead of using host network. Under “Port Settings” – “Local Port” is set to “49180” & the “Container Port” is set to “6789” – Hope this helps.
After days of trying to get nzbget to work, this finally worked. Thank you! Finally an easy guide!! Especially when I know nothing about docker. Coffee coming your way, or a beer, pick your poison.
One question that may be specific to me… my Synology is being used as just a server to download files, automation, etc. I have a WD PR4100 that I’m using as the Plex server that holds all my movies, my synology will hold all TV shows.
My WD shares are mounted to a folder in my Synology. Do I have to change the file paths? Or do I create a new file path in the docker setup for nzbget to point movies to the WD, rather than storing them on the Synology? Thanks again!
Hey Justin, are you using Radarr to manage your Movies? As that will help me answer. Thanks for the beer
yes I am. I just set up Radarr now and I mapped a drive “movies” to the Plex folder on my Synology. Hoping it works, but if you know something better I’m all ears!
Pretty much what I was going to say lol.
Setup guide worked for me. The only thing which was unclear for me is that the fact that ‘MainDir’ has to be equal to a value added in the docker mount path (in the this setup ‘/data/usenet’). In fact every different main folder needs to be present as a mount path in the docker.
This is to ensure that when Sonarr / Radarr asks NZBGet where it downloaded your files it will say /data/usenet/….. the consistent paths makes everything work nice and smoothly.
Not sure what you mean by “In fact every different main folder needs to be present as a mount path in the docker.” you don’t need to mount anything other than what is in the guide?
Hello,
First thanks a lot for the tutorial, I am actually migrating to docker in order to next upgrade from DSM6 to DSM7.
I have a little issue regarding my setup. I have an external access to my nzbget application by using the synology application portial (using reverse proxy). My issue is that authentication that I have parameterized in the security tab of Nzbget is never called when using the application portal reverse proxy. Any idea is welcome. It’s working when I shutdown the docker nzbget application to launch my old nzbget package (provided by the community).
Thanks,
Louis
I have resolved my issue by forcing the FormAuth parameter in the security tab. I think I had issue because I did not close my browser between my differents test cases when switching between each nzbget application.
Hey Dr_Frankenstein
I keep getting these errors in NZBGet. I followed all instructions and the service account you had in step 1 has RW permissions.
ERROR Thu Oct 14 2021 01:42:33 Could not delete temporary directory /warez/media/tv/Random TVShow/_unpack: No such file or directory
ERROR Thu Oct 14 2021 01:42:33 Unrar error code: 9
ERROR Thu Oct 14 2021 01:42:33 Could not create directory /warez/media/tv/Random TV Show/_unpack: could not create directory /warez/media: Permission denied
Wondering if you or anyone else experienced this.
Thank you
Hey, double check your mount points are consistent across all the apps, might be easier to trouble shoot if you jump on Discord as we can share screenshots.
Sounds good. I will do that. Definitely a lot easier to troubleshoot that way!
YES! I’m getting this exact error! I noticed something very odd in the nzbget log. It has entries showing “User gid: 911”, when I very clearly entered “100” in the environmental variables. https://i.imgur.com/NMUhFOJ.png Too new at this to know if the error is related to this…
The gid:911 in the log was due to my having listed the variable as GUID: 100 instead of PGID. D’oh!
But I’m still having the Permission denied / error code 9 issue
Did you fix this — if you initially set the ID’s incorrectly it can mess with the permissions and mean that you still have an issue when they are then set correctly. Sometimes it’s worth deleting the offending folder and recreating it.