| Update | Date |
|---|---|
| Amended the path to save the compose file – this is for security, so the container has no access to the file contents. | 14/04/2023 |
Please note that the original version of NZBGet is no longer receiving updates from its developer – It continues to function perfectly, however you may wish to use the actively developed SABnzbd.
What is NZBGet?
NZBGet is an Usenet downloader, it will download releases from Newsgroups and where required will also repair and extract releases. It works on its own or in conjunction with other tools such as Sonarr and Radarr.
Let’s Begin
In the guide I will be taking you through the steps to download and setup NZBGet in Docker.
In order for you to successfully use this guide please complete the three preceding guides
- Step 1: Directory Setup Guide
- Step 2: Setting up a restricted Docker user
- Step 3: Setting up a Docker Bridge Network
Downloading the NZBGet Image
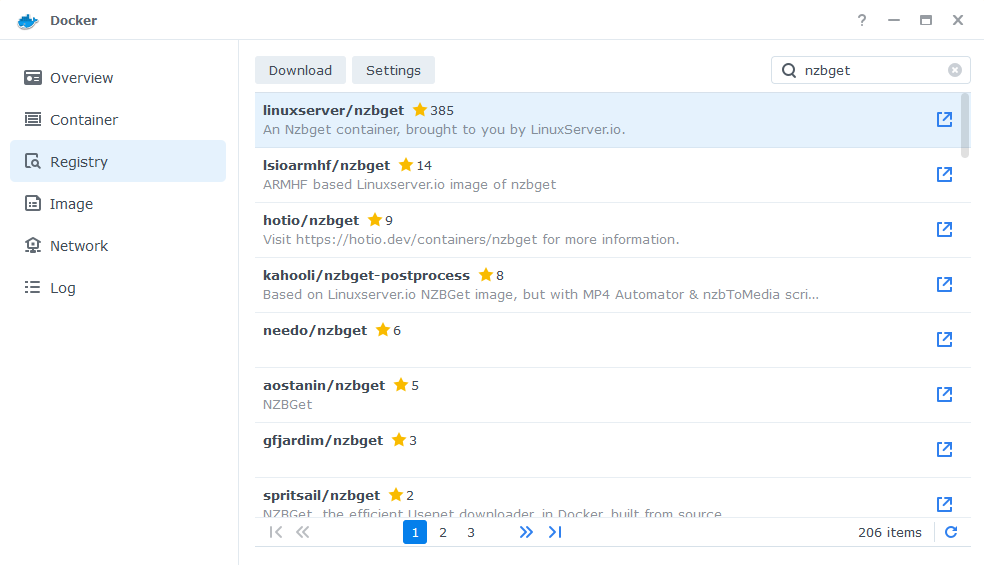
Open up Docker within DSM and navigate to the ‘Registry’ tab, then search for ‘nzbget’. In the list of available containers select the one made by Linuxserver as shown below and click on ‘Download’.
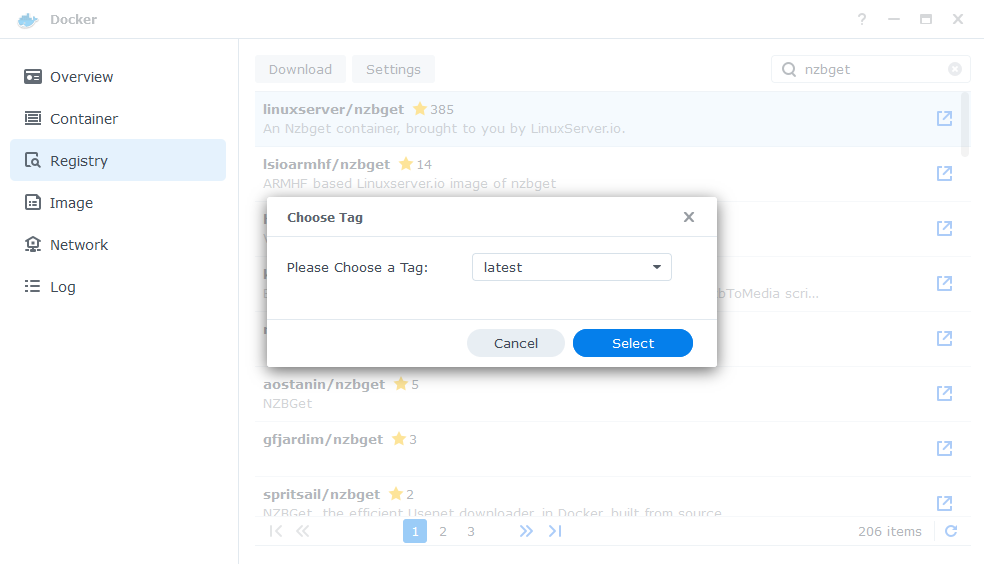
The pop-up box will ask which version you want to download, make sure you choose ‘Latest’ from the list of available versions.
You can check the status of the download over on the ‘Image’ tab.
Setting up the container
In Docker click on the ‘Image’ tab, in the list of your containers select the ‘Linuxserver/ NZBget’ image and click on ‘Launch’
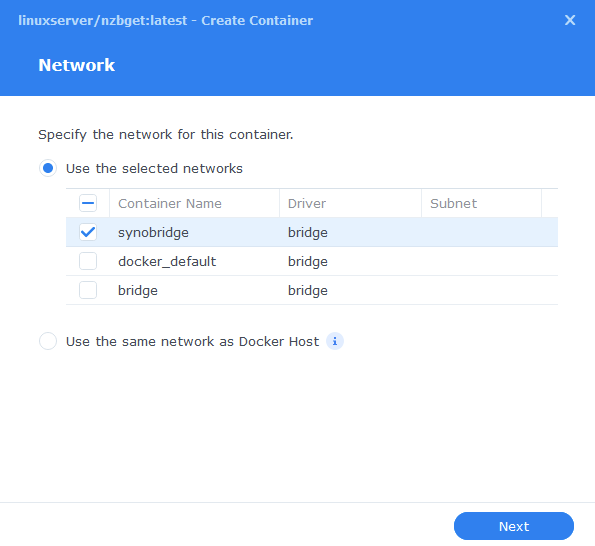
You will be greeted with the Network screen, we will be using the ‘synobridge’ network we created earlier select it from the list and click Next.
General Settings
Next you will be greeted with the General Settings screen, this is where you can start specifying some of your preferences.
You can change the name of the container to anything you like, and you may want to enable Auto Restart as this will ensure NZBGet starts automatically if you reboot your NAS.
You will also notice a Configure capabilities button — don’t change anything in here!
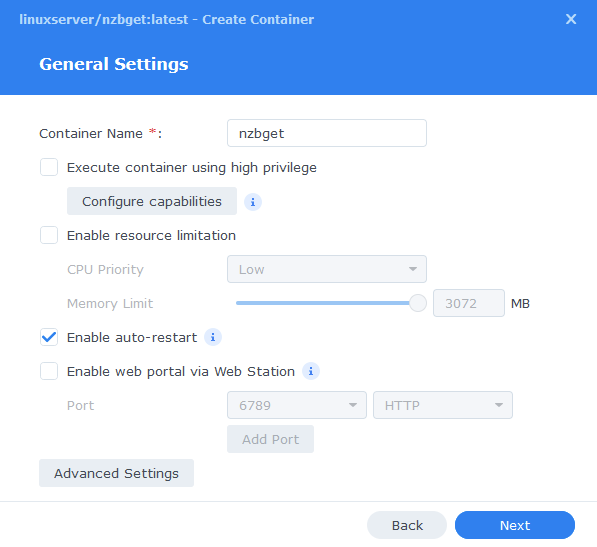
Next up we are going to click on the ‘Advanced Settings’ button, this will take you to a new window with a number of tabs which we are going to work through.
Environment Variables (PGID, PUID and Timezone)
Next we are going to set up a couple of environment variables that docker will use to allow the container access to our files and folders and also to tell it where we live in the world.
Click the Add button, and fill in the following details as per the table/screenshot, you will need to do one at a time.
| Variable | Value |
|---|---|
| PUID | The UID you obtained in the user setup guide |
| PGID | The GID you obtained in the user setup guide |
| TZ | Your timezone wikipedia.org/wiki/List_of_tz_database_time_zones |
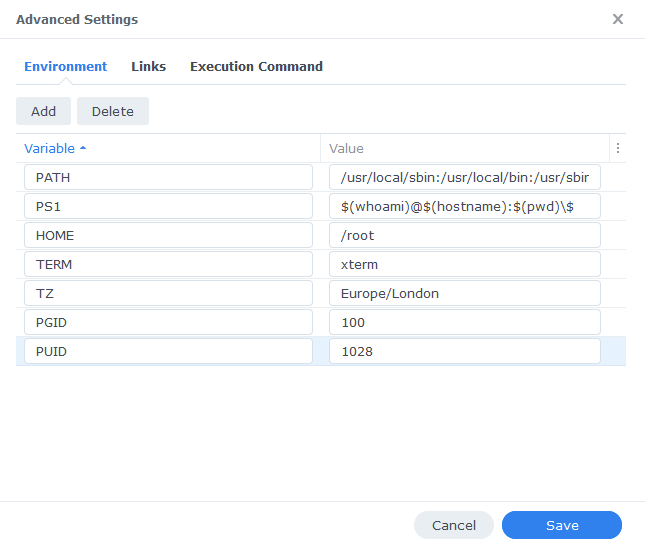
Links/Execution Command
You do not need to set up anything on these tabs.
Press ‘Save’ to go back to the initial setup screen, then press ‘Next’
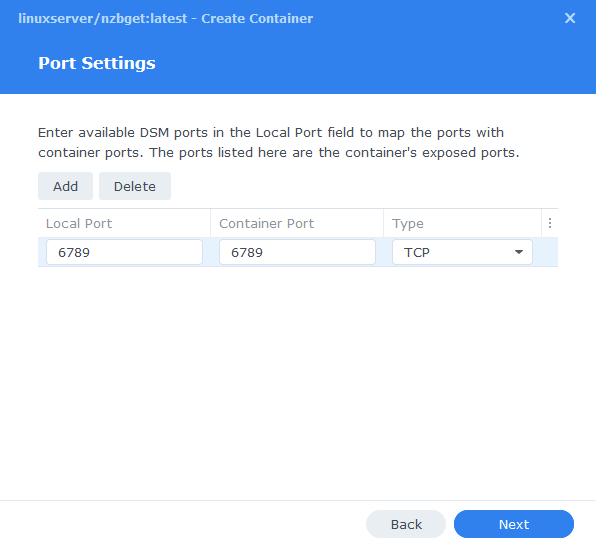
Port Settings
We won’t be changing any of the ports the container uses. You can repeat the ones shown on the right side of the settings page ‘Container Port’ onto the left side ‘Local Port’ once you have done this press ‘Next’.
Volume Settings
We will now be specifying the directories where NZBGet will store its configuration files and where to download files to.
First let’s create a folder for the configs, click on ‘Add Folder’ select the ‘docker’ share and create a new sub-folder called ‘nzbget’ click on this folder and click ‘select’
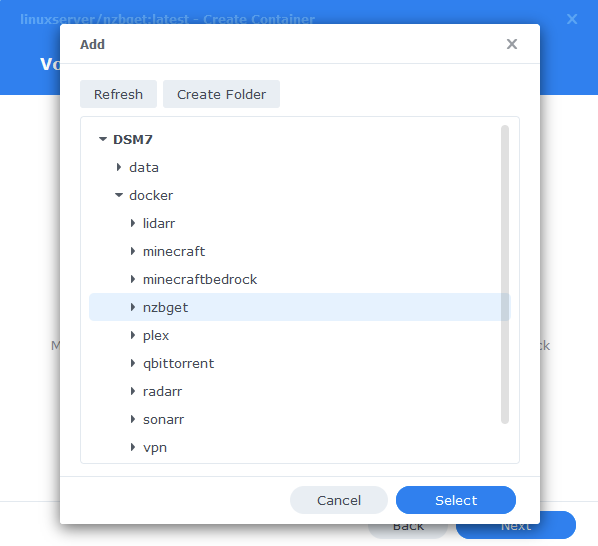
Next repeat this process and select the /data/usenet folder as this is where downloads will be heading.
You will then enter the ‘Mount paths’ as per the table and screenshot below.
| File/Folder | Mount path |
|---|---|
| docker/nzbget | /config |
| data/usenet | /data/usenet |
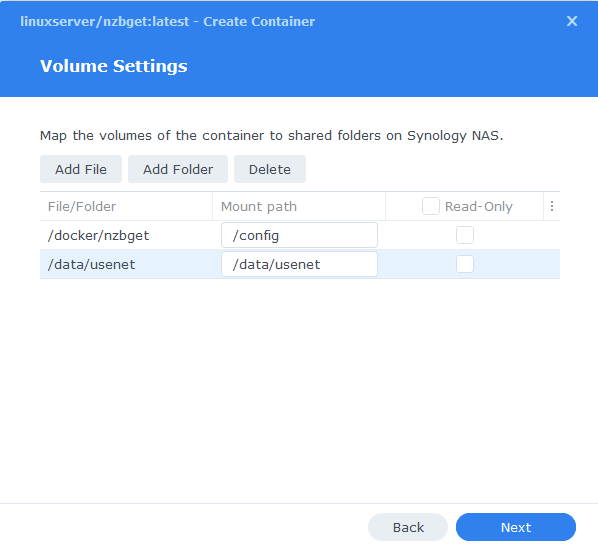
Click Next to move to the final screen.
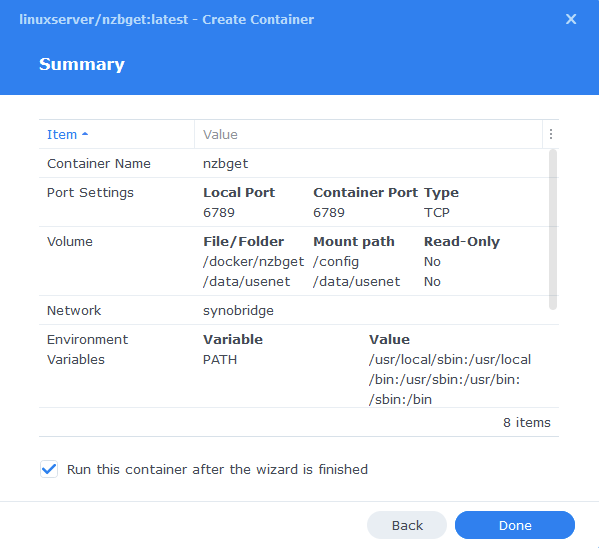
Summary
You have now completed the setup of the container.
You will be shown an overall summary of the settings we have specified, this is a good time to double-check everything is correct. Finally, click on Done and the container should start to boot.
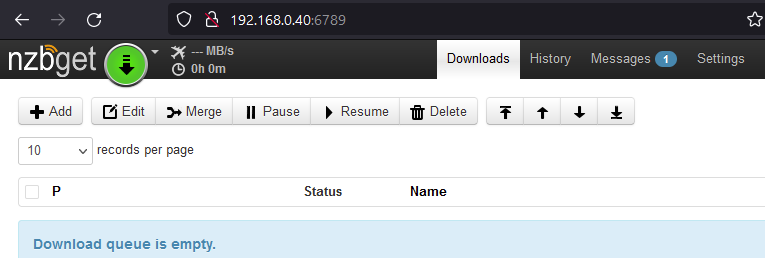
Some final steps
NZBGet will now be running, you can connect to it by going to the IP address of your NAS and port 6789
e.g. 192.168.0.40:6789
The default login details are:
Username = nzbget
Password = tegbzn6789
File Paths
To make sure you file ‘path’ settings are correct, go into settings and change the following value, this will ensure downloads go to the correct place.
| Path | Path to enter |
|---|---|
| MainDir | /data/usenet |

You have now completed the setup and can begin using NZBGet.
| Historic Updates | Date |
|---|---|
| Added Docker Compose details Added new folder mappings to ensure atomic moves and Hard-linking | 03/05/2021 |
| Guide re-written and updated with DSM7 screenshots | 01/08/2021 |
| Updated screenshots and steps for DSM7.1 | 11/06/2022 |
| Added new port settings and Docker Bridge Network | 24/07/2022 |
| Added note regarding ongoing updates of NZBGet | 30/12/2022 |
| Compose version number removed and small wording amendments | 08/04/2023 |
Looking for some help, join our Discord community
If you are struggling with any steps in the guides or looking to branch out into other containers join our Discord community!
Buy me a beverage!
If you have found my site useful please consider pinging me a tip as it helps cover the cost of running things or just lets me stay hydrated. Plus 10% goes to the devs of the apps I do guides for every year.

