Last updated on 6 April 2025
Please note if you are using DSM7.2 or higher you should use the Container Manager version of this guide from the menu.
If you are still using an older DSM version migrate to Dockge and you can use my new guides!

See the Dockge guide here to start migration!
This guide has reached the end of its updates
| Update | Date |
|---|---|
| Amended the devices mounted to the container as had reports of better performance with them. | 17/05/2023 |
In this guide I am going to take you through the setup of Jellyfin in Docker using Docker Compose.
As of writing the Synology UI does not have the capability of passing through specific hardware to a container, this means we will need to set up Jellyfin via SSH using Docker Compose. However, don’t freak out as it’s not that difficult!
Does my Synology support Hardware Transcoding?
Before we do anything else, you need to make sure your model of Synology has hardware transcoding capabilities. You need to do a quick lookup via the linked Google Sheet below, this is updated by Plex however it’s perfectly relevant for Jellyfin.
If you find that your model does not support hardware transcoding you can jump back over to the standard guide.
Let’s Begin
As usual, it’s important you complete the three preceding guides which will get your folder structure and docker, user and bridge network setup.
- Step 0.5 : Docker, Memory Recommendations and Limitations
- Step 1: Directory Setup Guide
- Step 2: Setting up a restricted Docker user
- Step 3: Setting up a Docker Bridge Network
Docker Compose
We will be using Docker Compose to set up the Jellyfin container. In a nutshell we will be creating a text file (YAML formatted) which tells Docker exactly how we want to set up a specific container.
The next steps can be done either using a code/text editor such as Notepad++ or to keep things simple for this guide we will be using the Synology Text Editor which can be installed from the Package Center.
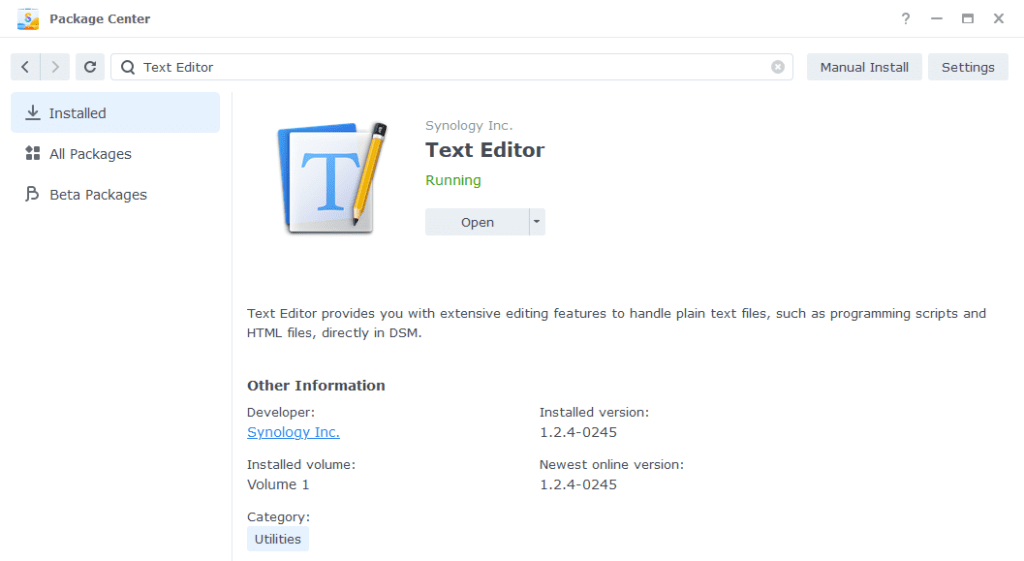
Open up Text Editor and click on File then New to start a new file.

You can now copy and paste the details below into the new text file, it is important you don’t change the spacing as YAML has to be formatted correctly in order to be read by Docker Compose.
services:
  jellyfin:
    image: linuxserver/jellyfin:latest
    container_name: jellyfin
    environment:
      - PUID=1234 #CHANGE_TO_YOUR_UID
      - PGID=65432 #CHANGE_TO_YOUR_GID
      - TZ=Europe/London #CHANGE_TO_YOUR_TZ
      - JELLYFIN_PublishedServerUrl=YOURNASIP
    volumes:
      - /volume1/docker/jellyfin:/config
      - /volume1/data/media:/data/media
    devices:
      - /dev/dri/renderD128:/dev/dri/renderD128
      - /dev/dri/card0:/dev/dri/card0
    ports:
      - 8096:8096 #web port
      - 8920:8920 #optional
      - 7359:7359/udp #optional
    network_mode: synobridge
    restart: unless-stopped
The two optional ports in the above can be removed if you will not use them. 7359 is for automated discovery of Jellyfin by the apps, and 8920 is the HTTPS port which is useful if not using the reverse proxy later in the guide.
Environment Variables
We need to make some changes in order for the container to have the correct permissions to save its configuration files and to have access to your media.
PUID and PGID
When you created your docker user you would have noted down these IDs add these to the compose file in the ‘environment:’ section
Volumes
We can now pass through our file paths into the container they are mounted using the volume’s section of the compose file.
I have pre-filled this section to pass the correct paths, the only thing that you may need to change is the /volume1/ if your file paths are on a different volume.
Timezone
The timezone variable will tell the container where you are in the world meaning your logs and scheduled tasks will run at the correct times. A list of timezones with the correct formatting can be found here wikipedia.org/wiki/List_of_tz_database_time_zones
Your final file should look similar to the one shown below.

Saving the Compose File
We now need to save this file into our docker share.
Click on File then Save As, navigate to the ‘docker’ share and create a new folder called ‘jellyfin’ (lower case)

You need to change the ‘File name’ to jellyfin.yml and save it in the ‘docker‘ folder

SSH and Docker-Compose
It’s time to get logged into your Diskstation via SSH, you can do this in the same way as when you obtained your IDs in the ‘Setting up a restricted Docker user‘ guide.

Once you have logged in you will need to give 2 commands, you can copy and paste these one at a time — you will need to enter your password for the command starting with ‘sudo’
First we are going to change directory to where the jellyfin.yml is located, type the below and then press enter.
cd /volume1/dockerThen we are going to instruct Docker Compose to read the file we created and complete the set-up of the container. Again type the below and press enter.
sudo docker-compose -f jellyfin.yml up -dWhen the command has completed you should be able to see Jellyfin running in the list of containers in the Synology GUI.

Jellyfin Initial Setup
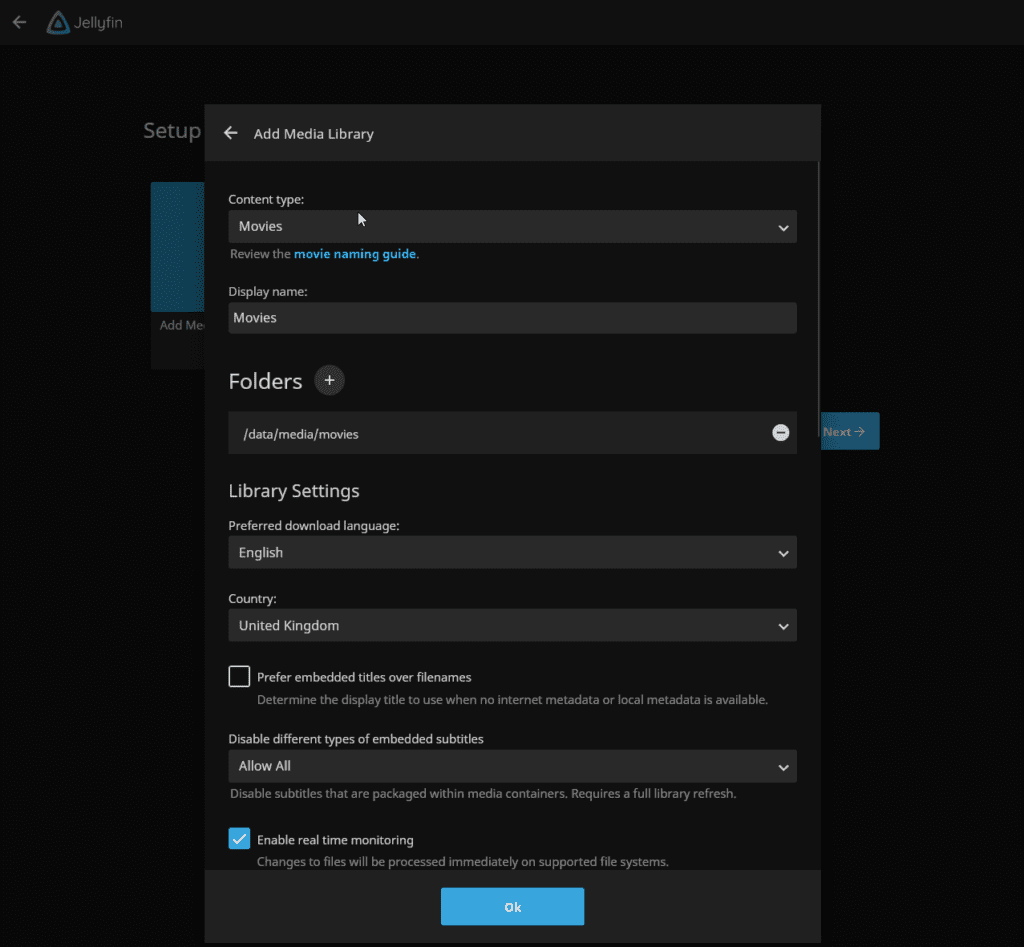
After a few minutes you should be able to access the server and go through the initial Jellyfin setup by going to the IP of your NAS in your browser followed by port 8096.
e.g. 192.168.0.30:8096
When adding movies or shows they will be located in the /data/media folder.
External Access
You have some choices when it comes to making your new container accessible from outside your home network, these come with different levels of security and convenience. This mini section is generic but covers the basics of getting this guide up and running and is entirely optional.
- Synology’s DDNS (Dynamic Domain Name System) with a TLS Certificate and Reverse Proxy
This is useful if you have some family members or friends that need access to something like Overseerr or Jellyseer and is covered below. - Tailscale or Wireguard VPN
If just you or close family in your household are accessing these services, and you don’t want to expose them to the internet this would be the more secure choice. See my other separate guides. - Cloudflare Tunnels
I don’t currently use these, so I would recommend watching the Wundertech guide on how they work.
A note on Double NAT or CGNAT
Unfortunately more ISPs are moving to these methods of address allocation as the IPv4 address space is getting low on available addresses. If your ISP is doing this your choices are more limited.
You can test if this is the case by checking the WAN IP on your Router/Modem settings and then comparing it to the one shown on portchecker.co. If they are different you are likely Double NAT and will either need to see if you can pay your ISP for a standard IPv4 address or use Tailscale or Cloudflare Tunnels for access.
Using the built-in tools on DSM
The first step of this process is to forward port 443 on your Router to your NAS IP Address, how you do this will depend on your router model, so please refer to its manual.
Router (External):443 > NASIP (Internal):443
Next make sure you have registered for a Synology Account as we are going to be using their DDNS service. https://account.synology.com/en-uk/register/ If you already have this set up move to the next step.
DDNS (Dynamic Domain Name System)
A DDNS address allows you to get external access to your container via an address provided by Synology, this is useful on home internet connections where your ISP will change your IP address on a semi-regular basis.
In the DSM Control panel go to ‘External Access’ and then to the ‘DDNS’ tab

Click on ‘Add’, then fill out the following sections.
| Section | Value |
|---|---|
| Service Provider | Synology |
| Hostname | This will be the unique address just for you so keep the name generic. minecraft.synology.me = BAD myawesomenas.synology,me =GOOD |
| Email: | Log into your Synology account |
| External Address (IPv4) | This should be filled in automatically |
| External Address (IPv6) | This should be filled in automatically if your ISP is using IPv6 |
| Get a Cert from Let’s Encrypt | Tick this box |
| Enable Heartbeat | Tick this box |
Now press OK, DSM will apply your settings. It can take a few moments to set up and the DSM interface will refresh. You will likely receive a certificate error which you will need to accept to get back into DSM.
Reverse Proxy
We are going to set up a reverse proxy subdomain for the address you just register. This means you and your users can access the container without using a port number as it will route all traffic through the secure 443 port.
Go back into the Control Panel and access the ‘Login Portal’ then in the ‘Advanced’ tab click ‘Reverse Proxy’ and then click on ‘Create’.

We are now going to enter some rules, so when you or your users access the URL specified the request will automatically be sent to the containers web UI.
Use the settings below, you will need to amend the Hostname sections in line with the hostname you registered earlier, and the IP of your NAS.
| Setting | Value |
|---|---|
| Reverse Proxy Name: | Give it a meaningful name in line with the container you are setting up. |
| Protocol: | HTTPS |
| Hostname: | containername.xxx.synology.me ‘containername‘ will be the name you want to use to access this container ‘.xxx.synology.me‘ will be the exact name you registered earlier |
| Port: | 443 |
| Protocol: | HTTP |
| Hostname: | ‘localhost’ or your NAS IP address |
| Port: | The UI Port Number from the yaml in the guide you are following |
On the second tab ‘Custom Header’ click on Create then WebSocket, this will add two entries for WebSockets to function correctly, you can now press save.

You should now be able to access the web UI of the container by going to the address you just set up in the reverse proxy, it will be a secure connection, and you should have no certificate errors.
You should now be able to access the Jellyfin login screen to https://jellyfin.yourhostname it will be a secure connection, and you should have no SSL errors.
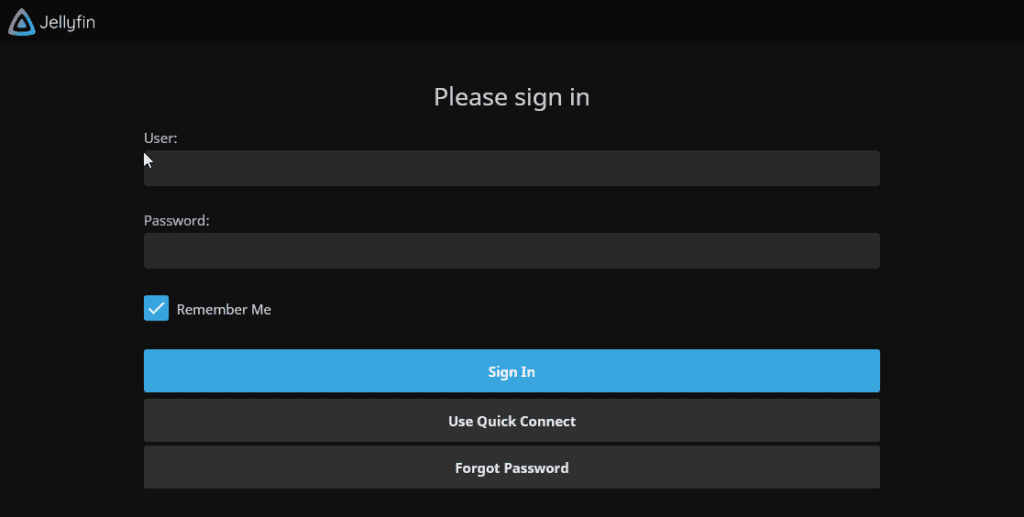
You can now log in with the username and password you created earlier, the same address is used in the Android and iPhone apps.
How to enable Hardware Transcoding
The last steps for initial set up are to enable the hardware transcode features for your NAS.
On the main Jellyfin homescreen, click on the hamburger menu on the top left and then ‘Dashboard’ in the ‘Administration’ section
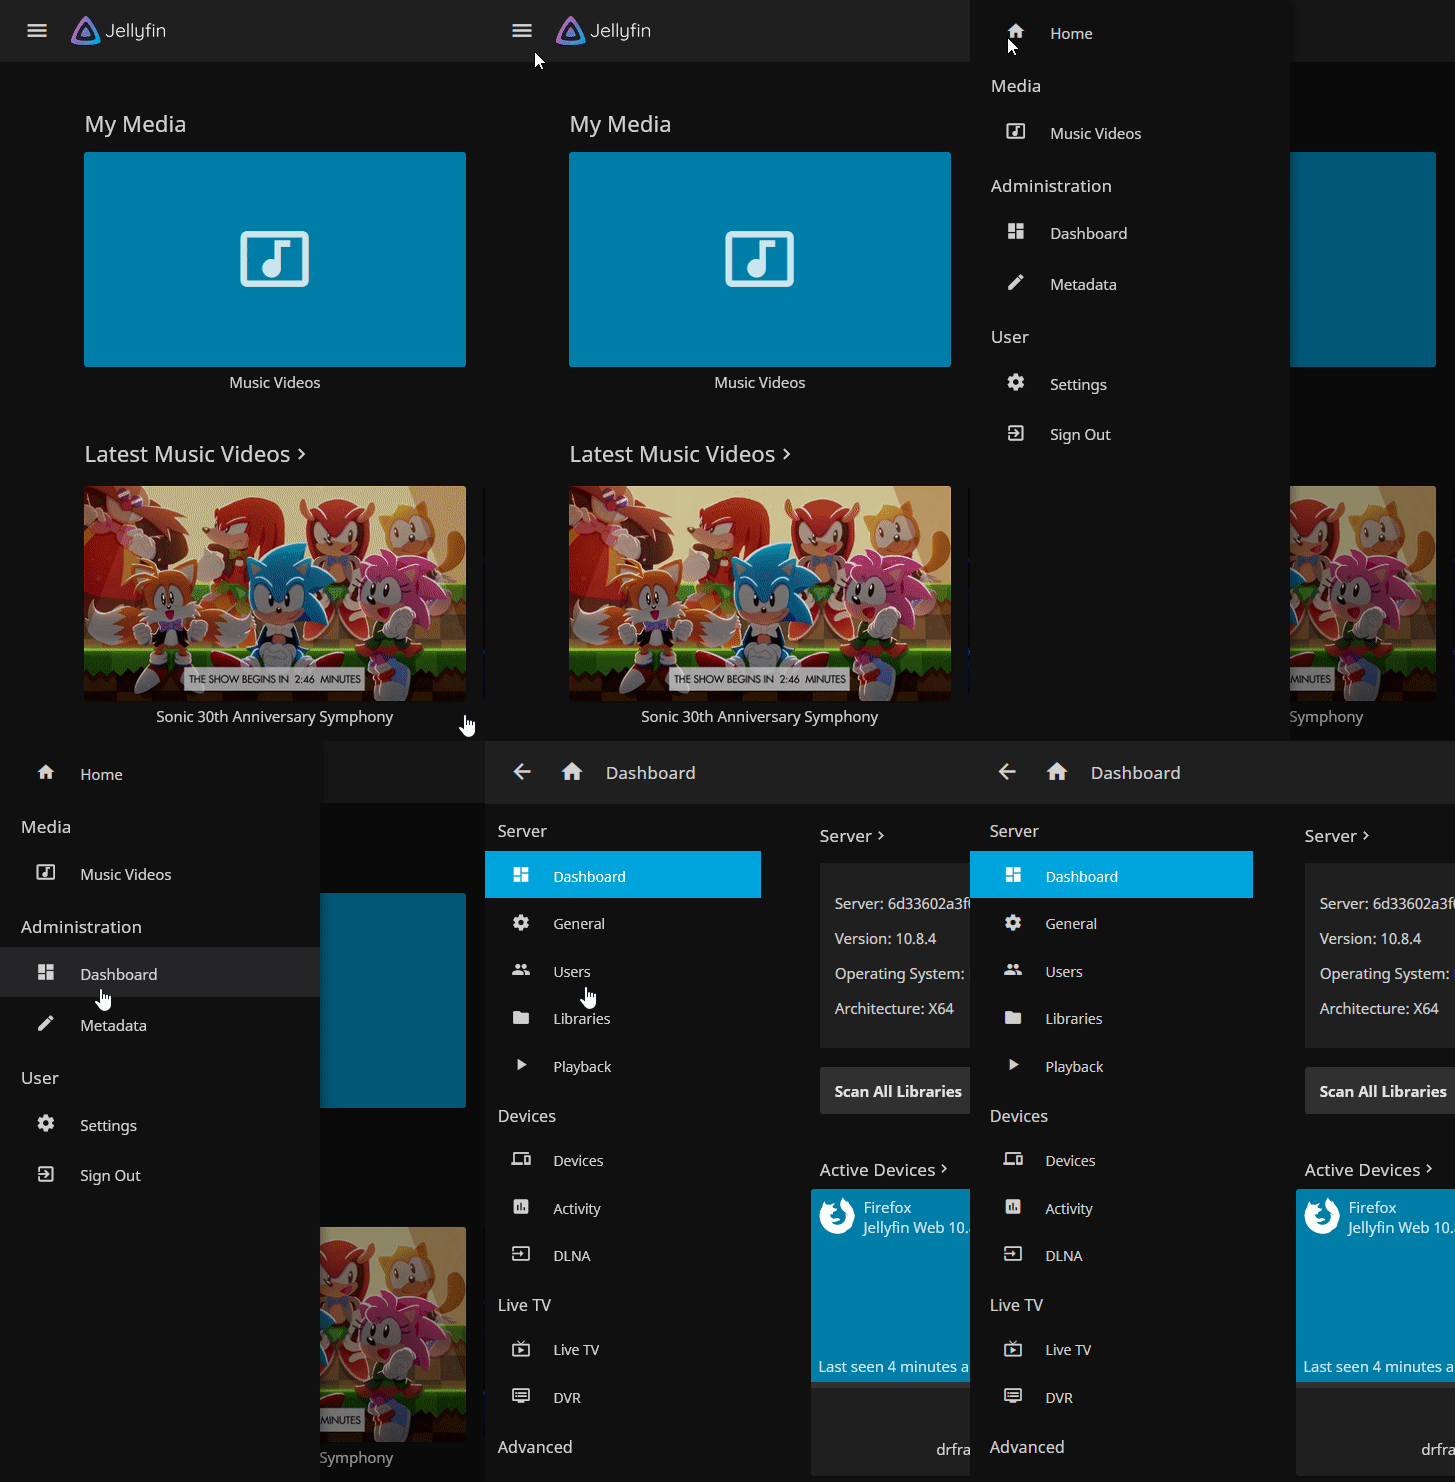
On the next screen select ‘Playback’ where you will now be able to select from the first drop-down from ‘None’ to ‘Intel QSV Video’
I have removed the video previously shown below and changed into a table – to take into account some feedback and testing completed in our Matrix/Discord server.
Below are the settings you would enable for a Gemini Lake based NAS such as the 920+/720+/420+/220+. You can cross-check between the Synology CPU list and the table on the QSV Wikipedia page as to the hardware functions your NAS supports.
Please note that I have included the items I changed from the default values – e.g. if the default item is turned off, and I turn it on then it appears in the table.
| Setting changed from the default. | Variable to use |
|---|---|
| H264 | Ticked |
| HEVC | Ticked |
| MPEG2 | Ticked |
| VC1 | Ticked |
| VP8 | Ticked |
| VP9 | Ticked |
| HEVC 10bit | Ticked |
| VP9 10bit | Ticked |
| Allow Encoding in HEVC format | Ticked |
| Enable VPP Tone Mapping | Ticked |
| Enable Tone Mapping | Unticked |
Once you have made the required change press ‘Save’ and you are now free to change any other settings you wish in relation to the server, make sure you check out the fantastic documentation from Jellyfin.
| Historic Updates | Date |
|---|---|
| New guide released | 02/09/2022 |
| Added how to enable Hardware Transcoding in the Admin settings | 12/09/2022 |
| Added an environment variable to help with tone mapping | 18/02/2023 |
| Removed the OpenCL mod as it should not be required for newer + Models and removed compose version | 09/04/2023 |
| Adjusted tone mapping settings to avoid a device error | 09/04/2023 |
| Amended the path to save the compose file – this is for security, so the container has no access to the file contents. | 14/04/2023 |
Looking for some help, join our Discord community
If you are struggling with any steps in the guides or looking to branch out into other containers join our Discord community!
Buy me a beverage!
If you have found my site useful please consider pinging me a tip as it helps cover the cost of running things or just lets me stay hydrated. Plus 10% goes to the devs of the apps I do guides for every year.


Hello I have a DS224+ and getting this error from the logs
ffmpeg version 5.1.3-Jellyfin Copyright (c) 2000-2022 the FFmpeg developers
built with gcc 10 (Debian 10.2.1-6)
configuration: –prefix=/usr/lib/jellyfin-ffmpeg –target-os=linux –extra-libs=-lfftw3f –extra-version=Jellyfin –disable-doc –disable-ffplay –disable-ptx-compression –disable-static –disable-libxcb –disable-sdl2 –disable-xlib –enable-lto –enable-gpl –enable-version3 –enable-shared –enable-gmp –enable-gnutls –enable-chromaprint –enable-libdrm –enable-libass –enable-libfreetype –enable-libfribidi –enable-libfontconfig –enable-libbluray –enable-libmp3lame –enable-libopus –enable-libtheora –enable-libvorbis –enable-libopenmpt –enable-libdav1d –enable-libwebp –enable-libvpx –enable-libx264 –enable-libx265 –enable-libzvbi –enable-libzimg –enable-libfdk-aac –arch=amd64 –enable-libsvtav1 –enable-libshaderc –enable-libplacebo –enable-vulkan –enable-opencl –enable-vaapi –enable-amf –enable-libmfx –enable-ffnvcodec –enable-cuda –enable-cuda-llvm –enable-cuvid –enable-nvdec –enable-nvenc
libavutil 57. 28.100 / 57. 28.100
libavcodec 59. 37.100 / 59. 37.100
libavformat 59. 27.100 / 59. 27.100
libavdevice 59. 7.100 / 59. 7.100
libavfilter 8. 44.100 / 8. 44.100
libswscale 6. 7.100 / 6. 7.100
libswresample 4. 7.100 / 4. 7.100
libpostproc 56. 6.100 / 56. 6.100
[AVHWDeviceContext @ 0x5590954148c0] No VA display found for any default device.
Device creation failed: -22.
Failed to set value ‘vaapi=va:,driver=iHD,kernel_driver=i915’ for option ‘init_hw_device’: Invalid argument
Error parsing global options: Invalid argument
Hey – Still getting the same error? Try amending the devices section to only contain.
– /dev/dri:/dev/dri
Hi Dr_Frankenstein,
thank you for your Helpfull Installation Guide. I have a Synology DS720+, followed your Instruction and get this Error in the Transcoding-Log:
[h264_qsv @ 0x5590443c2bc0] Selected ratecontrol mode is unsupported
[h264_qsv @ 0x5590443c2bc0] some encoding parameters are not supported by the QSV runtime. Please double check the input parameters.
Thank you.
Patrick
Try turning off the Low Power modes in the transcoding settings.
@Dr_Frankenstein: Just read your Reply. Thank you this Solved my Problem, now i can Use QSV. I had to untick:
– Enalbe Intel Low-Power H.264 hardware encoder
– Enable Intel Low-Power HEVC hardware encoder
The First one was still enabled by default.
THX
Solved it, had to Use VAAPI and not QSV.
Hi,
Just configured the HW trasncoding for ds420+ and not working at all… any idea?
Thanks
Hey sorry you got caught in the Spam net – We have a few people on Discord using 920+ with hardware transcoding working OK it’s the same hardware so should work.
Couple of things to check – Make sure you have the same settings as shown in the short video at the end of the guide with QSV selected. When you play some media that requires transcoding check the dashboard it will tell you why it has had an issue.
I have a Synology DS920+ and I followed your step by step guide and everything works fine except the hardware acceleration. I can only watch movies that are streamed directly. Can you help me?
Hey David – It might be easier if you jump into our Discord group as there are quite a few people using Jellyfin on the 918 and 920, we can figure out what the issue is 🙂
I followed your instructions and was able to get Jellyfin to work. However, I am having the an issue where I am unable to cast to any devices in my network. When I install Jellyfin on my computer(just as a test) I am able to cast to everything without issues. Any idea what I should do?
Hey, can you try adding port 1900 to the yaml file, it will be formatted the same as the other ports. Then start Jellyfin again using the compose command.
I tried that but I end up getting an error when using the compose command: ERROR: yaml.scanner.ScannerError: while scanning for the next token
found character ‘\t’ that cannot start any token
in “./jellyfin.yml”, line 20, column 1
Here are links to photos of what I did:
https://imgur.com/nbReys7
https://imgur.com/iaiJ6gK
I should add that jellyfin was not able to see any other devices to cast to when I would try to cast something. The other devices show up when I installed a completely seperate jellyfin on my laptop(as a test). Thanks for the help, I appreciate it.
The error is saying that the line you added (line 20) has something wrong with the formatting it’s usually a random space or using tab in the line break. I made a yaml to copy and paste below, I also removed the port after your NAS ip as it is not required.
https://paste.drfrankenstein.co.uk/?2f13503053dc5c42#9dNUf6HGSfRHuaRTT8ErqLwF7EMFGjrEJM3wqvPeY6u3
Okay I got that working but it doesn’t look like it fixed it.
Here is what I see when I try to cast: https://imgur.com/PtDg3Gl
OK Just done a bit of searching around, it looks like you can only cast using SSL (not sure why it would then work via your PC though to be honest!)
When attempting to cast are you doing it via the reverse proxy/DDNS address? Or are you using the WebUI via the internal NAS IP and Port?
Try changing this in your yml from the IP of your NAS to the reverse proxy address
JELLYFIN_PublishedServerUrl=192.168.0.143
Then bring back up Jellyfin with the updated setting and try and cast.
(I can’t test this out at the moment on my useguide setup as a bit limited on time tonight)
I was using the WebUI via the internal NAS IP and Port. I think I’m following you on the reverse proxy address. I dug around to try and find what the address is, is this it? https://imgur.com/y1vKr10
It appears to be the same IP as my NAS is. Did I mess something up there?
Not sure what you have added as the actual source address? You might want to retrace your steps through the Part 2 section of the guide as it should be your DDNS address for example https://jellyfin.aaron.dscloud.me then the destination looks correct.